Is your site not showing the latest changes? Do you want to learn how to clear cache in Cloudways hosting? You have arrived at the right place to know how to remove the Cloudways server cache.
Cloudways is ideal for long-term business sites as it helps to achieve top search engine rankings by making your site super fast. It also offers the best user experience for your visitors.
You have made the correct web hosting decision! Before getting into the Cloudways cache-clearing guidelines, let me explain its benefits!
Disclosure: We get a commission when you buy a product via our affiliate link at no additional cost.
Table Of Contents
Why Is Server Cache Clearing Essential?
- When you migrate the site, clear the server cache for a better user experience.
- Remove the cache to display the optimized images when you install the image compression plugin.
- Flush the cache to avoid security issues when you update your theme or plugin.
- Remove your cache to display changes when you add or modify blog content.
Cloudways Caching
Cloudways contains several caching features like Varnish, Redis, and the Breeze plugin.
- Varnish Cache – Full page cache for static content delivery
- Redis Object Cache – Stores the frequently accessed data to reduce the database load
- Breeze Plugin – Developed by Cloudways for cache optimization
These multiple cache layers work together and offer a smooth user experience. However, they may also serve the updated content when you are not purging them. So, let’s see how to clear Cloudways server cache.
Detailed Instructions To Remove Cloudways Varnish Cache (Method 1)
Here are the step-by-step instructions to clear the cache from your Cloudways server!
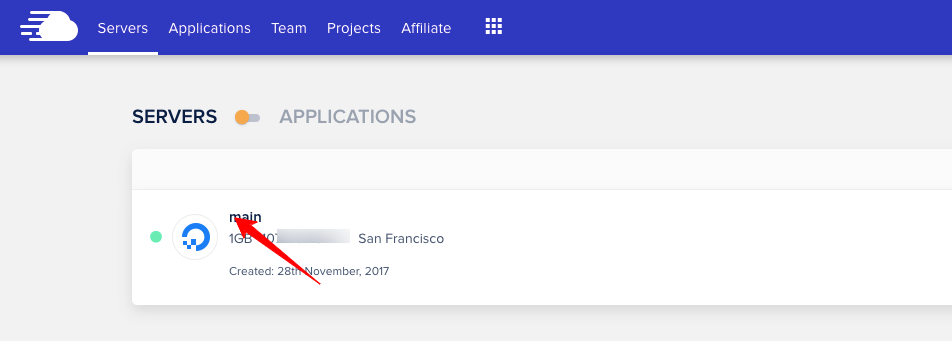
Step 1: Log in to your Cloudways account, go to your Main server > Server management settings > Manage services.
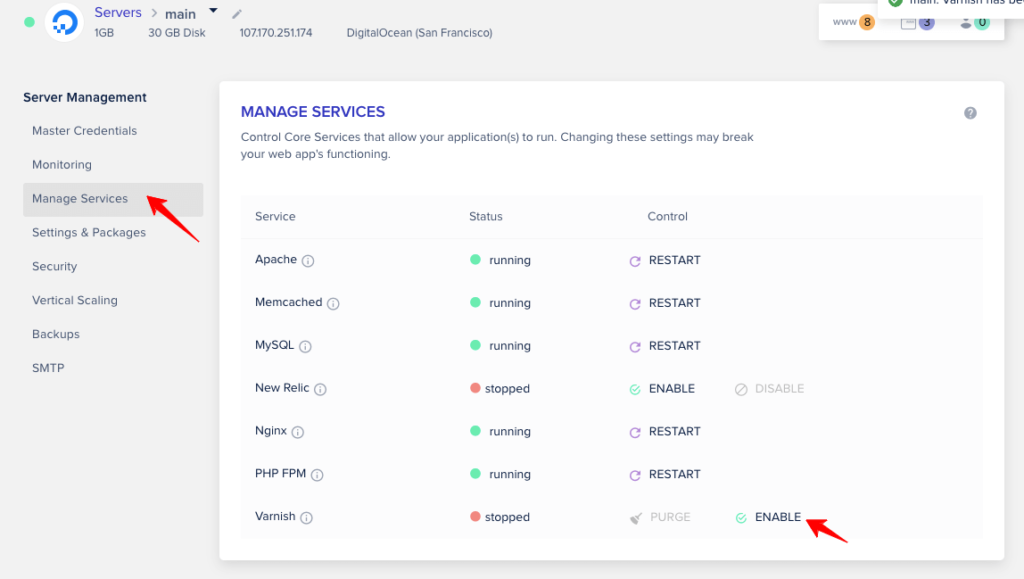
Step 2: Look at the bottom; the last setting is Varnish. Enable it. Now, the Varnish cache is activated for your entire Cloudways server. The message at the top is that the Varnish Cache has been enabled.
Step 3: Locate the “Purge” option and click it. Now, it clears all the caches from your server. This process applies to your entire server.
Note: If you have several applications on your server and want to disable the cache for any one of them, do the following steps.
Step 4: Click “Applications” on the Cloudways server menu and select that particular application.
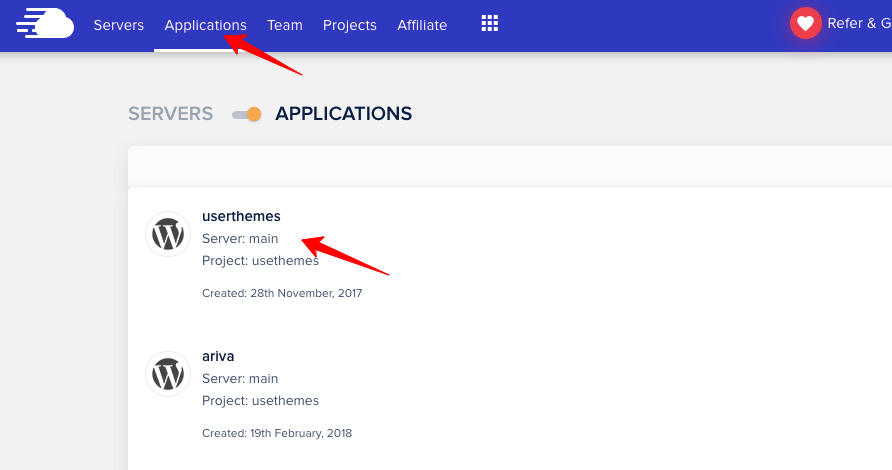
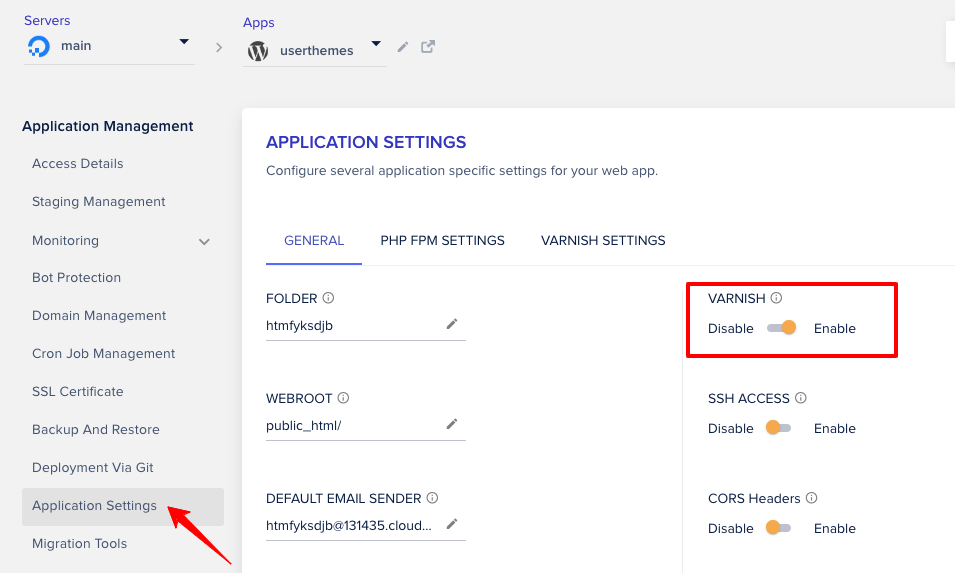
Step 5: Now, click the application settings to see the Varnish cache option. If you don’t want to clear the cache for this Cloudways server application, disable it.
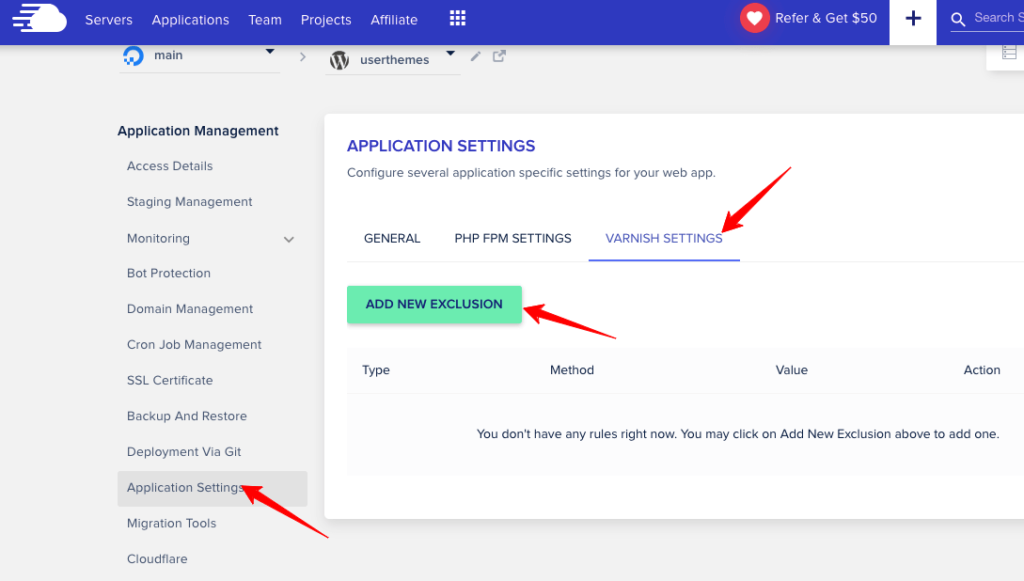
Step 6: If you want to disable cache for a particular page or post, click the Varnish settings > Add New Exclusion button. As the name implies, you can exclude a specific article from caching by giving its URL.
Step 7: Get a Sample URL and add it to the Add New Exclusion option. Click “Save“.
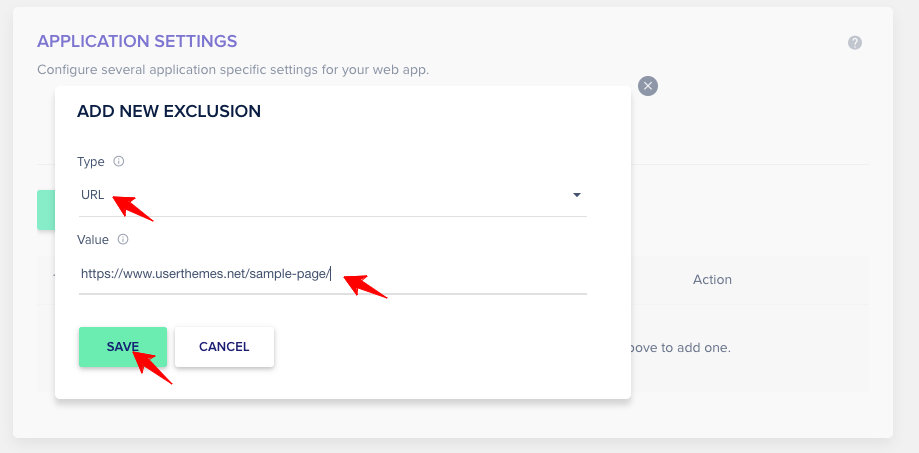
Note: Add a new exclusion option that allows editing and deleting the rules. So you can easily add or remove the URLs.
Clear CDN Cache (Method 2)
If you have integrated Cloudflare CDN into your Cloudways plan as I did, it is easy to flush the cache through your CDN account.
Step 1: Log in to your Cloudflare account
Step 2: Select your site from the dashboard.

Step 3: Locate the “Caching” setting on the left, then click “Configuration”.
Now, on the right side, you will see options to clear the cache for the whole site or individual pages. Check the screenshot!
For minor changes, use the “Custom Page” option.
If you are not using a CDN, do so now with my detailed guide to activate Cloudflare CDN on Cloudways hosting.
Video Tutorial To Clear Cloudways Cache
For easy understanding, here is the video I captured to clear the cache in Cloudways hosting.
FAQs – Clearing Cloudways Server Cache
How do I empty my entire cache in Cloudways hosting?
I have explained the easiest ways to clear the Cloudways Varnish cache. You may follow methods via SSH, cPanel, or FileZilla FTP.
Can I disable Cloudways cache for any Application directly?
You must understand that no direct setting enables the Varnish cache for a particular application. If you enable the Varnish cache for the whole server, this setting is automatically enabled for all applications, so you must disable it.
How Often Should You Do Cloudways Cache Purge?
As you know, the cache files make your site load faster. So, don’t clear your cache unless you modify your website.
Is there another way to flush the cache in Cloudways?
Not directly within Cloudways. However, you can clear your browser cache or use a cache management plugin like Breeze to accomplish the task.
Wrapping Up
The hosting server stores the cache file for quick access. However, if your server gets new files, clearing the cache is mandatory, as it will not get removed automatically, and your site will be messed up with missing content.
Well, you have learned how to clear the cache in the Cloudways hosting server. And yes, it’s a cakewalk here! It is an incredibly managed cloud hosting with several useful setting options to get things done like this!