Do you want to learn how to create a staging site in Cloudways hosting? I appreciate that you want to make changes to your site in the outside environment and then take the modifications to your live site. You have made a great decision to test your application before deployment.
You have come to the right place to create a dedicated area and implement new things on your website. I have provided step-by-step instructions and a video tutorial to help you create a test site on the Cloudways server. Let’s start with the basic details.
Disclosure: We get a commission when you buy a product via our affiliate link at no additional cost.
Table Of Contents
What Is A Staging Site?
When creating a WordPress site, it is essential to determine whether a change can positively impact the site or hinder any of its features. Let’s say you wanted to add a contact form but are unsure if it’s working correctly. This is a common scenario experienced by site owners.
If you have experienced it, you should be aware of the staging feature. Staging sites are typically exact clones of the production site, so any changes made on the staging site can be replicated and safely tested without affecting the live version.
This includes changes to code, content, or design elements. Cloudways test sites usually have a different URL than the actual production site and are only accessible by people granted access (such as developers or designers).
Utilizing a staging site for testing makes it much easier to ensure that all updates and changes will work properly when pushed live. It’s also much faster to fix any issues that arise during testing and you don’t need to take down the entire website to make changes.
Advantages Of A Staging Site
A staging site is highly recommended for web developers and site owners, as it offers the utmost ease and feasibility of testing features before going live.
Here are the significant advantages of a staging site:
- It allows you to test changes without affecting the live site.
- As it is a duplicate version to replicate changes, you can get them live quickly.
- Ensuring updates and changes will work properly when pushed live is more accessible.
- It has a different URL than the production site, accessible only to those granted access.
- It enables you to quickly identify and resolve bugs and issues that arise during testing.
- You don’t need to take down the entire website to make changes.
With these benefits in place, there is no reason to postpone creating a staging site for your website using Cloudways hosting.
Staging Vs Live Site: What’s the Difference?
| Feature | Staging Site | Live Site |
| Affects users | ❌ | ✅ |
| Indexed by search engines | ❌ | ✅ |
| Safe testing | ✔ | ❌ |
| Used for production | ❌ | ✔ |
What Is Cloudways Staging?
Cloudways Staging is a straightforward feature that lets you create a dedicated space for testing your application. This environment is not accessible to the public, so you can experiment with your website’s new functionalities.
The exciting part of the Cloudways Staging feature is that it does not charge you extra for usage. All tasks can be completed using the “Pull” and “Push” options, and yes, you no longer need to manage a local staging server.
Best Features of Cloudways Create As Staging
- Highly secured environment with password protection.
- SSH and SFTP access are enabled by default.
- Pre-installed SSL certificates.
- The backup option is available before starting.
- It is possible to clone your MySQL Database.
Best Practices for Cloudways Staging
To make the most out of your Cloudways staging environment, follow these tips:
Take a Fresh Backup Before Changing Anything – Even though staging provides safe testing, always back up your live site files and database first.
Keep Staging Password Protected – This prevents public or search engine indexing.
Test Everything – Check forms, e-commerce flows, login, mobile layouts, and plugins before pushing to live.
Use Push Options Wisely — only push the parts you need to avoid unnecessary database overwrites.
Step-By-Step Guidelines To Make Cloudways Staging Site
Creating a staging site in Cloudways is no rocket science. Once you have your login credentials, you can switch between the staging and live sites in one click. Having explored staging sites for several years, here are detailed step-by-step instructions.
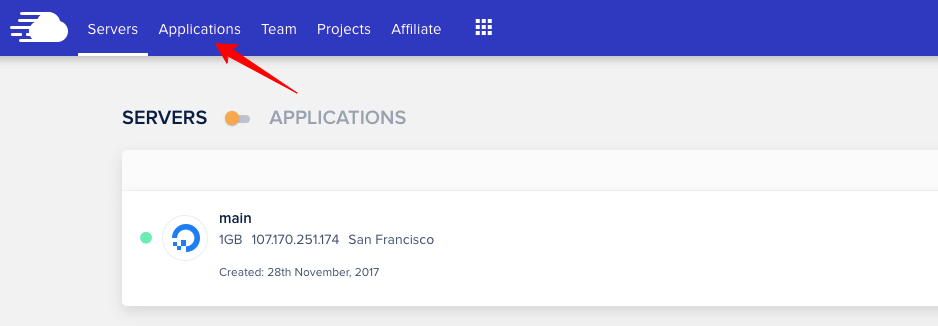
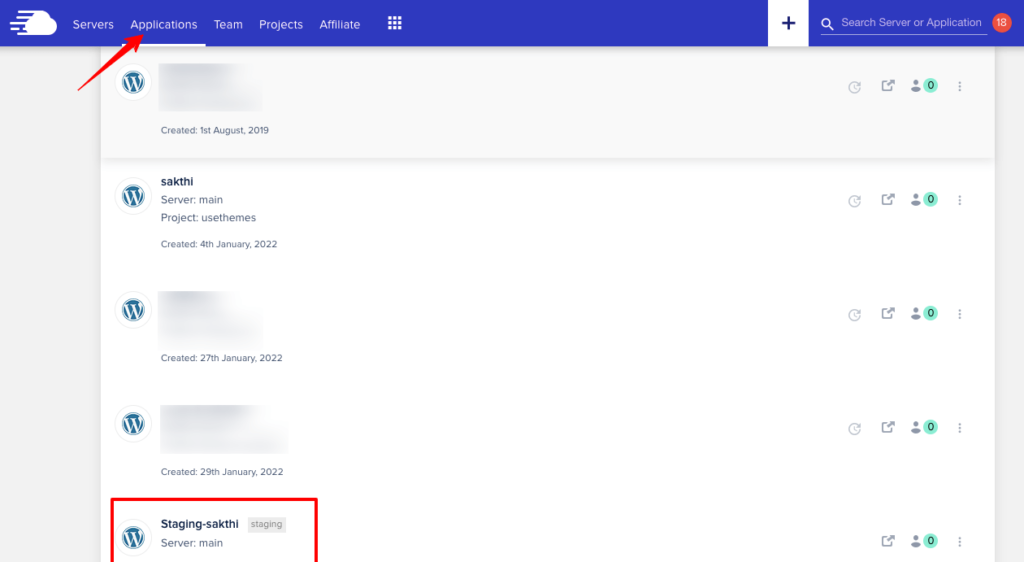
Step 1: Log in to your Cloudways account > Click “Applications” from the top menu.
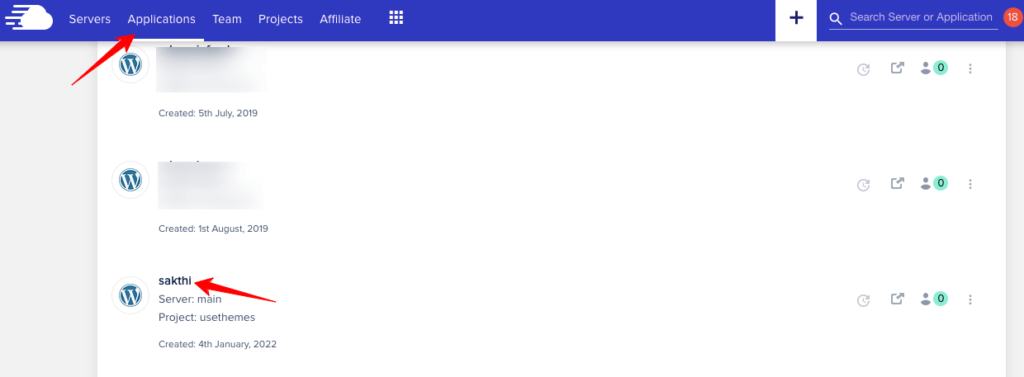
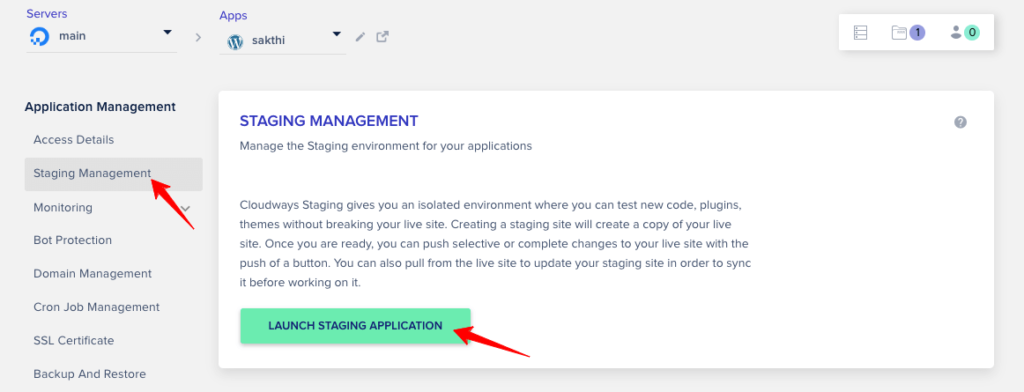
Step 2: Choose the application where you want to make a staging site. Click “Staging Management” from the left side settings.
Once the center of the page loads with information about staging management, please read it and click Launch Staging Application.
Step 3: Now, it will ask you to select a server for the staging application. Select one from the dropdown list. Click “Continue.”
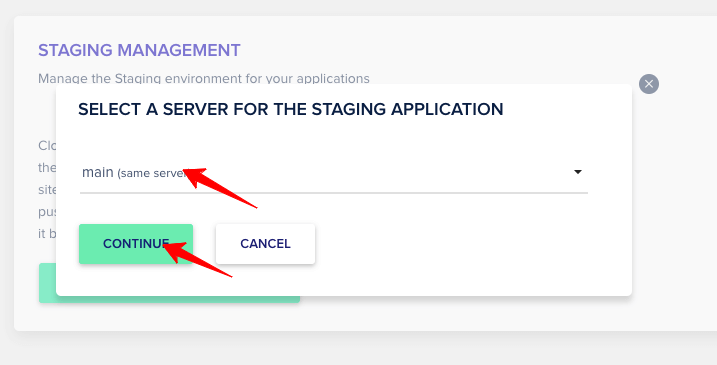
The staging site creation process begins now, and you will be notified once the staging application has been created.
Note: The created application has a “staging” message next to its name to help you find it easily. It gets listed under the “Applications” in the top menu.
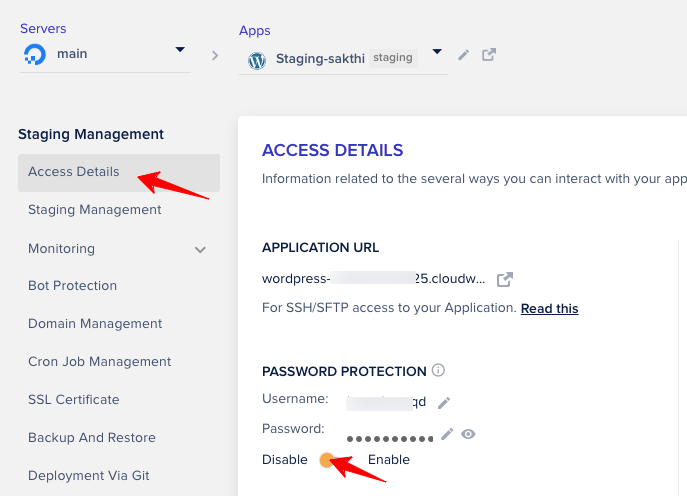
And when you select this application, you can see the credentials protected with the password. If you disable the protection, you will be able to access the staging site. Otherwise, it will ask you to enter the username and password. So, it’s better to deactivate the protection.
Step 4: You can quickly identify the primary site and staging site by examining their URLs, as the latter contains the slug “ID + Cloudwaysapps” in its URL.
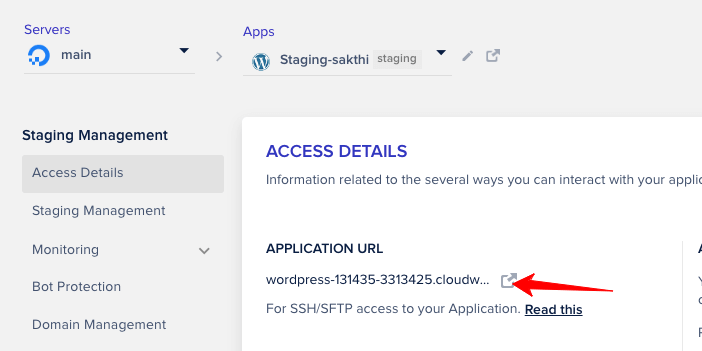
Now, log in to the WordPress admin dashboard of the staging site. (The credentials are already listed on the staging site application page)
Step 5: It’s time to change the staging site. You can customize your theme, set up plugins, or add new scripts for testing. Do the modifications and save the changes.
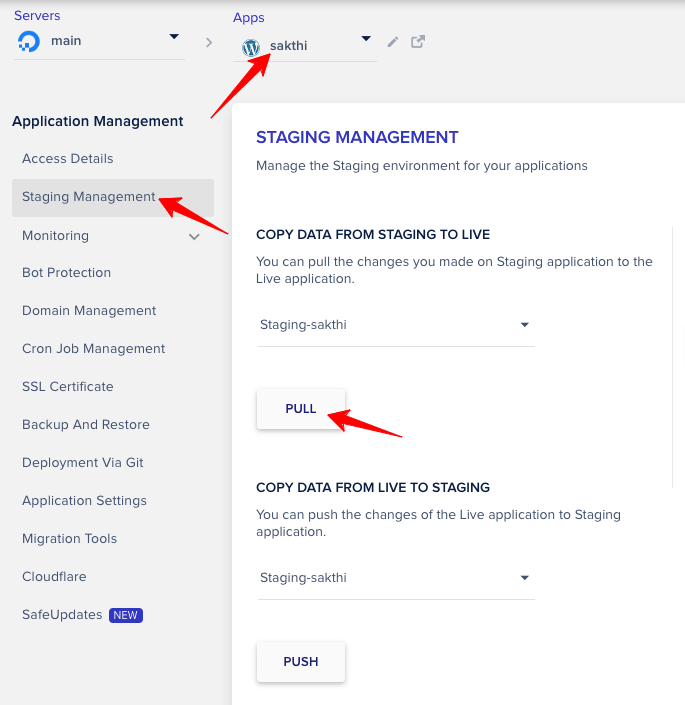
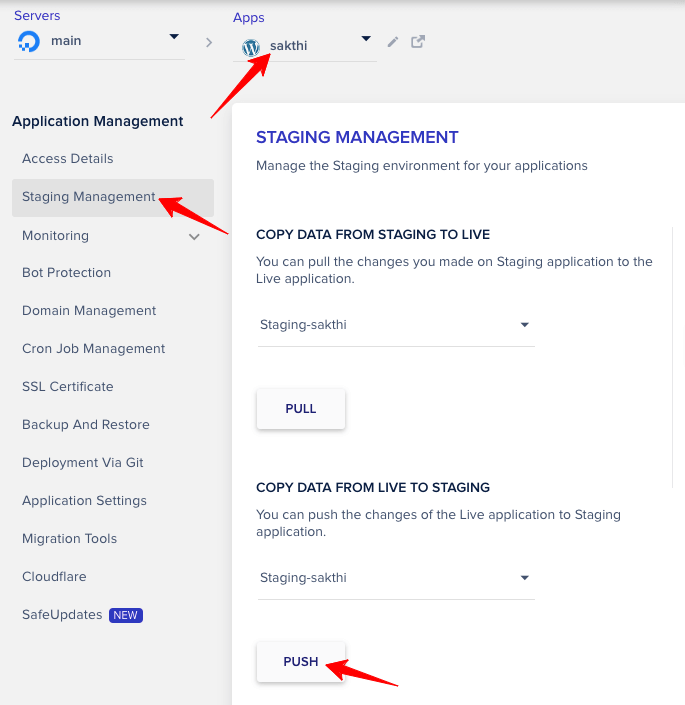
To see the changes on the live site, return to your Cloudways account. Select the main application and then click “Staging Management.”
Step 6: You can see two options – Pull and Push.
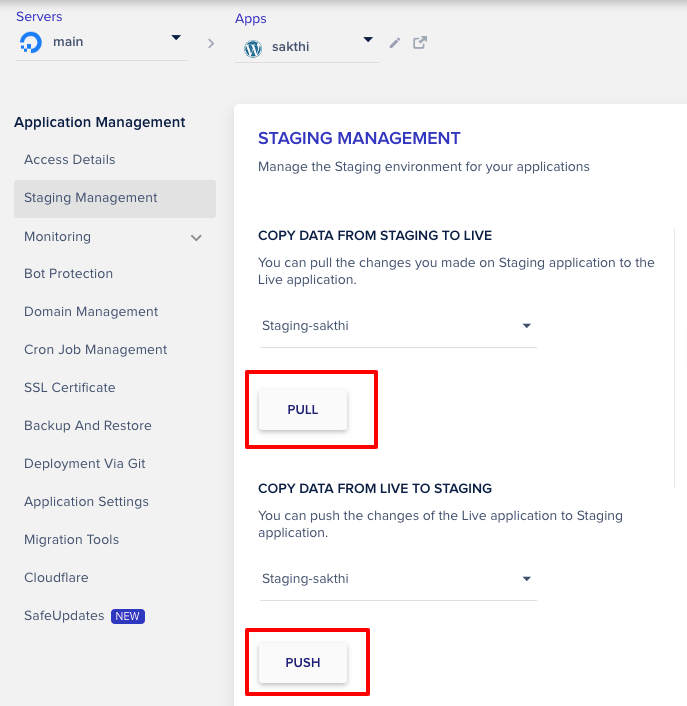
The pull process lets you copy data from staging to live, and the push process enables you to copy data from live to staging.
As a change is made on the staging site, click “Pull.”
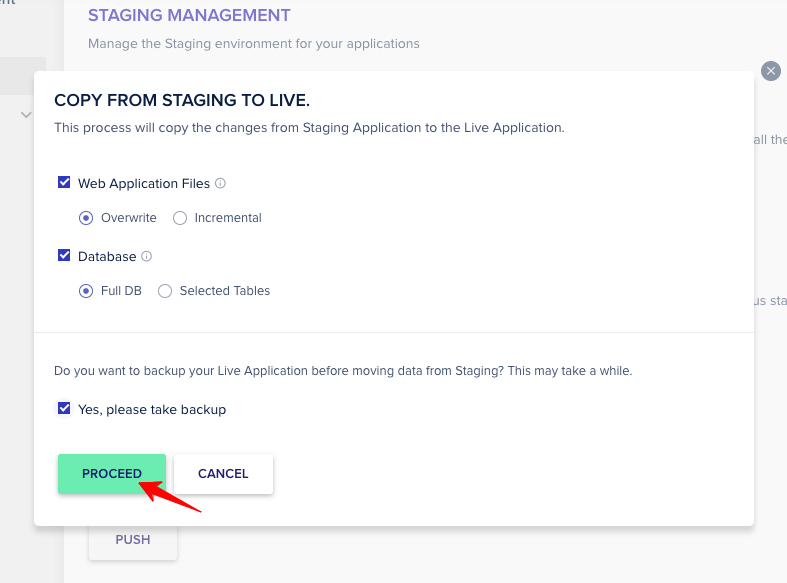
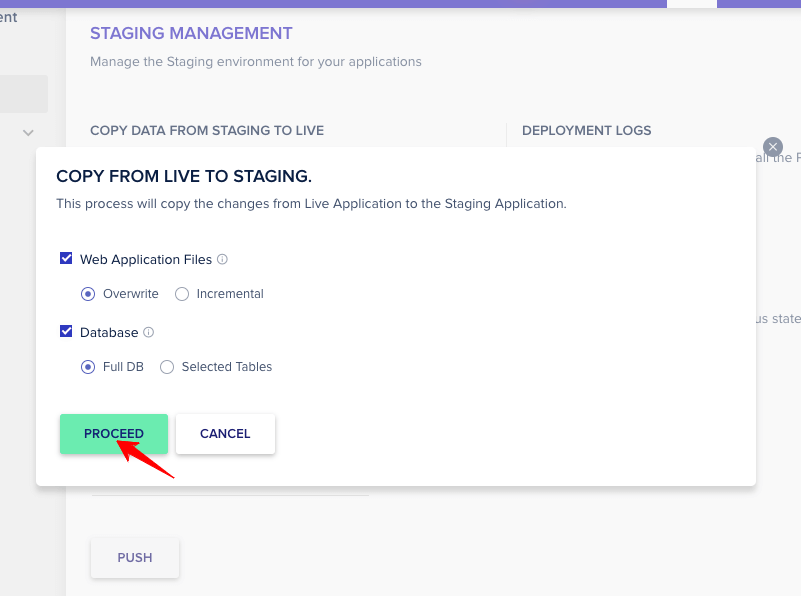
After clicking the pull option, you must select the following option, as shown in the image below, and then click “Proceed.”
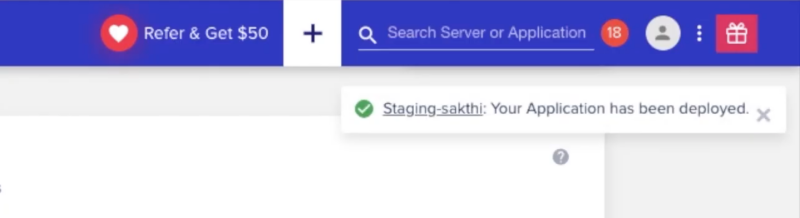
You will receive a notification: Your Application has been deployed successfully.
Step 7: Refresh the main application, and you can see the changes that you have made.
Tip: Repeat this step as often as needed until you have made all changes to the staging application and are ready to verify them with the live application.
Step 8: It’s time to check the Push option (to move the changes from the primary site to the staging site)
Log in to the WordPress admin dashboard of your main site and make the modifications.
Return to the Cloudways account and click Staging Management for your primary application. Click “Push,” then select the following option, as shown in the image below.
Step 9: Refresh your staging site and see the modifications made in the primary application. Repeat this step as many times as you want.
Note: If you navigate to the “Staging Management” setting of your staging site, the Push option is available at the top, and below it, the Pull option is placed. This is because we must push the changes to the main site and pull vice versa.
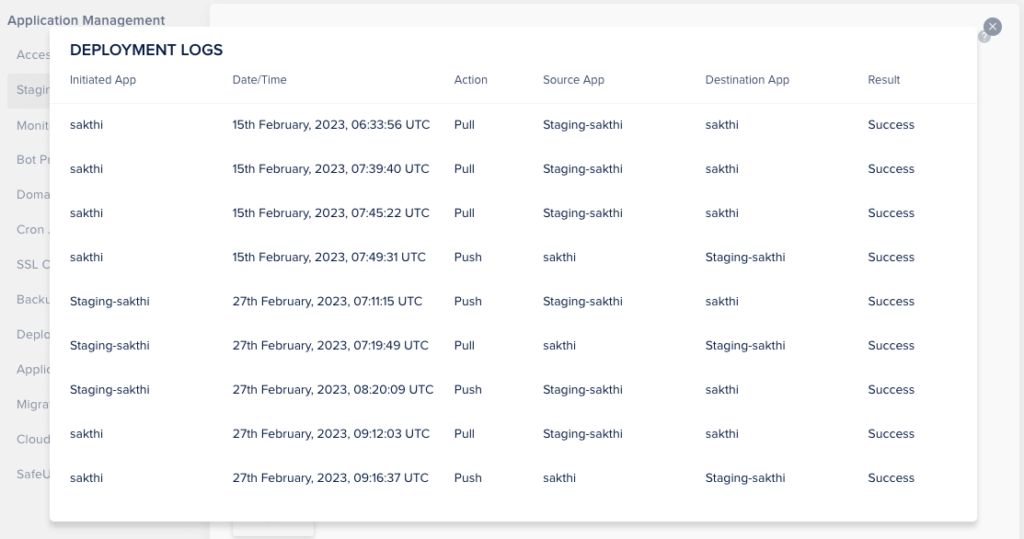
Step 10: Review the list of staging logs to determine the frequency of push and pull options.
On the Cloudways tab, click Staging Management and then click View Logs under the Deployment Logs section.

Reviewing this log helps you track and follow changes in both site versions.
That’s all! You have learned the essential things you want to know about staging in Cloudways. Now that your staging site is ready, you can:
- Install or update WordPress plugins
- Activate new themes
- Modify CSS or site layouts
- Run troubleshooting tests
None of these changes will affect your live production site.
Video Tutorial To Create Cloudways Staging Site
For my busy visitors who find the detailed guidelines challenging to read, I’ve created a video tutorial that explains how to create a staging site on Cloudways.
Cloudways Clone Site – Frequently Asked Questions
Does a staging application affect usage on the Cloudways server?
You can create multiple staging sites in Cloudways; however, be sure to check the disk space to avoid any unnecessary issues. Moreover, you can remove it after moving the files to your live site.
How to set up a Cloudways duplicate website for testing?
Stay on the staging site settings, use the Push option under Staging Management, and take your changes live.
Will I get Cloudways WordPress Staging Login?
You will get all the credentials once you start creating the staging site for your existing server application.
Is Cloudways staging available for all the applications?
Yes, Cloudways supports staging for WordPress, Magento, Laravel, and PHP-based apps.
How long does it take to create a test site in Cloudways?
It takes only a few minutes, and it depends on the size of your site and server performance. The smaller site just takes a minute
Do I need technical skills to use Cloudways staging feature?
Not at all. Cloudways provides a user-friendly interface that allows you to easily create and manage staging environments.
Wrapping Up The Cloudways Staging Environment
A staging site is a duplicate environment of your live site to safely test updates, theme changes, plugins, or code before deploying them to your production site. It ensures that your WordPress site changes don’t break your live site, and provides a secure sandbox for development without risk.
Staging is a compelling feature that enables professionals, site owners, and web developers to test every functionality before it goes live. After using Cloudways for more than 9 years, I am highly impressed with the ease of creating a staging site to roll out new features.
In this guide, you have learned how to create a staging site in Cloudways, manage it, and push staging changes to live WordPress with confidence. With direct settings such as Pull, Push, and review logs, you can understand the changes you have made. Are you clear with my explanations?
Hi Anil,
This article is helped me a lot, Thank you for sharing such an informative blog. Can you please clear me that, How many domains can add to a Cloudways hosting plan and Why is Cloudways hosting better reliable, and more secure for a blogger?
Nice article, I really appreciate the way you have come up with research-oriented work. Keep going, thanks!