
Do you have a small or medium business website hosted on WordPress? And getting enough traffic through Search Engines and online advertising.
However, it lacks brand value and cannot generate sales for your products. If this is the reason, You must add testimonials to WordPress.
Why are Testimonials so important?
My co-blogger has conducted a poll on Facebook asking people: Do you think testimonials on your business website helped you grow your brand value?!
Here is the result: over 90% answered YES!

As you know, 35% of Websites on the Internet use WordPress CMS(Content Management System). Plus, 54 out of 100 companies prefer using WordPress instead of custom CMS.
Now, the point is, what are the benefits of testimonials on business websites?
Testimonials help enhance business image, improve purchasing behavior credibility, and increase sales.
Even reviews from old customers are used as an emotional appeal to improve sales.
Moving on to the next part, if you are using WordPress, it is easy to add a free testimonial slider plugin.
5 best free testimonial slider plugins in WordPress
Here is the list of 5 best testimonial slider plugins in WordPress:
- GS Testimonial Slider
- Site Reviews
- Easy Testimonials
- Strong Testimonials
- Testimonials Basics
However, In this post, I will review the best testimonial slider plugin for WordPress i.e. GS Testimonial Slider.
GS Testimonial Slider plugin is a short-code-based plugin that allows us to show clients’ recommendations and testimonials on a post or page. Also, on custom pages created by Elementor or Thrive Architect at a specific location of our choice, like the middle or bottom of it.
So, now we will discuss this plugin’s main features.
Main features of GS Testimonials Slider plugin
Here are the top 10 features of GS Testimonials plugin i.e. best testimonial slider plugin of 2021.
- Easily Customizable.
- Responsive in nature.
- Short-code support.
- Lightweight, Clean and beautiful design.
- 20+ pre-designed testimonials.
- Works with all WordPress themes.
- Star rating options.
- Well documentation and customer support.
- Priority email support.
- Hide/show navigation arrows.
Currently, this testimonials plugin is actively installed and used by more than 3,000 websites.
This makes it the best testimonial slider plugin on WordPress & even ensures quality, feature richness, and security-related concerns.
Now I know what question is popping up in your mind!
How do you install and use the GS Testimonial Slider Plugin on your business website?
Here is the step-by-step guide,
GS Testimonial Slider Plugin installation guide
If you are not a techie and want to install this plugin in easy steps, then this section is for you.
How to install a free testimonial slider plugin on WordPress?
First of all, log into your WordPress website and then follow this step-by-step guide to install the testimonial plugin through the WordPress repository.
- In the WordPress dashboard, click on Plugins.
- Click on the Add New Button
- Search for “GS Testimonial slider “
- Click on Install
- Activate the Plugin
- Returning to the WordPress Dashboard, the post of this plugin will show up below the Posts Option.
How to install a testimonial slider plugin by uploading the zip file on WordPress?
In this case, you need to download the zip file by Clicking here
- Now go to the WordPress Dashboard
- Go to the Plugins section
- Click On the Upload Plugin button
- Choose the zip file of the GS Testimonial Plugin you downloaded & click on install now.
- Activate the plugin
- This will also show up below the posts in the WordPress Dashboard.
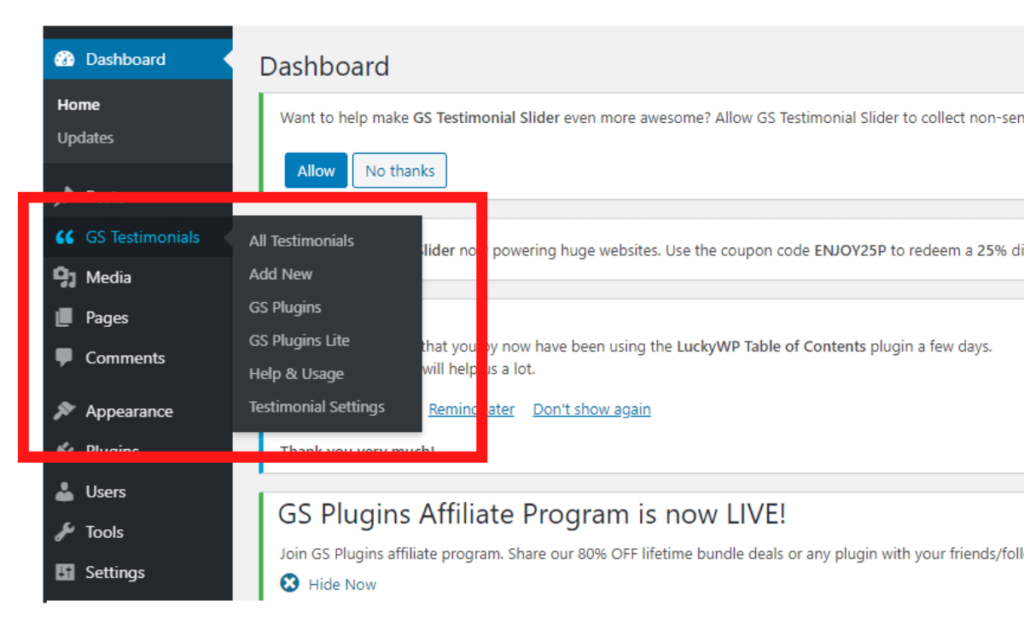
Explaining the main menu of GS Testimonial Slider Plugin
Under the Posts in WordPress Dashboard, you will find the option of “GS Testimonials Slider.” once you click on it, a new submenu will appear with several options listed below:
- All Testimonials
- Add New
- Testimonial Category
- GS Plugins
- GS Plugins Lite
- Help & Usage
- Testimonial Settings
Before jumping onto, here is how to add a testimonial to your WordPress website.
You need to be familiar with this plugin, so let’s see how many options it has and how to use all of them at their full potential.
How to manage GS testimonial Slider Plugin?
In the submenu section, let’s discuss all the above functions of this plugin one by one so you can get a better idea of; How to use the GS Testimonial Slider plugin.
1. All Testimonials
In All Testimonials: Here, you will see all the Testimonials you added until now. Mentioned columns will also display several information here like:
- Author Name
- Testimonial Categories
- Author Image
- Company
- Designation
- Date
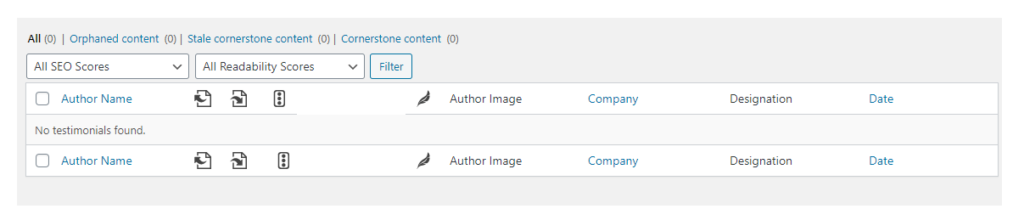
You can use all the above options to sort testimonials that have already been added by date, author name, or company.
However, if you have not added any testimonials yet, don’t worry. I will explain briefly how you can add testimonials to your WordPress business website with the help of the GS Testimonial Slider Plugin.
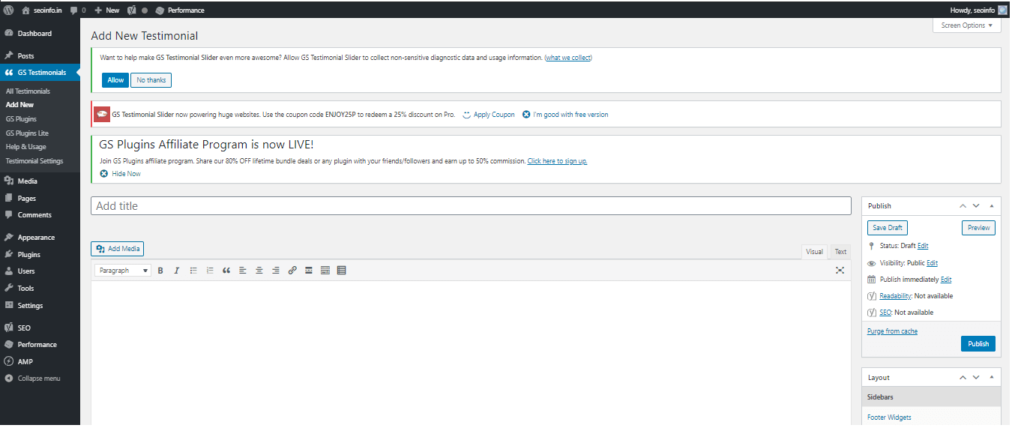
2. Add New
As the name suggests of this option, you can add a new testimonial here.
As we have been talking about WordPress since the start of this article, it is obvious that this tutorial will only work on WordPress CMS. So, let’s start our tutorial on the main feature of this plugin.
If you know how to add a post or a page in WordPress, then you know how to add a Testimonial on your website.
Why?
With GS Testimonial Slider Plugin, you will get the exact same experience of adding a post or a new page on WordPress.
Mainly, I will discuss 7 simple steps, as you can see in the Photo or Video.
- Author Name: Add the name of the Testimonial Author.
- The Testimonial: Add The Testimonial/Review or recommendation in the classic editor or Gutenberg Editor that you received from the client.
- Author Image: Add a picture of your client/customer who wrote the testimonial for your business website.
- Company or Website Name: Add the Company or Website Name of the testimonial author. Keep it blank if you do not have any details about the author’s company or website.
- Designation: Add the designation of the testimonial author.
- Categories: You can add different categories to your testimonials by assigning them to specific pages. Or it works well; then you have separate but custom product pages on a single website.
- Star Ratings: Add the Star rating value you received from the customer. (This option is available only for PRO members)
So, this is how you can add testimonials. To check the testimonial before publishing it on the pages, you can verify them for any error by visiting the “All Testimonials” Tab.
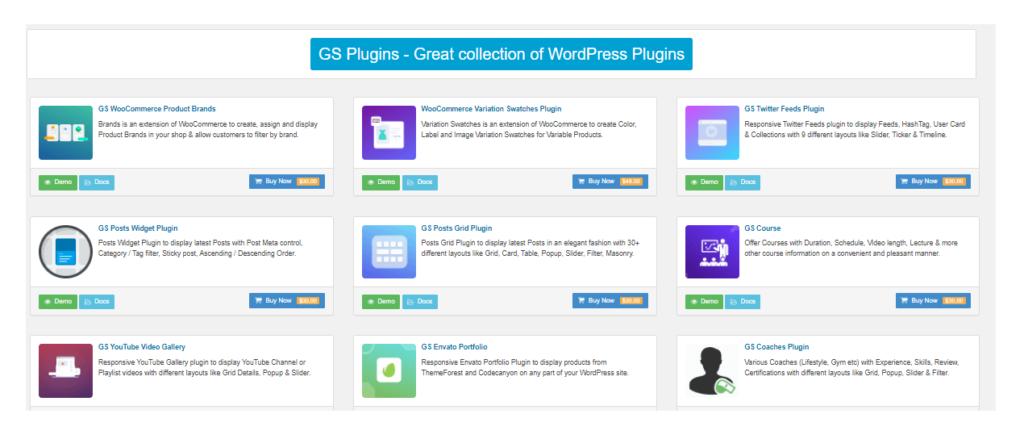
3. GS Plugins & GS Plugin lite
In these options, you can check other paid and free plugins of GS Products, although they do not matter much in the case of testimonials on your business website.
However, now we are going to discuss the Pro features of the GS Testimonial Slider plugin.
Note: These options will only work if you have purchased the Pro Version of this plugin.
4. Testimonial Settings
Testimonial Settings generally have 3 types of options in it – General Settings. Style settings and advanced settings.
1. General Settings
- Transition Settings: Here you can choose a transition of your choice like Carasoua, fade, fadeout, Scrollhorz, Scrollvert, Fliphorz, Flipvert, Shuffle, and Tileslide.
- Stop On Hover: You can turn ON or OFF by moving the mouseover on the navigation slider.
- Navigation Arrow: The navigation arrow will show the left & right sides of the hover state. If you don’t wish to show the arrow, turn the switch off! Default ON
- Sliding Speed: You can increase or decrease sliding speed. Here, Set the speed to a millisecond. The default speed is 4000 milliseconds or 4 seconds. To disable autoplay, just set the speed to 0.
- Responsiveness: You can play with this button to make your testimonials responsive, although the default setting is always ON.
- Pagination: Pagination control below the Testimonial slider. The default setting is set to OFF ( Note: This is a Pro Feature )
- Company & Designation: Show or Hide Company & Designation Label. The default setting is ON for this feature in the GS Testimonial Slider.
- Star Ratings: Show or Hide Star Ratings. The default setting is OFF (Note: This is a Pro Feature )
- Image: Show or Hide Images on Testimonials.
Note: keep in mind that if you turn ON or OFF any settings here, they will work on the entire website, and hence, changes made will reflect everywhere on the website.
2. Style Settings
Style settings refer to the design of your testimonials; let’s discuss what options you get with the premium version of GS Testimonial Slider.
You can change Testimonial Color, Author Name Color, Font Size, Line Height, Font Weight, Navigation Arrow Color, Ratings Color, Margin, Name and designation Color & much more only if you have a pro version of this plugin.
3. Advance Settings
As the name suggests, if you want to give extra weight to the design, these are the advanced settings perfectly made for you.
Here, you can change Font Family, Image width, Image Height, Company label, Designation label, Author image border, Border thickness,
Border style, Style, and theming( 8 free themes available) and columns.
Pricing Plans Of GS Testimonial Plugin
GS Testimonial plugin offers 3 different pricing plans! Check the details.

Wrapping up the article
A testimonial is a smart strategy to establish credibility if you are an affiliate marketer or selling something through your website. It is an unbiased way of showing your potential to your visitors or customers so you can easily make sales/conversions.
Yes! Adding the best testimonials slider plugin to your WordPress website will boost brand image, sales, and honesty. And GS testimonial is a perfect all-in-one Testimonial Slider plugin for your business website. You must check – How to add a slider in the Divi theme.
I hope you got an ideal solution for your requirement – How to show a testimonial slider in WordPress! Collect the testimonials from satisfied clients or experts in your niche and build trust, enhance site experience, and add authority to your site.
As always great insightful post. I’m pleasure to read this, thank you for sharing, good luck.
Hey,
If you are an affiliate marketer or selling something through your website, then testimonial is the smart strategy to establish credibility. As it is an unbiased way of showing your potential to your visitors or customers, you can easily make the sales/conversions.
Great And Very helpful post, just on my way to add testimonial plugin to my blog.