Do you want to learn how to upload custom fonts in the Divi theme builder? You have come to the right place to do it easily. The font you use affects your website’s branding, readability, user experience, and even performance.
While the Divi Theme comes with hundreds of built-in Google Fonts, some users like you prefer using custom fonts to create a more unique and professional design.
Whether you want to upload a premium font, use a brand-specific typeface, or host Google Fonts locally for better privacy and speed, Divi makes the process relatively simple.
In this tutorial, you’ll learn how to upload custom fonts in Divi step-by-step. I’ll also show you how to optimize fonts for speed, improve Core Web Vitals, fix common font issues, and choose the best font formats for Divi websites.
I have also included a video tutorial to add custom fonts in the Divi theme. Go through them, and if you have any doubts, please reach out to me in the comment section.
Before getting into the details, let me share a few benefits of adding custom fonts to your current theme, so you can get this feature without hesitation.
Disclosure: We get a commission when you buy a product via our affiliate link at no additional cost.
Table Of Contents
Why Use Custom Fonts?
Most Divi users rely on the default Google Fonts library. While those fonts are decent, they are also used on millions of websites. Custom fonts help your website stand out and create a stronger visual identity.
Nowadays, many e-commerce brands use premium typography to create a luxury feel, while SaaS companies often choose modern sans-serif fonts for a clean and minimal appearance.
Another major advantage is performance and privacy. Instead of loading fonts from Google’s servers, you can host fonts locally on your website. This reduces external requests and helps improve GDPR compliance.
As a WordPress theme designer, I would say that adding custom fonts is the best way to improve typography, which, in turn, boosts the user experience and search engine rankings.
Step-by-Step Process To Upload Custom Fonts In Divi Builder
Step 1: Visit the WordPress dashboard and click either “Add New” or “Existing page.” Name your page.
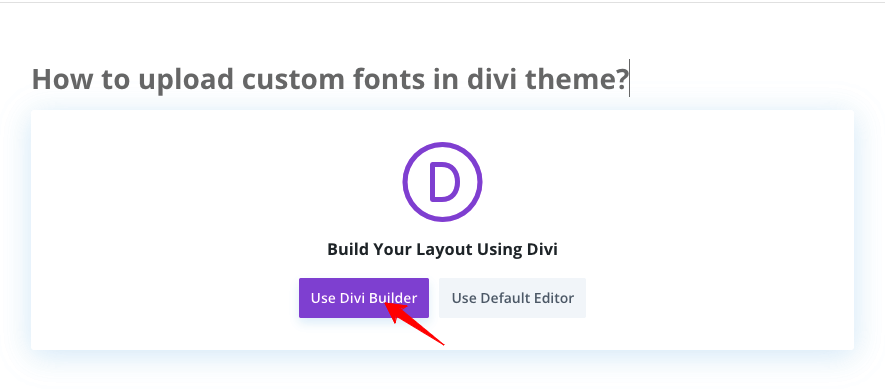
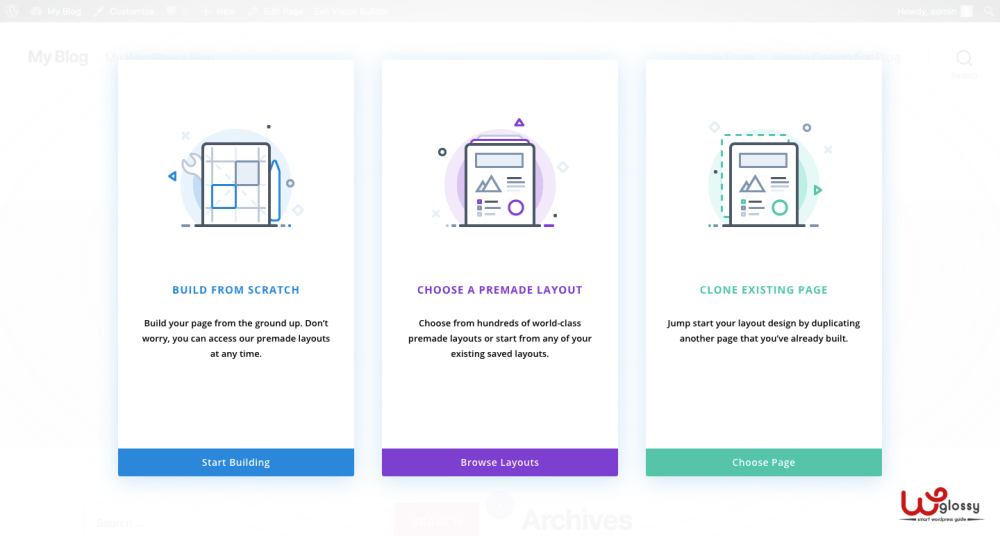
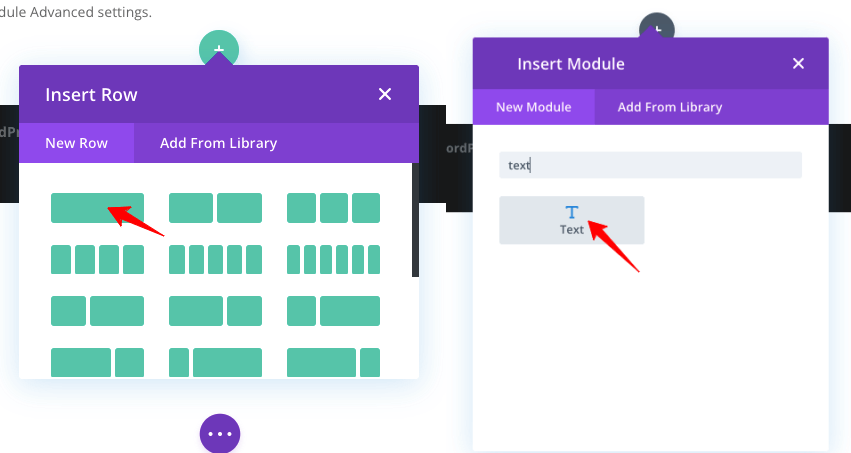
Step 2: Click “Use Divi Builder,” and you will now see 3 options. Choose “Build From Scratch.” After that, you will get a pop-up like this, and I’m picking “one column structure.”
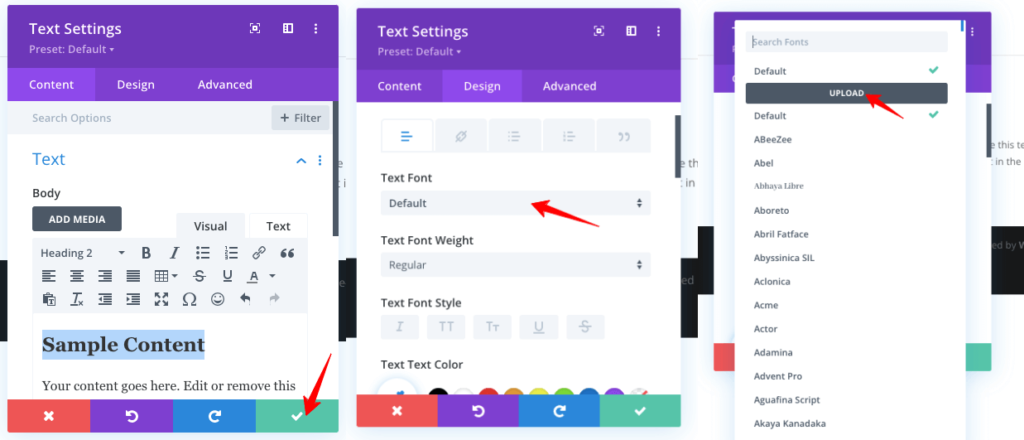
Step 3: Search for “Text Module” in the Module settings and choose it. The Text module will open with some default text. Add “H2 Title,” then you can only see the font variations.
Step 4: Add sample text, select it, and set it to Heading 2. Publish the page (green tick button).
Step 5: In the same settings, visit the “Design” tab, go to the Text section, and click “Text Font.” You will get the preference: Upload the font, select it, and click “Choose Font Files.”
Note: Divi supports the TTF and OTF file formats. TTF (TrueType Font) and OTF (OpenType Font) are commonly provided when purchasing premium fonts. These formats work in Divi, but they are usually larger.
Large font files can:
- Slow down page loading
- increase render-blocking resources
- hurt mobile performance|
You can still use them, but converting them to WOFF2 is usually the better option.
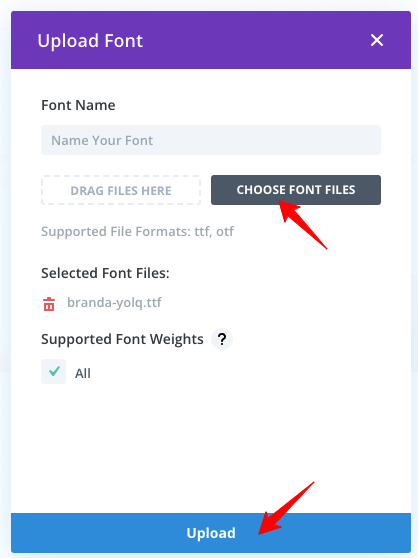
Step 6: Enter a font name and select the files to upload, then click “Upload.” Now, the fonts will get added. Look at the preview of the newly created page, and you can see that the uploaded font has been applied. Now, you have to save and exit the page builder.
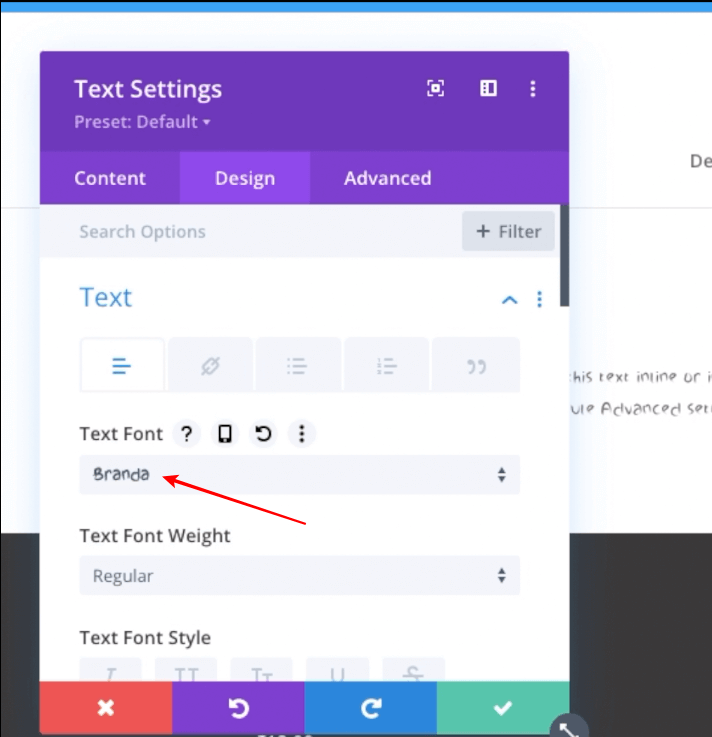
Step 7: After uploading, select the font family, as shown in the image below.
Step 8: Now, I will tell you how to select this uploaded font for the Heading and body content. For that, go to Theme Customizer > General Settings > Typography, and there, you will see the uploaded fonts added under the “Header Font” and “Body Font” sections.
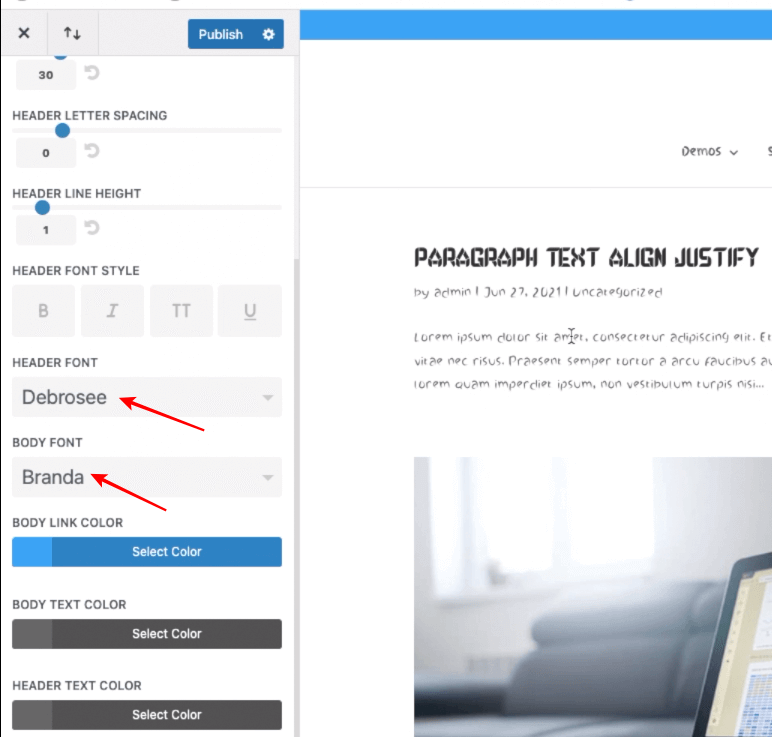
Step 9: Select your preferred uploaded font and see the changes on the preview page. Now, click the “Publish” button. So, I hope you have clearly understood how to use the custom fonts in Divi for the Header and the body text.
Here is a Bonus lesson on using Google fonts in the Divi theme.
How To Add Google Fonts In Divi?
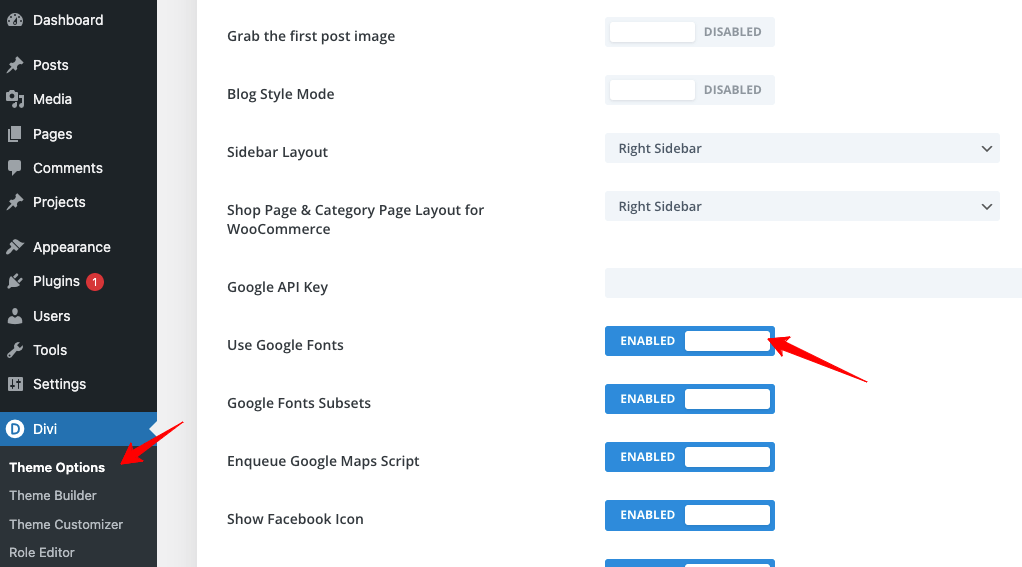
Visit your WordPress Dashboard > Divi Theme > Theme Options, where
You have a setting option – use Google fonts with an Enable/Disable button. Just enable the Google Fonts feature for your site built with the Divi theme, then click the “Save Changes” button.
Most Divi users are unaware of this Google font feature, so I have explained this useful setting in this tutorial. Once you activate this feature, you can use it in the same way as the uploaded custom fonts.
Video Tutorial To Add Custom Fonts To Divi Theme
Here are the video instructions for adding custom fonts in the Divi Theme Builder. I have done it for your easy understanding.
How to Optimize Custom Fonts for Speed?
One of the biggest mistakes Divi users make is uploading large font files without optimization. Fonts can significantly affect Core Web Vitals, CLS (Cumulative Layout Shift), LCP (Largest Contentful Paint) and mobile performance.
Here are the most important optimization techniques.
1. Use Only Necessary Font Weights
Many users load every font variation:
100
200
300
400
500
600
700
italic versions
This creates unnecessary HTTP requests and larger page sizes.
In most cases, you only need:
Regular (400)
Medium (500)
Bold (700)
Removing unused font weights can noticeably improve performance.
2. Preload Important Fonts
Preloading tells the browser to load important font files earlier.
This improves: text rendering speed, visual stability, and Core Web Vitals
Example preload code:
<link rel="preload" href="/fonts/font.woff2" as="font" type="font/woff2" crossorigin>
This is especially useful for hero section fonts and heading typography.
3. Use font-display: swap
Without proper configuration, browsers may hide text until fonts fully load. This creates the dreaded “invisible text” problem.
Adding: font-display: swap; allows fallback fonts to display immediately while the custom font loads in the background. This improves user experience and perceived performance.
Common Divi Font Problems and Fixes
Sometimes uploaded fonts may not work correctly in Divi. Most font-related issues are easy to fix once you know the cause.
1. Custom Font Not Showing
This is one of the most common issues. Usually, the problem is caused by browser cache, unsupported font format, CSS conflicts and optimization plugins.
To fix it:
- Clear all caches
- Regenerate Divi CSS
- Re-upload the font in WOFF2 format
- Disable optimization plugins temporarily
In many cases, simply clearing the cache solves the issue.
2. Font Looks Different on Mobile
Sometimes fonts appear correctly on desktop but not on mobile devices. This usually happens because:
- Responsive typography settings differ
- Fallback fonts are loading
- Font weights are missing
Check your responsive typography settings inside Divi Builder and ensure mobile styles are configured correctly.
3. Font Upload Failed
If Divi refuses to upload the font file, the issue may be:
- file permissions
- unsupported formats
- excessively large file size
Converting the font to WOFF2 often resolves upload issues while improving performance at the same time.
Frequently Asked Questions
Does Custom Typography Affect SEO?
Indirectly, yes. Typography influences: readability, engagement, bounce rate, user experience, and page speed. Poorly optimized fonts can slow down your website and negatively affect Core Web Vitals.
On the other hand, optimized typography improves usability, visual hierarchy, mobile experience, and reading comfort. All of these factors contribute to better SEO performance over time.
How To Get Full Control Over Typography?
You may use this custom CSS
@font-face {
font-family: ‘CustomFont’;
src: url(‘/fonts/customfont.woff2’) format(‘woff2’);
font-weight: 400;
font-style: normal;
font-display: swap;
}
How to Host Fonts Locally in Divi?
Many websites load fonts directly from Google servers. While this is convenient, it can create privacy and performance concerns. Hosting fonts locally means the font files are served directly from your website rather than from external servers.
Local font hosting has become especially important after privacy regulations increased in Europe. If you use Google Fonts, plugins can automatically download and host them locally.
Popular Plugins:
OMGF
Perfmatters
Local Google Fonts
Wrapping Up
If you want to build brand awareness through elegant web design for your long-term business site, uploading the appropriate custom font is a clever move. In simple words, it will create a visual identity for your brand.
Uploading custom fonts in Divi is easy, but optimizing them correctly is what separates fast, professional websites from slow and poorly optimized ones.
For the best results:
- Use WOFF2 fonts
- Host fonts locally
- Preload critical fonts
- Limit unnecessary font weights
- Maintain a clean typography hierarchy
I hope you have understood how to upload custom fonts in the Divi theme. My video tutorial will also help you add them without any trouble. You may also include Google Fonts to improve your online visibility.