Do you want to learn how to enable Cloudflare CDN in Cloudways hosting and make your site load lightning fast? You have made a great decision, as it is the best favor you are doing for your business site.
After the core web vitals assessments become a search engine ranking factor, most site founders are keenly interested in enabling the CDN feature to their web assets.
Even we did the same! To pass the CWV tests, we have integrated the Cloudflare CDN into our Cloudways account. And now, we are scoring good speed results. Look at the screenshot below!
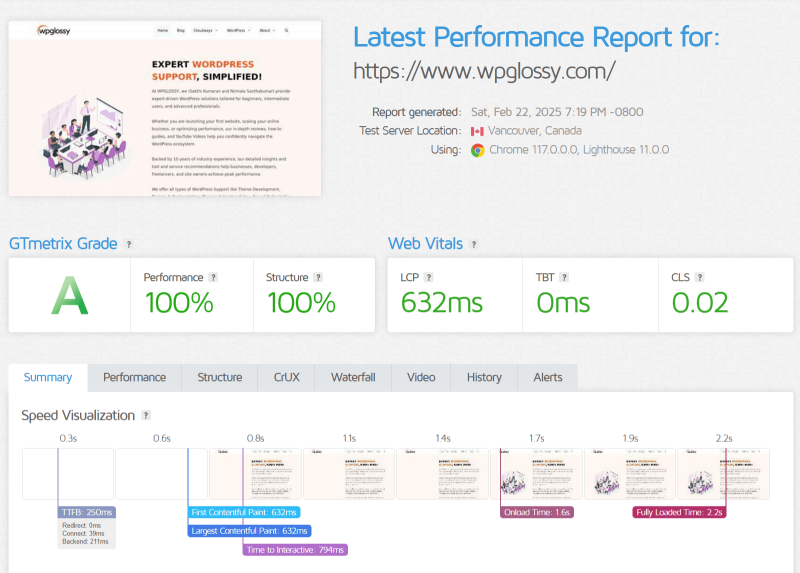
By offering fast-loading pages to our audience via the CDN, we are achieving strong SERP rankings for our targeted keywords. Ultimately, we maintain our authority in Google’s eyes. Let’s get into the topic!
Cloudways is the most amazing CDN-ready cloud hosting I use for my blogs! The primary reason for using this managed cloud hosting service is its industry-leading best loading times and world-class security.
They are doing a lot for the site speed boost and data safety, and the CDN is one of them. You can offer an end user a quick, responsive site by improving page load times.
I assume this post is a CloudwaysCDN review that explains how to set up Cloudflare CDN for your Cloudways account. It will improve your website’s load time and server-side performance by enabling efficient load balancing and reducing data transfer.
Let’s start from the basics!
Disclosure: We get a commission when you buy a product via our affiliate link at no additional cost.
Table Of Contents
Cloudways CDN Feature – Overview
Earlier, Cloudways partnered with Stackpath to provide the CDN feature for its clients, and now it has been changed to Cloudflare CDN since it is the most used CDN and its market share is high compared to other providers.
This managed hosting service always prioritizes the speed and security of a website; hence, it has introduced the Cloudflare enterprise CDN add-on, providing robust protection for thousands of webpreneurs. The price is highly affordable and worth spending for enterprise-grade performance.
Why Cloudways + Cloudflare CDN?
When the two biggies get combined, be ready to admire the maximum server performance and top-class security. You will get the following features in the Cloudways Cloudflare partnership.
1. Fastest CDN
The Cloudflare CDN is meant for powerful, full-scale performance. Its advanced network architecture can provide lightning-fast speed and incredible end-user experiences. Your website’s static content will be cached by the CloudwaysCDN and served to your readers from the closest server.
Image optimizations with polish, Accelerated Mobile Pages, and smart routing are among the best speed features of the Cloudflare Enterprise plan in Cloudways. Moreover, Agro-tiered caching is used at the data centers to minimize static content requests. In addition, they have introduced full-page caching for dynamic pages to offer complete control over the page rules.
2. Easy To Install
The CloudwaysCDN WordPress installation procedure is straightforward and direct; you can finish the job in a few minutes. You need to include the essential records in your domain registrar and verify the ownership of your Cloudways account.
3. DDoS Protection
The enterprise-grade service from Cloudflare protects your site against DDoS attacks from the edge. It can prevent login & bot attacks and layer 3, 4 & 7attacks. The one thing I admire is that it offers reserved IPs for Cloudways users. All these DDoS security features are not available for the free and premium pans of Cloudflare.
4. Worldwide coverage
Start serving your site content from the server closest to your visitors. Your business website will never be limited to geographical boundaries, regardless of location.
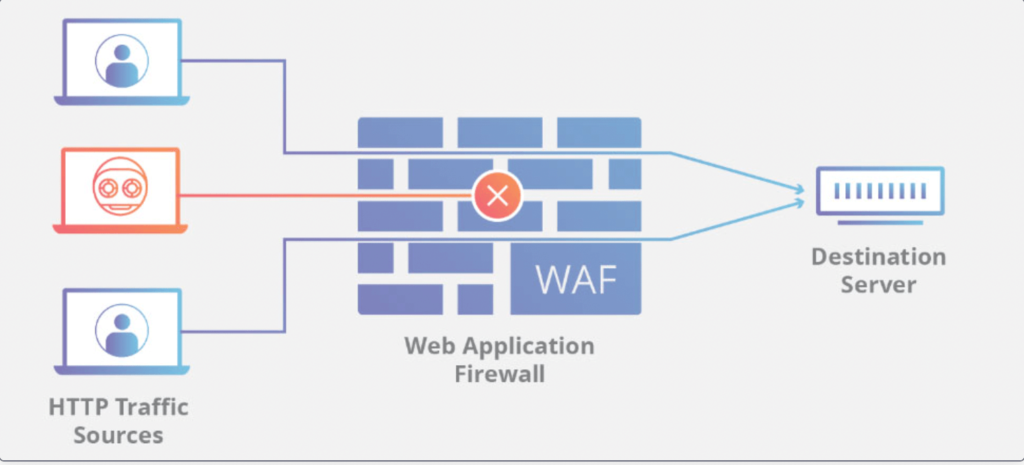
5. WAF
WAF is an intelligent web application firewall characteristic of Cloudflare CDN to discover the threats and attacks before they reach your server. It has exclusive firewall rules enabled for Cloudways, so you can hardly protect your WordPress sites with this security feature.
Monitoring the HTTP traffic is a notable upside of this feature that never allows SQL injection, cross-site scripting, and other suspicious file inclusions.
How to Set Up Cloudflare CDN on Cloudways?
I hope you are clear with the amazing Cloudways Cloudflare CDN features. Let’s see the simple activation process that can be done within a few minutes.
Note: If you already use the Cloudways hosting service, skip “Step 1” and go directly to “Step 2.”
Step 1: Register for an account!
After registering with Cloudways managed hosting, add the server to your account in your preferred region.
Now, let’s see how to integrate Cloudflare CDN in Cloudways.
Step 2: Go to your main server, click “Applications” on the Top Menu, and choose the particular application to which you want to activate the CDN.
Step 3: Selecting the application will redirect you to the access details; click the Cloudflare option on the left side settings.
Step 4: Now, it will show all the CDN features they offer to Cloudways users; review them.
Step 5: Enter your domain name and click the “Enable” button.

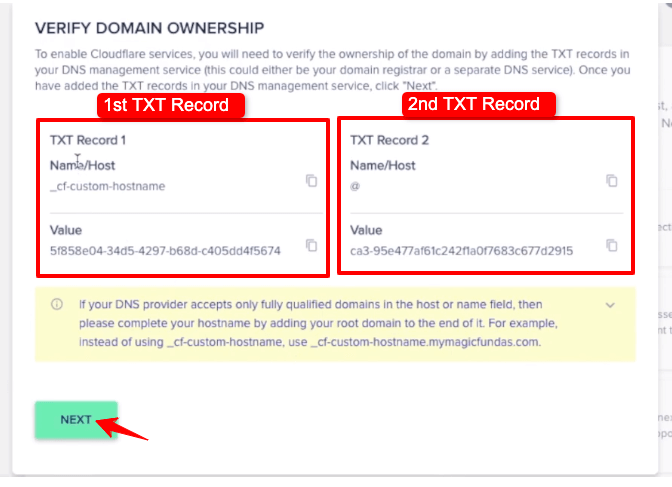
Step 6: After enabling, it asks you to verify your domain ownership by adding the 2 TXT Records; refer to the following image!
Step 7: I’m heading over there to register the domain with GoDaddy. Under the DNS management settings, click the “Add” button.
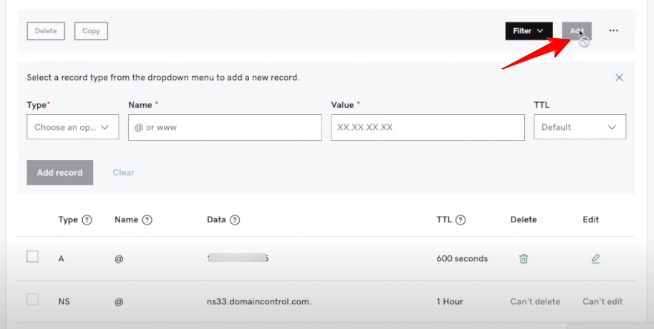
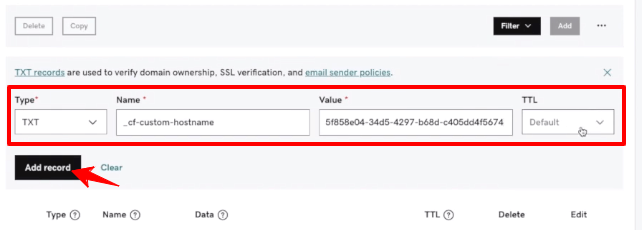
Step 8: On the “Type” field, choose TXT. For the “Name” section, copy the name from your Cloudways account (1st TXT record) and paste it. Likewise, do the same for the “Value” section; copy and paste the value from the 1st TXT record. Keep the TTL value as the default and click “Add Record.”
Step 9: Repeat the same process to add the 2nd TXT record. Refer to the image.
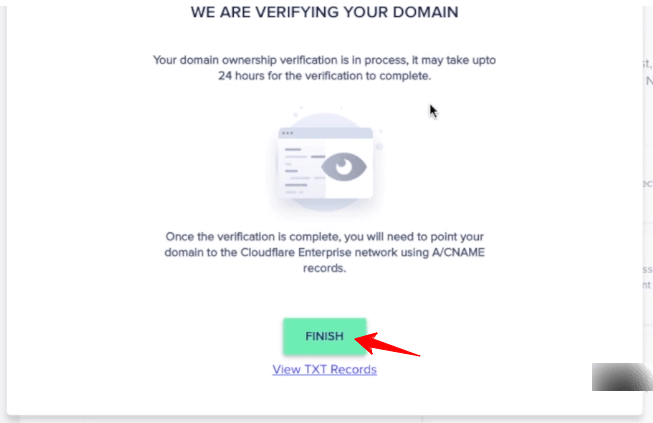
Step 10: After adding both records to your domain registration account, Click the “Next” button in your Cloudways account. Now, you will receive a notification that they are verifying your domain ownership, and the verification may take 24 hours to complete. Click the “Finish” button.
Step 11: You will be taken to a page that displays the features of the Cloudflare enterprise plan. Just go through it, and at the end of the page, see the status “Pending Verification.”
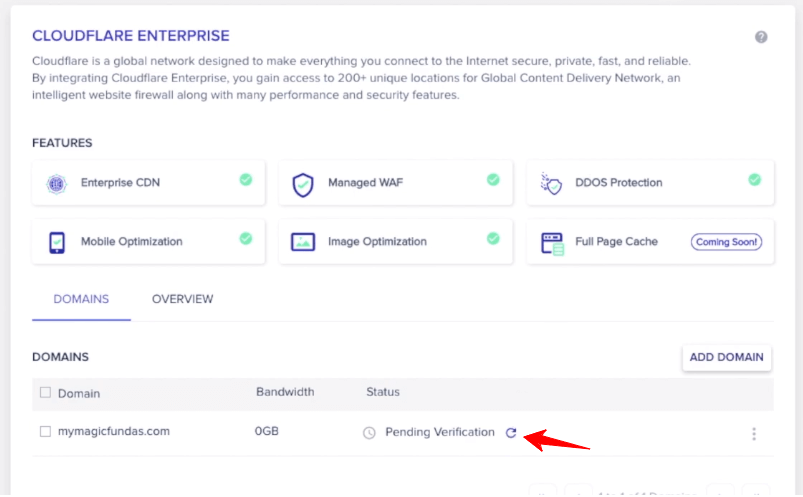
Step 12: Now, click the refresh button near the status, and the status will change to “Domain Not Live.” This means the domain verification is completed; however, the domain is yet to live. To take it live, you need to include add A & CNAME records.
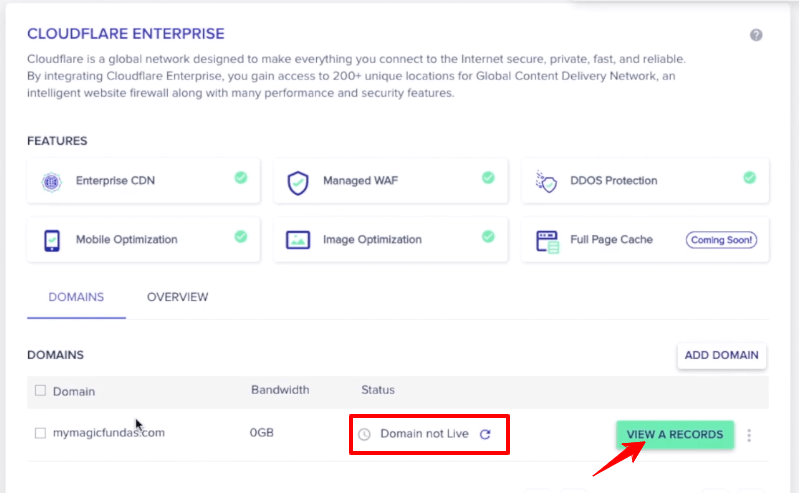
Step 13: Click “View A Records” (see the image above). It will show two values like this.
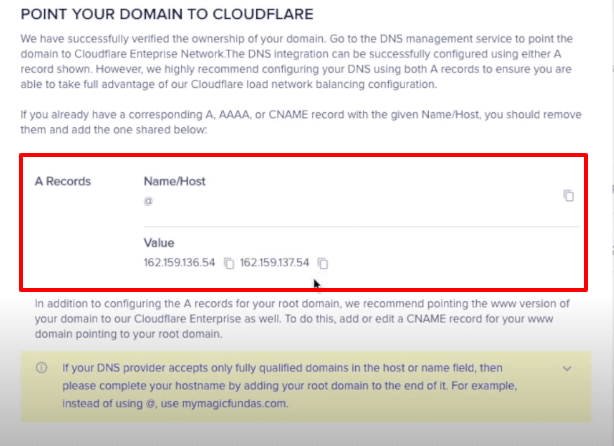
Step 14: Add these values as 2 A records in your domain management section.
Note: If any existing A record is available, delete it before adding new A records.
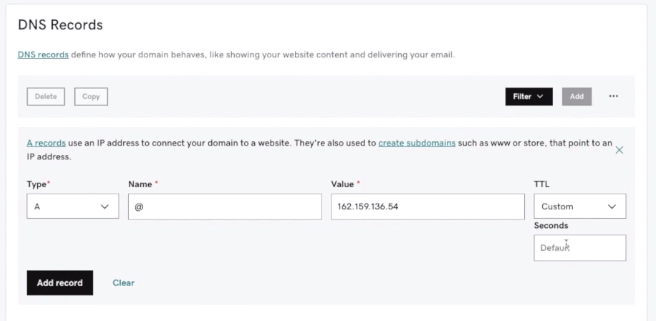
Let’s add the new A Record. Click “Add,” go to the Type field and select “A,” Give “@” in the Name field and paste the first value; for the TTL section, choose “Custom,” 600 seconds. Click Add Record.
Likewise, copy the second IP address given in your Cloudways account, go to your domain registration account, click “Add,” In the Type section, select “A” give “@” under the Name field, paste the 2nd IP address under the Value section, keep TTL as “Custom” 600 seconds and click “Add record” button.
Step 15: After adding A records, you have to add a CName record with your domain name (To enter the details, please refer to the below image)
Note: If any existing CNAME is available with your domain, delete them before adding a new CNAME record.

Step 16: After adding the CNAME record, click the refresh icon near “Domain Not Live.”
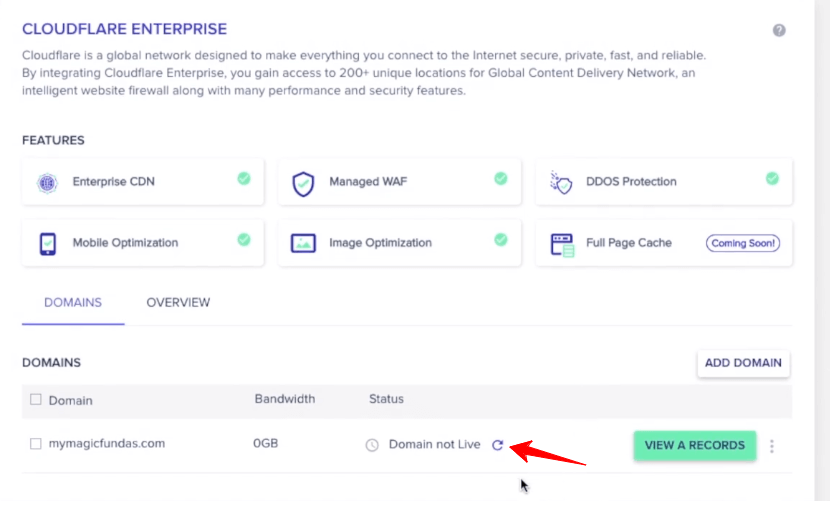
Step 17: After clicking the refresh icon, you will see Active status 🙂. So, you have successfully integrated the Cloudflare CDN into Cloudways hosting. Just refresh your site and check whether it is working fine or not!

Video Tutorial To Enable Cloudflare CDN in Cloudways
Watch the video I captured during the Cloudflare CDN integration process for one of my blogs in Cloudways hosting.
CloudwaysCDN Pricing
The Cloudways CDN cost is highly affordable when compared to other CDN providers. The single domain is priced at $4.99
For 1 – 4 Domains – $4.99/domain
For 5 – 10 Domains – $3.99/domain
For 10 – 25 Domains – $2.99/domain
For 25 + Domains – $1.99/domain
All these plans include exceptional features like Wildcard SSL, HTTP/3 support, Intelligent firewall, DDoS protection, Brotli compression, Mirage mobile optimization, PCI DSS compliance, and 100GB enterprise CDN. It is worth paying this lowest fee to improve your site speed.
Wrapping Up The Cloudways Cloudflare CDN Integration
Integrating the CDN into WordPress is a wiser choice, as it improves your website’s performance and security. Offering the fastest website for the readers is a part of SEO, and it is more likely to increase conversions with lightning-fast web pages.
Both Google and your site audience expect ultra-fast loading sites, so the CDN is the perfect approach to accelerate your content. After you activate CDN on Cloudways, don’t forget to implement the WordPress site speed optimization to dominate your competitors.
If you need an excellent yet affordable CDN with high flexibility, consider the Cloudways Cloudflare CDN, which is easy to get started with. To get further help in implementing the content delivery network for Cloudways managed hosting, catch me in the comments section.


Your article is very or very helpful to me! thank you. Wishing you every success in your life!