
If you’re considering creating a search-friendly database for your audience information, that’s a good decision. I’ll explain how I created the database for my site in a simple step-by-step guide. So, let’s find out how to create a searchable database in WordPress.
It’s important not only because you’ll have your subscriber’s and daily readers’ data but also because you’ll be able to contact them quickly. The best part is that creating this database isn’t difficult, especially with the Formidable plugin.
You can instantly access exclusive members’ contact details, such as email addresses, to inform them about a new product or event by simply typing their names into the database. Before getting into the guidelines, let me tell you its basics.
What Is A Searchable Database & Its Benefits?
As the name suggests, a searchable database is a database of properly organized data. It’s different from a regular database because it’s searchable and allows database owners to quickly find information by searching for specific keywords or other criteria like email and country.
In the context of a WordPress site, a searchable database can be incredibly valuable for managing and connecting with your audience. It has several benefits that include:
- Audience Insights: Easily access and analyze data about subscribers, customers, visitors (who fill out forms), or other users to better understand them.
- Targeted Communication: Quickly locate contact information, such as email addresses, to send personalized updates, exclusive offers, and event invitations to specific members of your blog audience.
- Simple To Manage: You can organize all your important user data in one place, making it simple to manage, update, and maintain your records.
How To Create A Searchable Database? Step-By-Step Guide
Now, let’s come to the main topic: how to create a searchable database in WordPress. Below, I’ll explain the step-by-step process using the Formidable plugin. Follow along until the end to fully grasp the steps in setting up your searchable database.
Step #1: Download & Activate The Plugin
The first and most crucial step is to download and activate the plugin. To do this, log into your WordPress website and go to the plugin library.
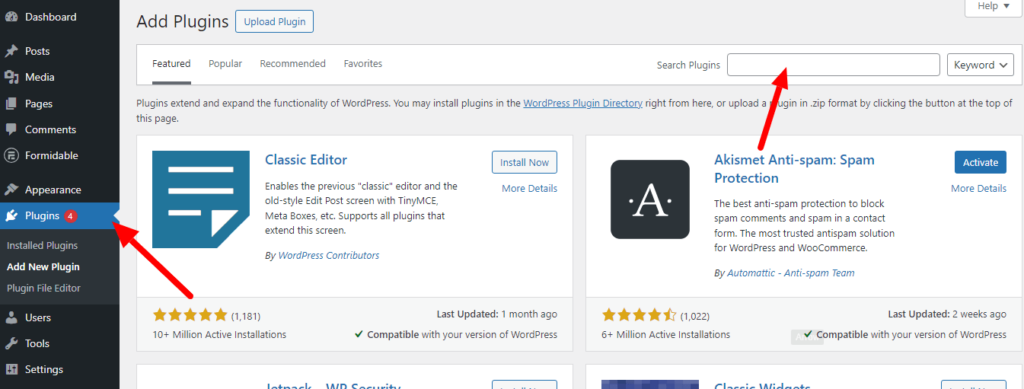
Search for “Formidable,” install the plugin, and activate it.

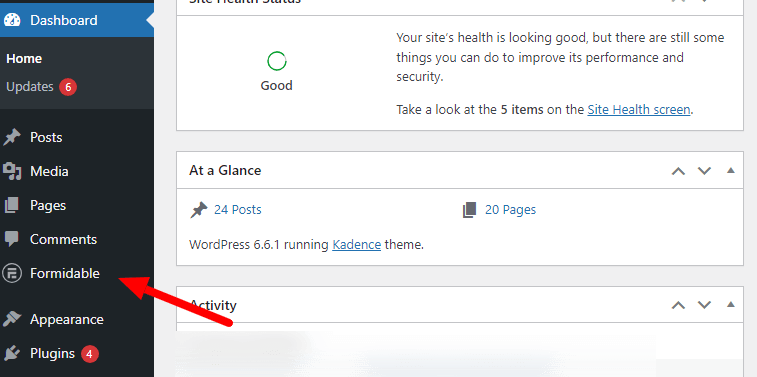
After that, the plugin will appear on the sidebar of the WordPress dashboard.
Step #2: Create A Formidable Form
Once you’ve installed Formidable, it’s time to create your form. This form will be the backbone of your searchable database as users will submit their data, like their name, contact information, and other relevant details. So, to create this form:
Find the “Formidable” plugin name in the WordPress sidebar and choose the “Forms Lite” option.

You need to create a new form, so click on “Add New” to see different form templates. You can also start from scratch if you want a unique, customized form.
Otherwise, Formidable has more than 300+ form templates (premium version, of course) and 33 form templates (free version), which you can use to save time.
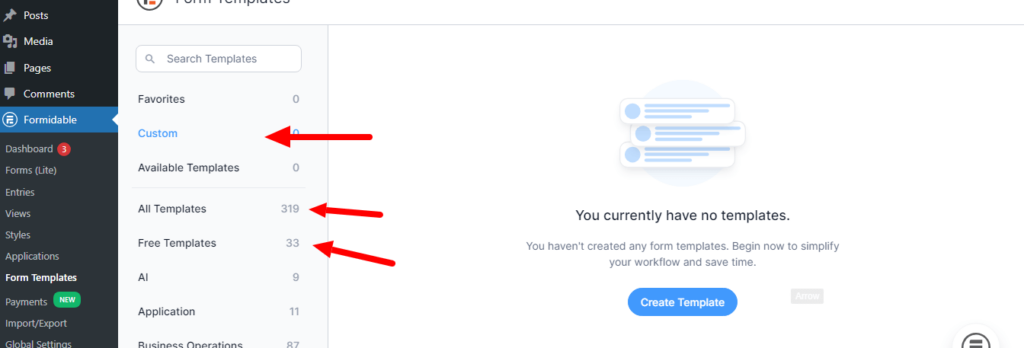
Give your form a name that describes its purpose, like “Product Database” or “Employee Directory.”
Step #3: Add Fields To Your Form
This is where you decide what information your database will contain.
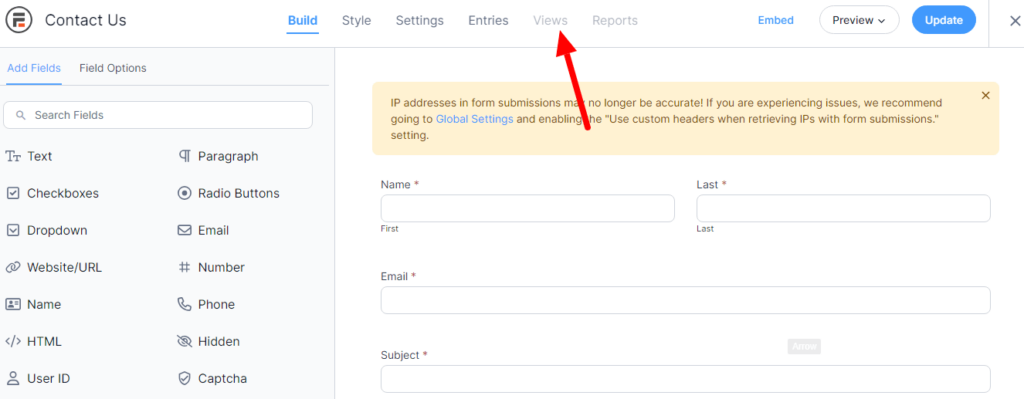
In the Formidable form editor, you’ll see a list of field types on the left. Drag and drop the fields you need into your form. For example:
- Text field for names or titles
- Email field for contact information
- Dropdown for categories
- Website/URL for links
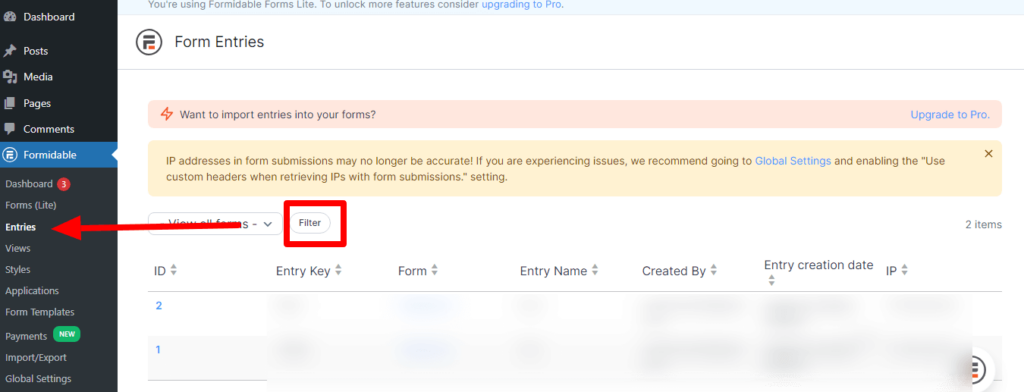
After creating the form with all necessary fields, publish it. A simple user database is ready. Whenever someone sends a message using the form, it will be available in the “Entry” setting of the Formidable plugin. You can use the filters to view the data.
Step #4: Set Up Views
Here comes the fourth step, which is about setting up a view, a listing page for the database that allows you or the audience (if you publish it) to easily search and access all the information. This feature is part of the pro version of Formidable, so you’ll need to upgrade to use it.
Go to “Formidable” > “Views” in your WordPress dashboard.

Click “Add New” to create a view.
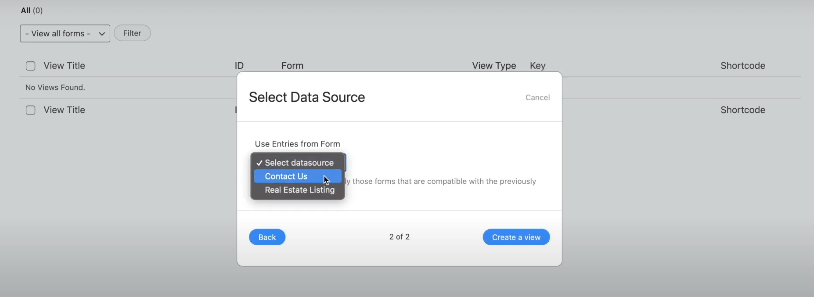
Choose the form you just created as the data source.
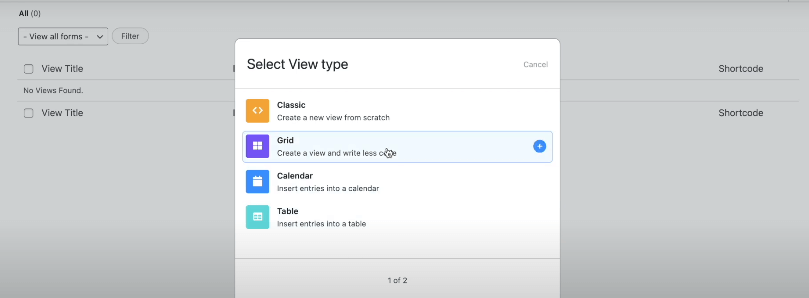
Select “Grid” or “Table” as your view format.
Add the fields you want to display in the “Listing Page” and “Detail Page” settings.

Choose which fields should be searchable, and your listing page will be ready. It will be private and available only to you as the website’s administrator or to other users like editors.
Once you publish it, the listing page will automatically be available to your audience, which is a good solution for a website that provides real estate listings.
Frequently Asked Questions
Can I create a database on WordPress?
Yes, you can create a database on WordPress using a plugin like Formidable. This plugin lets you create a database for your audience’s information and allows the blog owner to easily search for any information in the database.
Is there a database plugin for WordPress?
Formidable is the best database plugin for WordPress. It’s available in the WordPress library; you only need to download and activate it to create a searchable database.
Is the Formidable plugin free?
The Formidable plugin has two versions: free and paid. You can download the free version or pay for the premium version if you want advanced features like using the “view” settings that allow you to create a listing page. The choice is yours!
Final Thoughts
I hope this guide about how to create a searchable database in WordPress was helpful and that you’ve got the solution to your problem. Formidable is a great plugin. You don’t need coding skills and can quickly build a WordPress searchable database.
Plus, it allows you to upload data from XML or CSV files, though this feature is only available in the premium plan (which is why I suggest going for the premium version). If you’re unsure about upgrading, don’t worry.
Formidable also offers a 14-day money-back guarantee, so you can try the premium features risk-free. If it’s not what you need, you can get a full refund within those 14 days—it’s a win-win situation!
