Do you want to know how to create Cloudways Backup and Restore applications? It’s good that you want a recent website backup to stay safe against data loss. Let me show you the simple backup process and how to restore files in the Cloudways server.
As a Cloudways user, you know the simple settings features in the crystal-clear Dashboard. And yes, they have offered a 1-click option to back up your site. I always admire its simple dashboard preference! Let’s come to the point!
Without a proper backup strategy, a single issue can wipe out your years of content, customer data, and revenue. Fortunately, Cloudways provides:
- Automated offsite backups
- On-demand manual backups
- One-click restore
- Database-only restore
- Point-in-time recovery
- Configurable backup retention
In this complete guide, you’ll learn how Cloudways backups work, how to configure them properly, and how to restore your site safely without losing data.
Table Of Contents
Cloudways Backup – Quick Intro

Cloudways provides server-level automated backups stored on secure off-site infrastructure. Unlike WordPress backup plugins that operate within the website environment, this feature operates at the server level, making it reliable, independent of WordPress errors, quick to restore, and less resource-intensive.
With this feature, you can configure – Backup frequency, Backup retention period, and Local backups. It is clear that the Cloudways backup & restore process is highly flexible; you need to choose the option that best suits your site’s needs.
Step-By-Step Instructions To Take Cloudways Backup & Restore Files
If the intruder gets access to your site or you accidentally delete your core files, the server-level backup will always protect your web asset. In Cloudways hosting, the backup task is straightforward and quick! Let’s see how to do it!
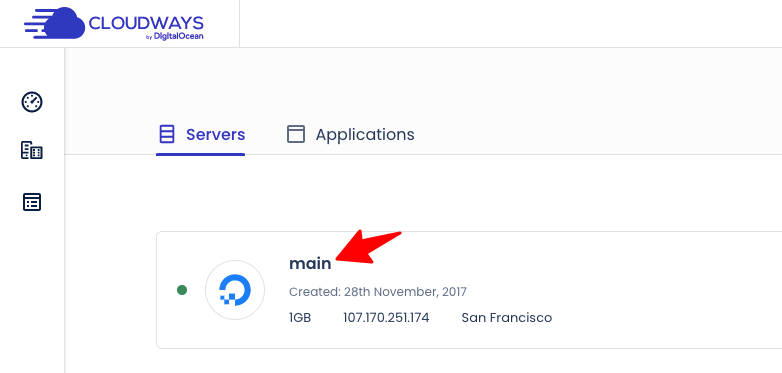
Step 1: Go to your Cloudways dashboard account. You may use the newly introduced server section interface.
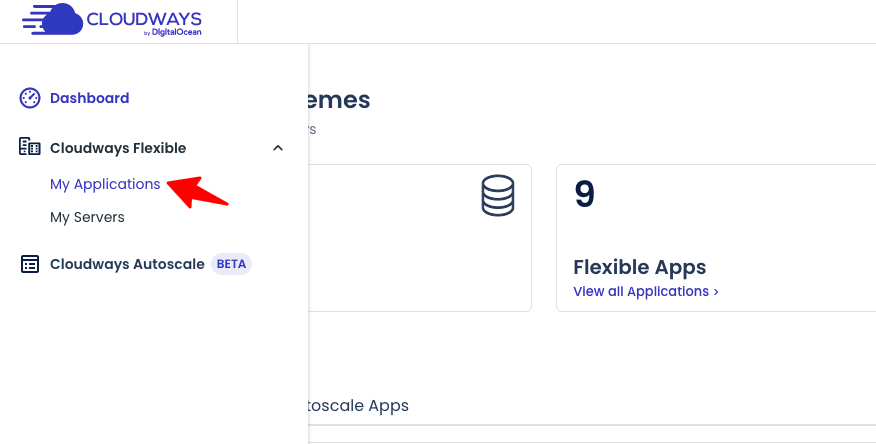
Step 2: Go to your left-side settings and click Cloudways Flexible > My Applications.
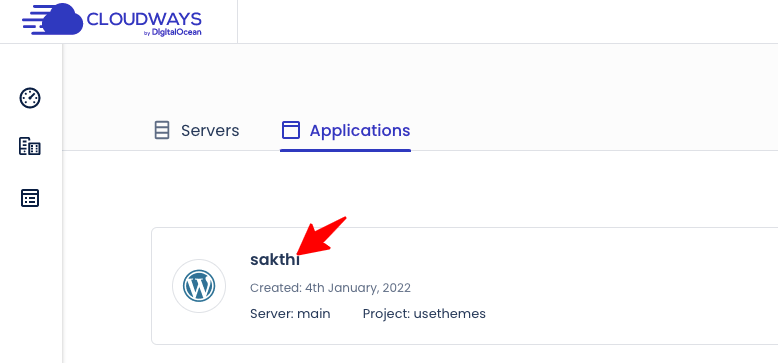
Step 3: You will get your applications listed; choose any of your applications to take a backup.
Step 4: You will get the access details for that application. Locate the option “Backup & Restore.” Click it.
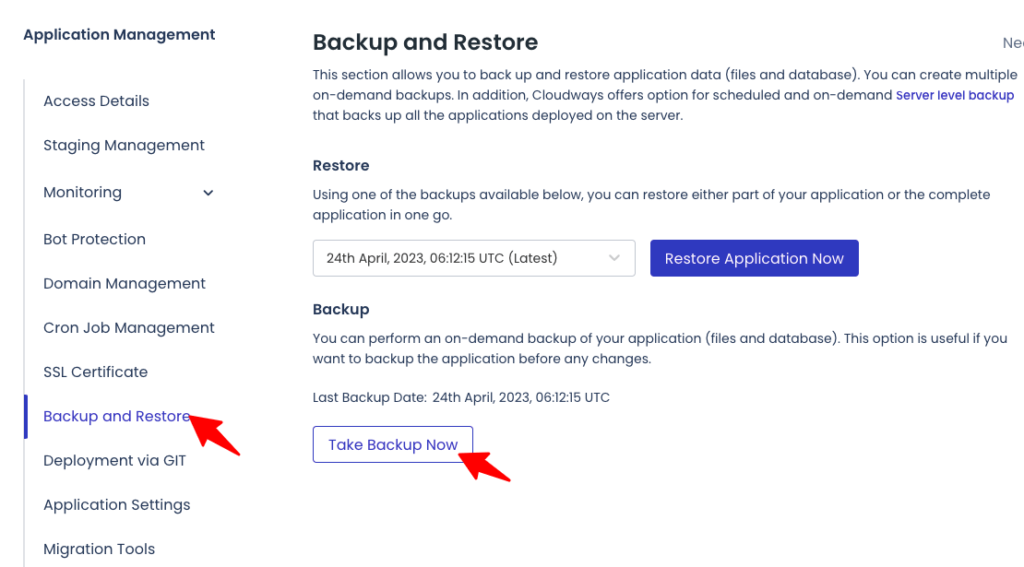
Step 5: You will be taken to a page with a button labeled “Take Backup now”; click it (refer to the above image). If your site is old, backing up will take some time. After the process, you will see a message at the top: “Backup completed.”
Step 6: Check the restore section (Use the drop-down arrow to view), and glance at the latest backup date and time. Select it and click – Restore Application Now.
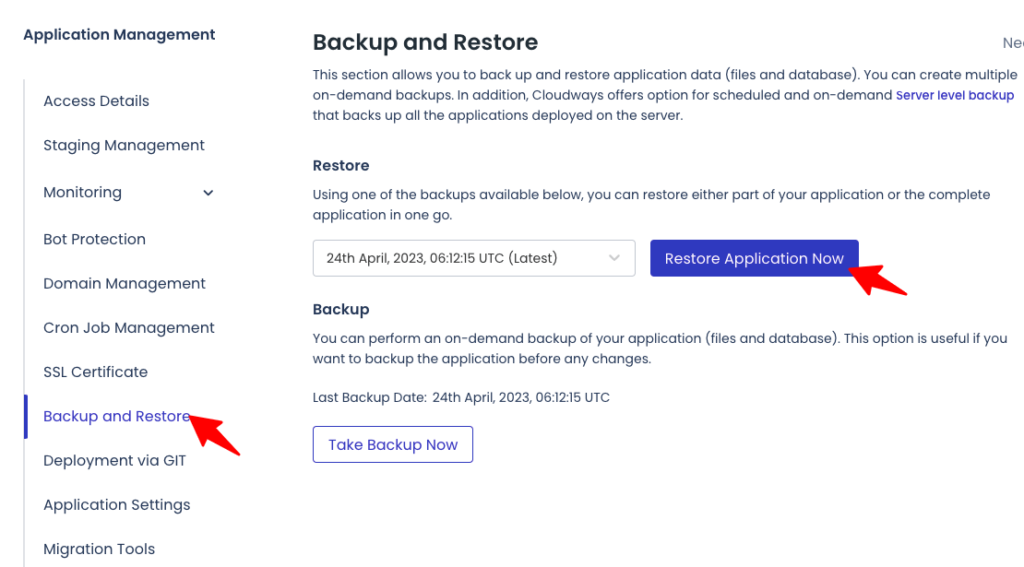
Step 7: Cloudways will give you three backup options – Complete backup, Web Files, and Database. You may choose your preferred option for file backup. Click the “Proceed” button to begin the restore application process.

After the restoration, you will get a message saying the application has been restored. That’s it, so you have learned how to take Cloudways Backup and restore the files.
What Is Roll Back In Cloudways Backup?
Let’s see an additional feature in the Backup process, Roll Back. It is a local copy of your application, which will be saved before you restore the files using the “Restore” option.
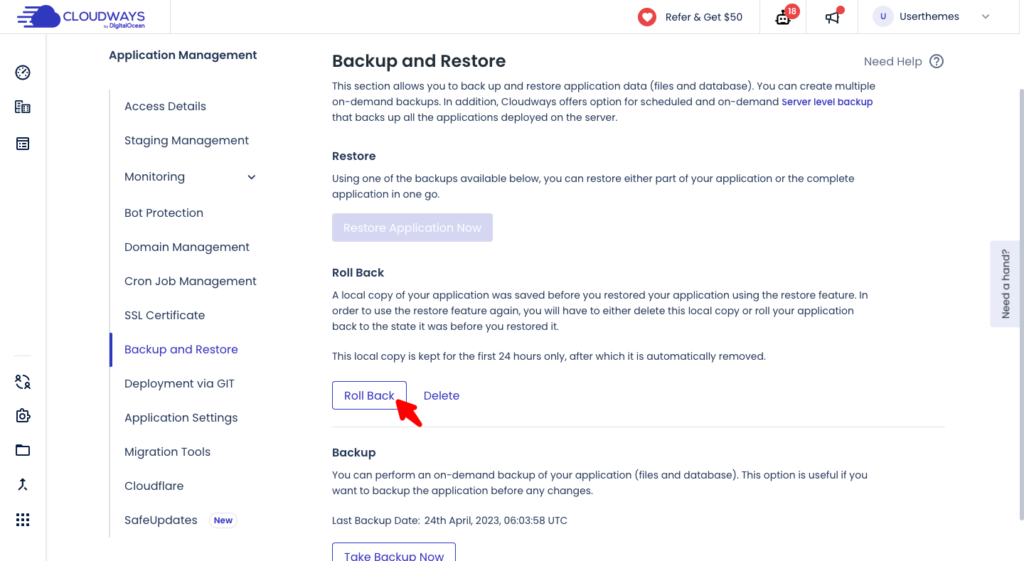
Note – If you want to use the restore feature again, you must either delete it or roll your application back to its state before you restore it.
So, if you don’t want the restored files, you may use this Roll Back option to remove the Cloudways backup that you have taken.
When you click “Delete” or Roll Back settings, it will ask for confirmation to delete. By clicking “Proceed,” you will get the message at the top that the “backup has been deleted.”
So far, we have seen a particular application’s backup and restoration process. And now, let’s see how to back up your entire server completely!
How To Back Up Your Entire Cloudways Server?
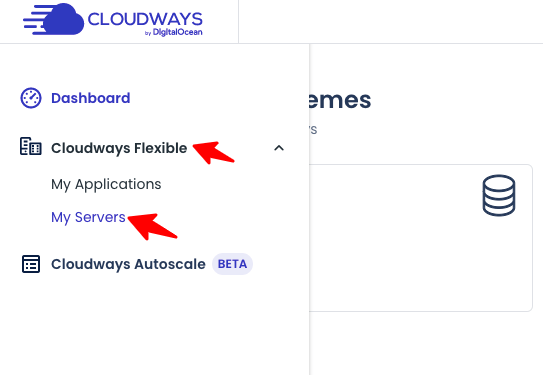
Step 1: Go to Cloudways Flexible > My Servers
Step 2: Select your main server
Step 3: Go to its left-side settings and hit the preference – “Backups.”
Step 4: You will be taken to a page with the button “Take backup now.” Click it.
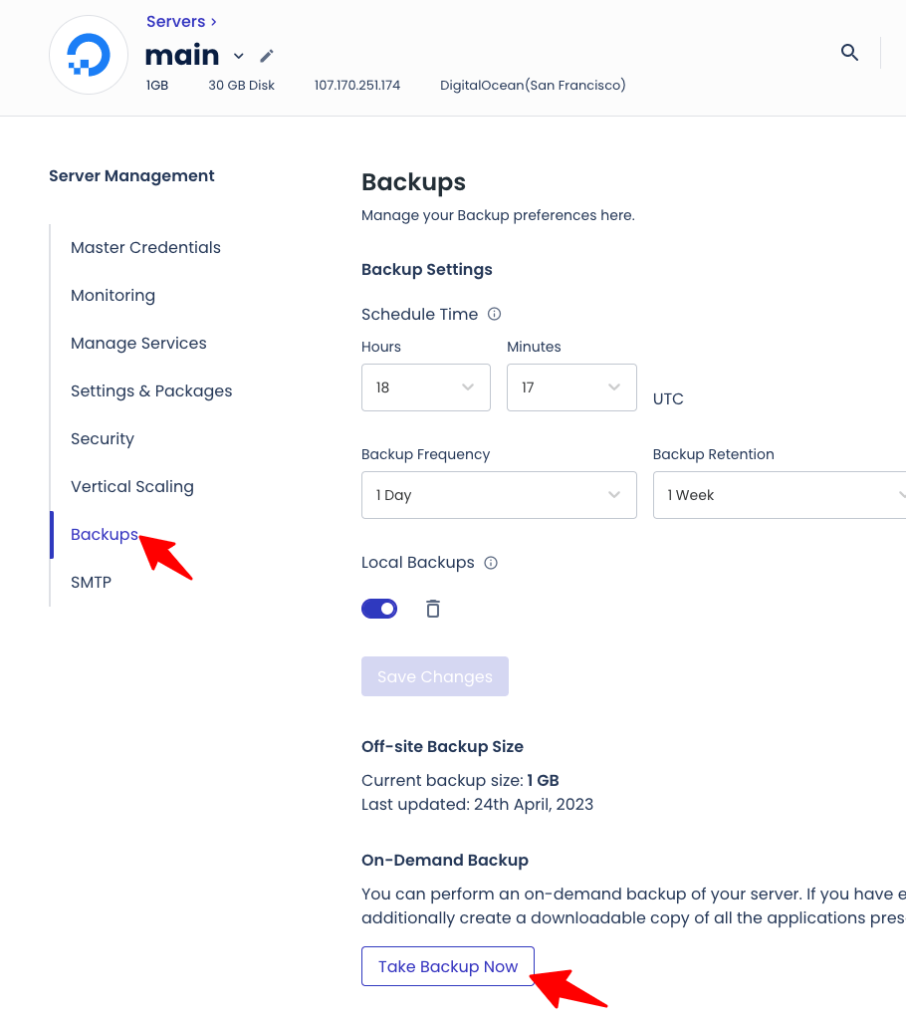
It might take some time, and yes, it depends on the file size of your server. Once the process is completed, you will get a message “Backup Completed.”
Note: You can delete the local backup by clicking the delete icon (See the screenshot above).
Look at the screenshot above and notice the Scheduled Backup for Cloudways. I use the default settings. However, you may modify the preferences according to your requirements.
You can adjust
- Schedule Time (UTC Timezone for automated backup)
- Backup Frequency (Possible to set from 1 hour to 7 days)
- Backup Retention (Allowed duration is 1 to 4 weeks)
Video Tutorial For Cloudways Backup Process
To help you understand, I have prepared a video tutorial on how to recover a deleted application in Cloudways. Watch it and subscribe to our YouTube Channel for useful videos like this!
Common Cloudways Backup & Restore Problems (And Solutions)
1. Restore Not Working
Fixes:
- Clear cache
- Disable CDN
- Check server resources
2. Backup Not Showing
Fixes:
- Refresh dashboard
- Verify backup frequency settings
3. Site Still Broken After Restore
Fixes:
- Clear browser cache
- Check for malware
- Contact Cloudways support
Cloudways Restore Backup Best Practices
To maximize protection:
- Use hourly backups for revenue-generating sites
- Always take a manual backup before updates
- Keep retention at least 7–14 days
- Test the restore process occasionally
- Monitor storage usage
- Strengthen site security to reduce restore need
Backups are not just safety tools. They are part of a full website security strategy!
Cloudways Download Backup – FAQs
How Long Does Cloudways Keep My Backup?
Cloudways will keep your application backup for 15 days. After that, you cannot recover your files.
How Much Does Cloudways Charge For Backups?
For off-site backup storage, Cloudways charges $0.33/GB per server. We are paying $0.50/mo as a backup charge; see the screenshot below.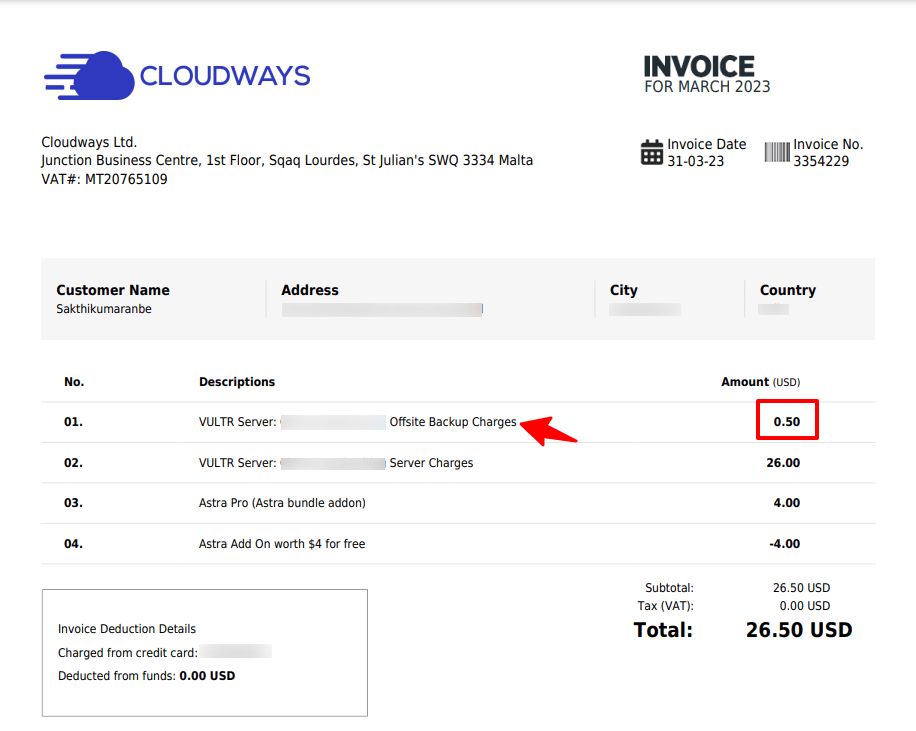
How Do I Manually Back up Cloudways?
I have already explained it in the article. Here is the brief form!
Go to Cloudways Dashboard > Target Server > Backups from the left menu
Enable Local Backups > Save Changes
Click Take Backups Now
Connect your server through SFTP login and download the backup.
Wrapping Up
Backing up is the best way to maintain a healthy WordPress site. Cloudways is the best-managed hosting provider with easy settings for automated off-site backup and On-demand application backup.
I hope you understood the simple process of taking a complete server backup and performing backup & restoration for a specific application on Cloudways hosting. If you need help, contact me via the comments.