Do you want to enable your online store’s WooCommerce gift wrap option? If you are planning to do it, keep reading this post. Here, we will show you how to activate the gift-wrapping option in your store and make it more powerful!
If you are running an online store and need to optimize sales, you should develop multiple strategies. Several strategies are available to boost sales, such as adding an email optin form to generate leads, running BOGO (Buy One Get One) campaigns, setting up category-based discounts, etc.
But have you ever thought about adding the gift-wrapping feature to your WooCommerce store?
By default, WooCommerce doesn’t come with this feature. But with a dedicated WooCommerce plugin like YayExtra, you can bring gift-wrapping features to the store and improve customer satisfaction.
Wondering how to do it?
No issues. This article will teach you how to create a WooCommerce gift wrap option on your online store without hassle.
But before going further, let’s see why adding a gift wrap plugin WooCommerce is suitable for your online store.
Why Adding WooCommerce Gift Wrap Option Is Good?
People love sending gifts to someone they love or care about. They follow this on almost every occasion, such as birthdays, wedding anniversaries, Christmas, etc. Sending perfectly wrapped gifts will create curiosity, and they will love the whole experience.
If you can provide your customers with perfectly wrapped gifts, they will find your store useful, and you can get more sales. On top of that, they will recommend your store to other people who need to buy gifts for their loved ones.
Hence, adding a gift wrap WooCommerce is best for every online store!
How to Add WooCommerce Gift Wrap Option?
I will use YayExtra to add the gift-wrapping option to the store. You can complete the task in 3 steps with this WooCommerce gift wrap plugin. The steps are:
- Create an options set
- Configure it
- Make it active
That’s it!
Let’s look at each option and learn more about it.
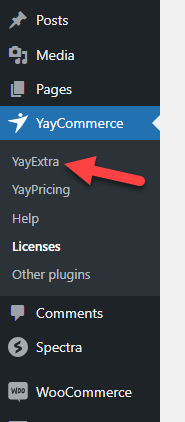
The very first thing you need to do is install and activate the YayExtra plugin on your online store. In this case, I will be using the premium version of YayExtra. Once you have completed the activation, you will see the plugin’s settings under the YayCommerce option.
Once you have done this, you are good to move forward.
Step 1: Create a New Options Set
Open the YayExtra settings and create a new option set.
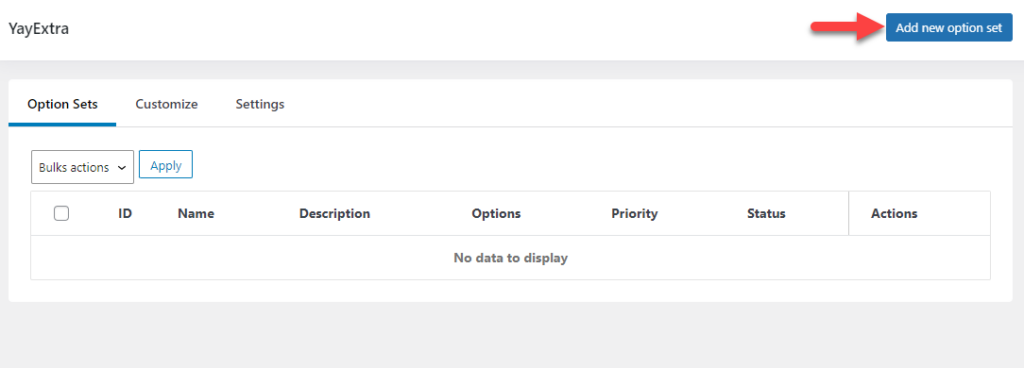
Give the option set a name and description. These data won’t be visible in the front end. It is for identifying the set in the backend.
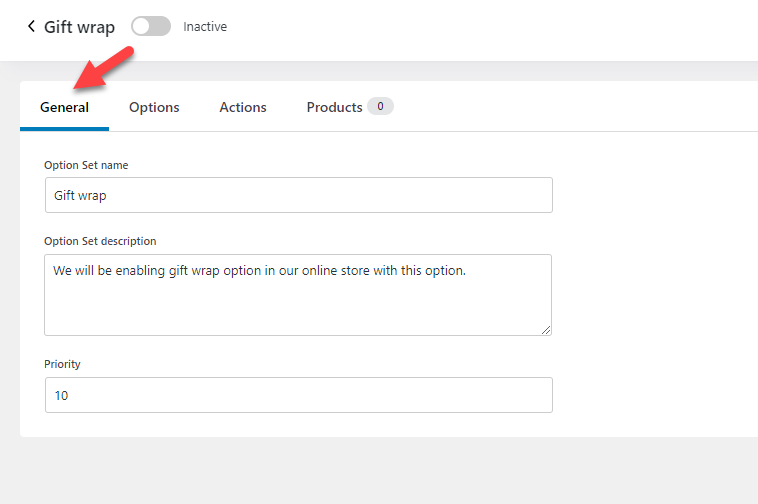
After this, let’s configure it.
Step 2: Configure the Options
There are three configuration options available in this best gift wrap plugin for WooCommerce.
- Options
- Actions
- Products
Let’s have a look at each customization option.
1. Options
This is the main configuration wizard. You can create an option to display custom fields on your product page. Hence, focus here well.
Start by clicking on the Add new option button.
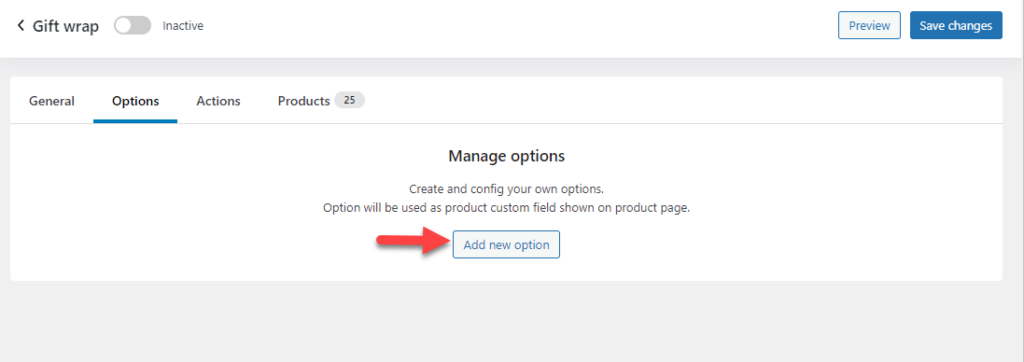
Now, give the option a name and select the type. Here, we will call it gift wrapping, and the type will be Swatches.

Now, add option values. This will be where we will display the gift wraps. You can add as many values as you need. In this case, we will add three values.
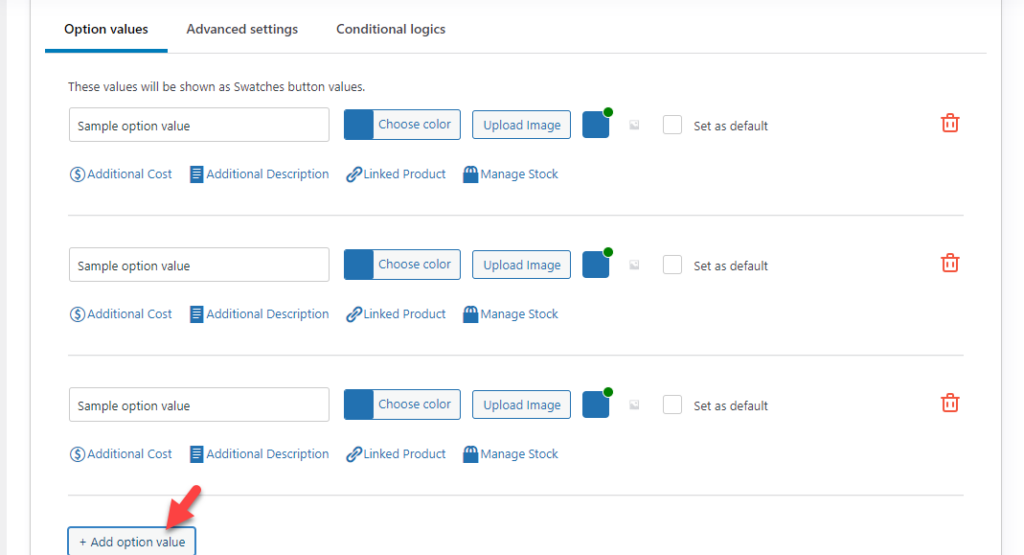
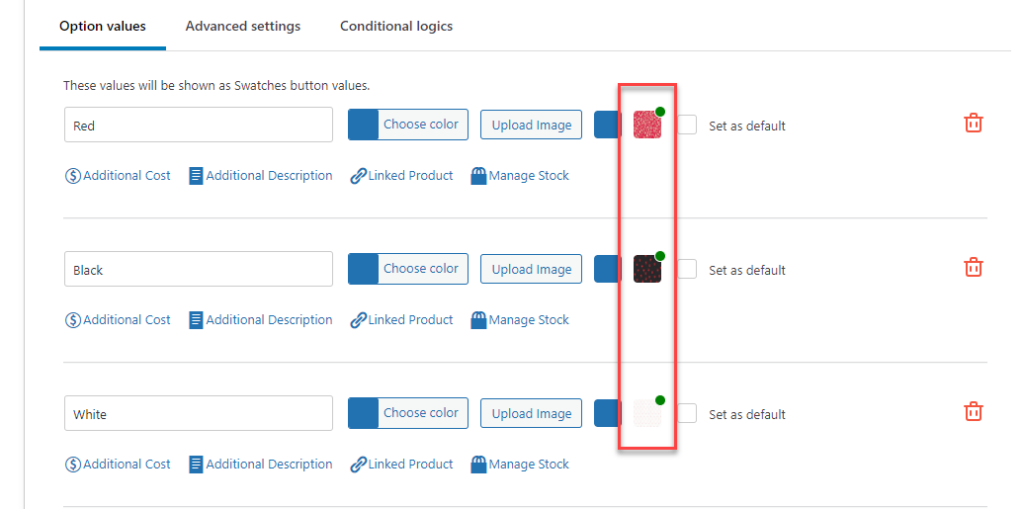
Now, upload the images of the wrap. We will provide customers with three colors:
- Red
- Black
- White
Configure the options according to your interests. Plus, ensure you have selected the image (there will be a green dot on top of the image if the option is selected).
You can add a custom CSS class to the field by going to the advanced settings. This option would be helpful if you need to add custom CSS to style the area better. You can also choose swatches shape and direction from the same page settings of this best WooCommerce gift wrapping plugin.
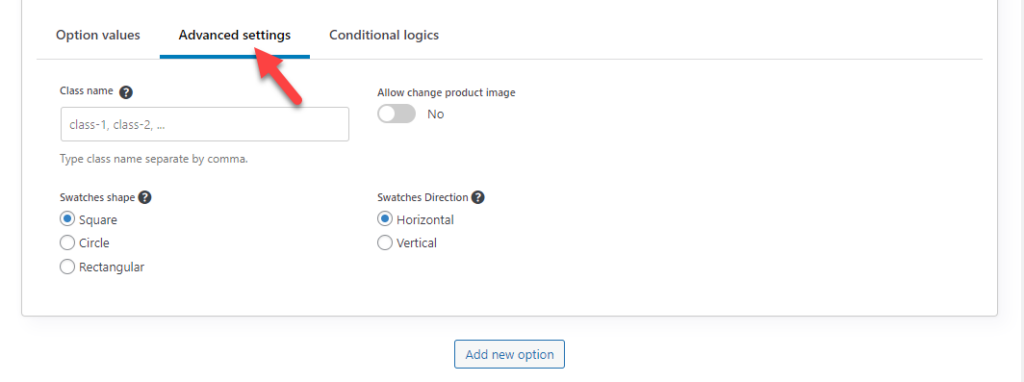
The default configuration options are acceptable to us.
That’s it! This way, you have successfully created a new field on your WooCommerce products pages! Now, save the options; click Save Chanages button.
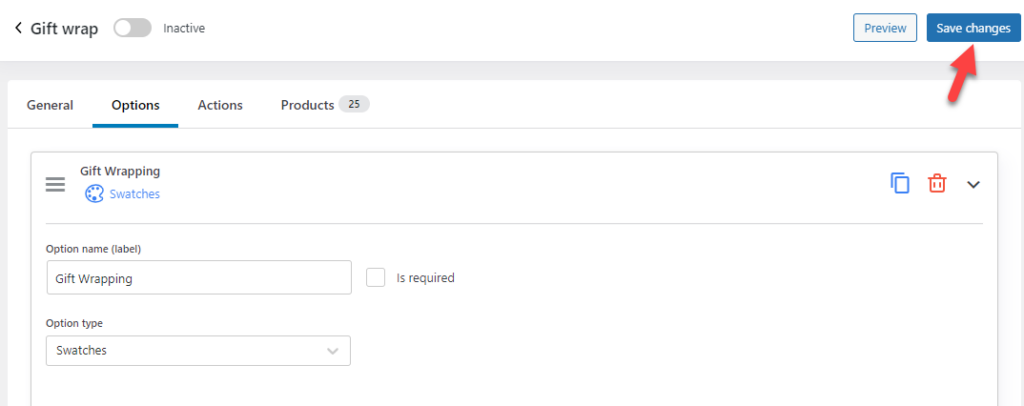
After saving it, move to the Actions settings.
2. Actions
This is optional but will come in handy in multiple situations. If you need to add extra gift-wrapping fees, use the actions settings. The configuration is pretty simple. The first thing you need to do is create a new action set.
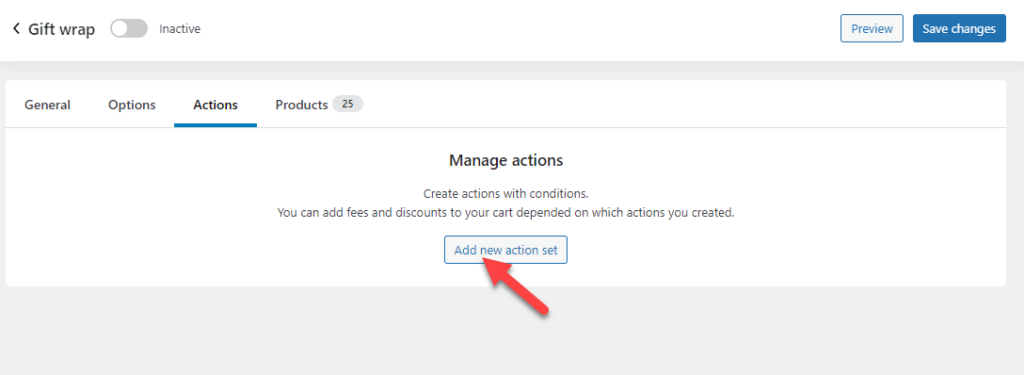
Configure the condition according to your needs. Here’s our condition:
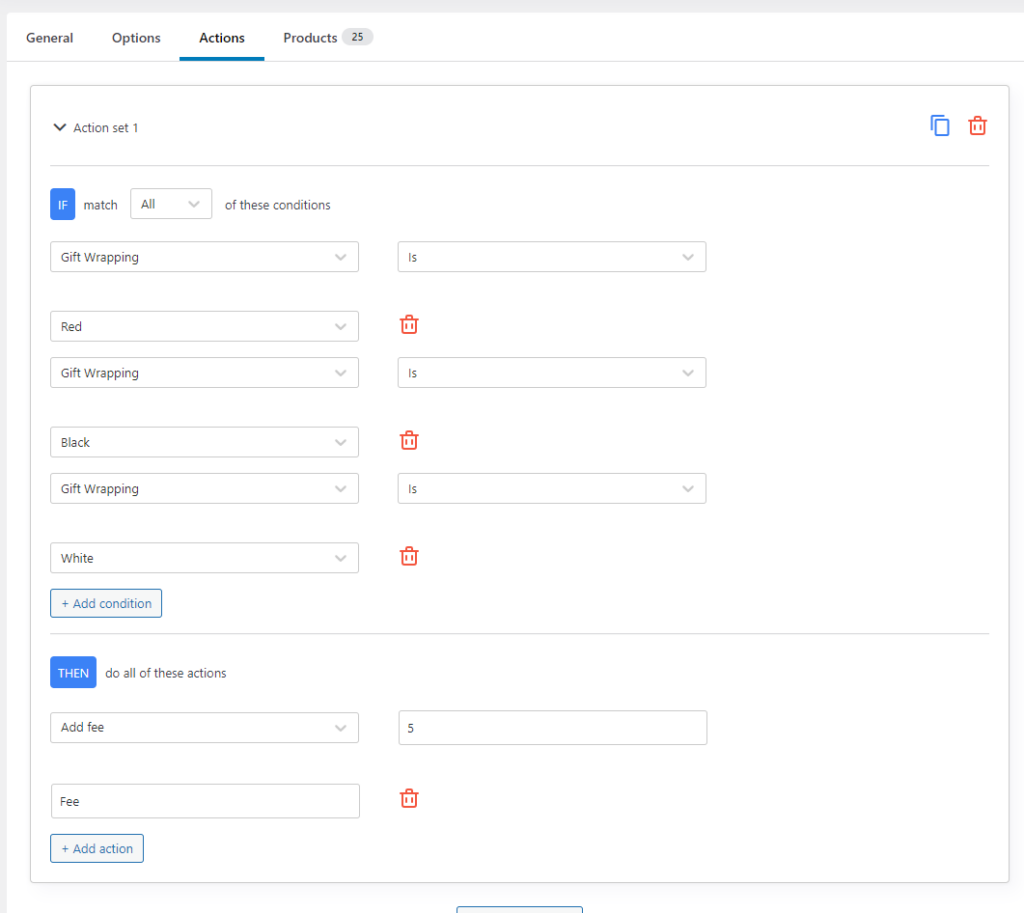
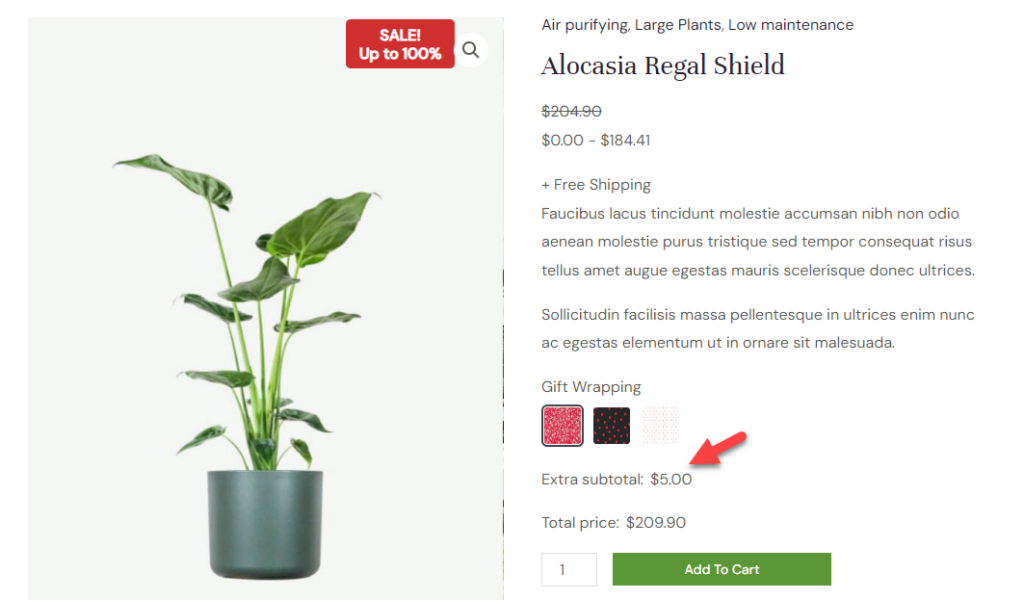
In our case, when someone enables the red/white or black gift wrapping, an extra $5 will be added to their total price.
Now, let’s move to the next option: selecting the products.
3. Products
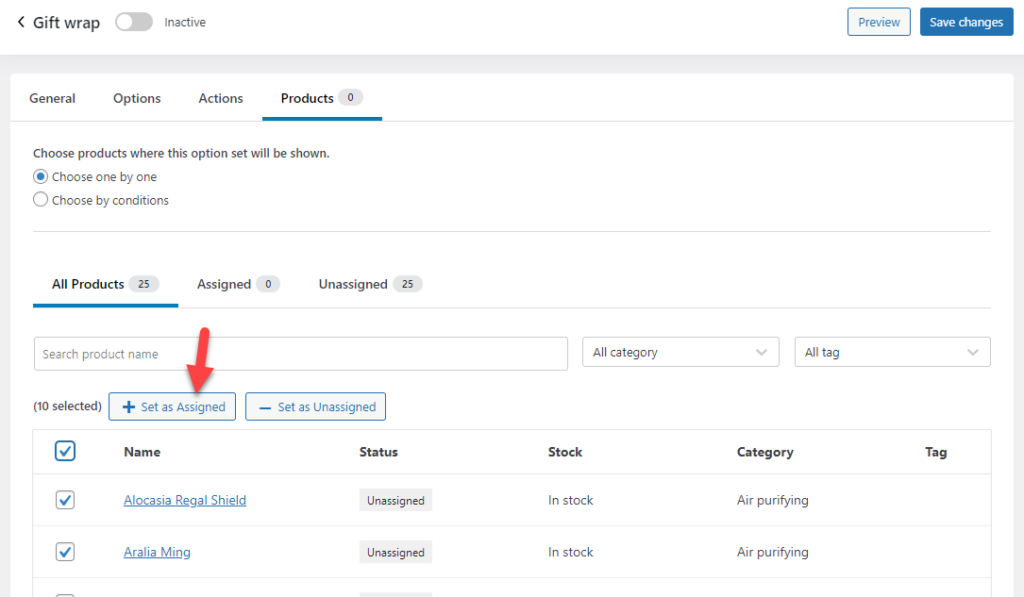
Finally, select the products you need to apply this new option. You can see all the published products there.
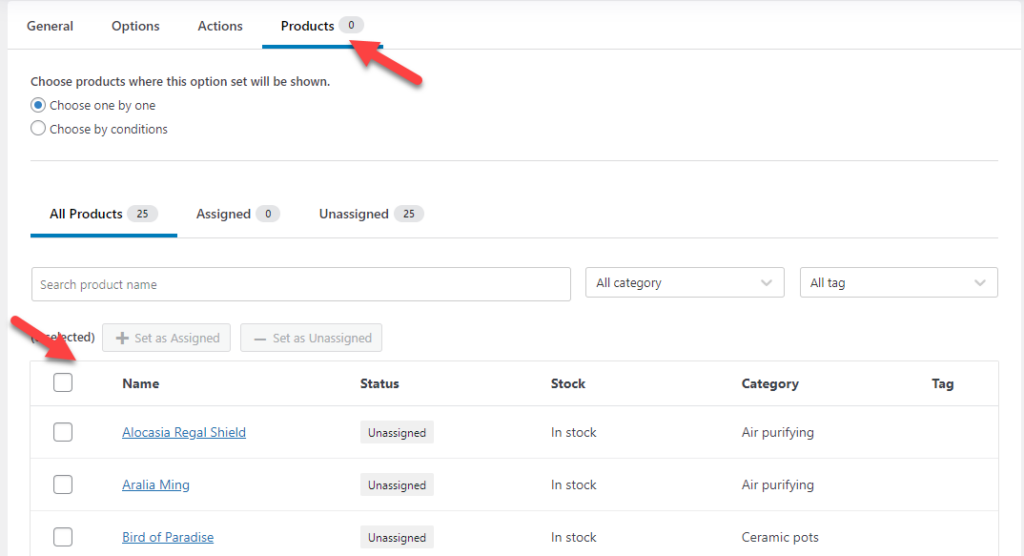
You can either pick individual products or all of them. In this case, we will pick all of them. After selecting the products, click on the Set as Assigned button.
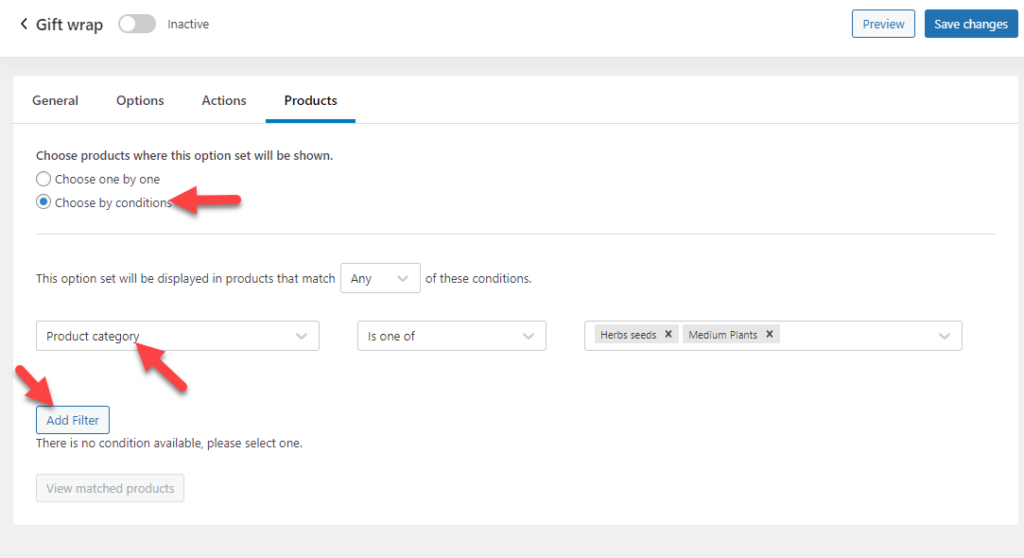
If you think you need to apply this to products from a specific category, select the option called Choose by Conditions.
You will see multiple options you can select and configure the product selection based on your preferences.
After making these changes, you are good to go. Save the settings and move to the next step.
Step 3: Make the Options Set Active
The final thing you need to do is make the options set active. This is a relatively easy task. After saving the options, activate the set.
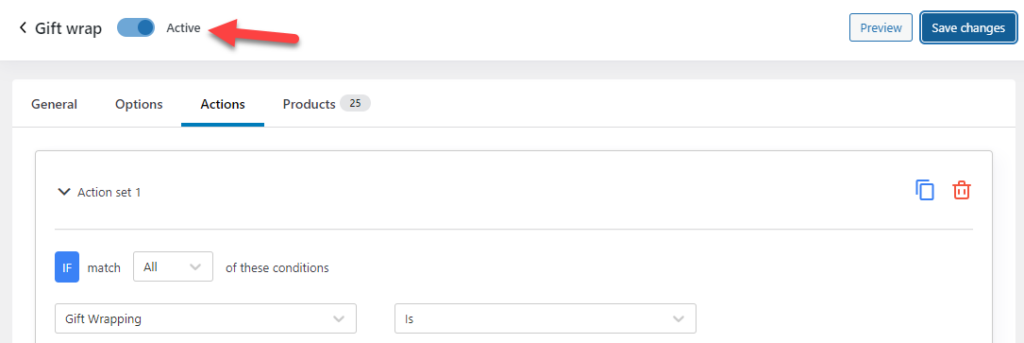
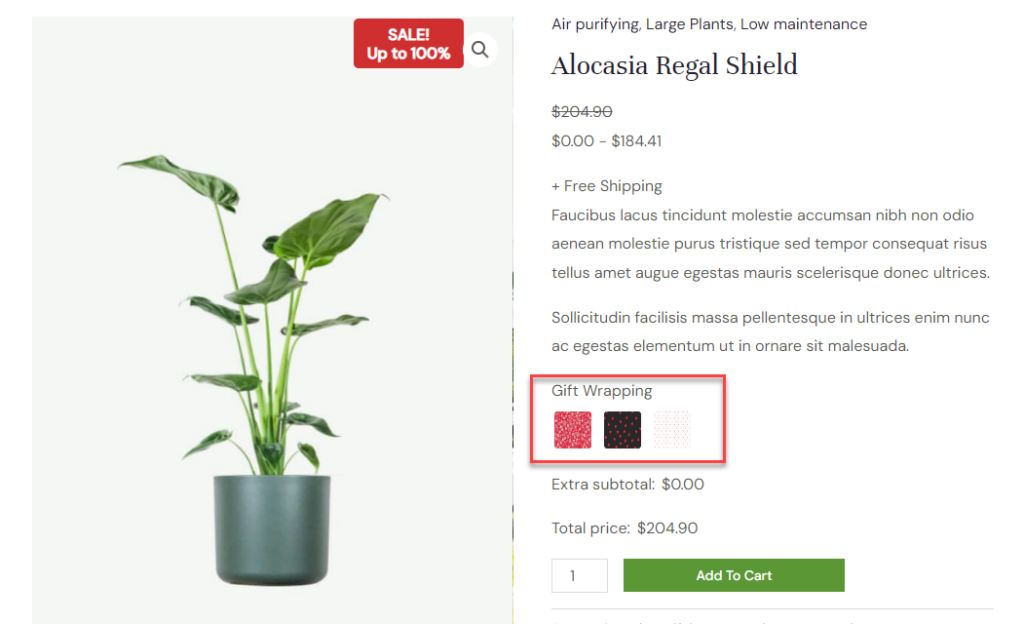
Now, it is time to check the front end for the changes. The three gift wrap options are available in the front end.
Plus, when we click on any gift wrap image, it shows a $5 extra fee.
Hence, this is successful. As you can see, without technical or coding knowledge, you can add custom product for gift wrap option WooCommerce using YayExtra.
Wrapping Up The Integration Of WooCommerce Gift Wrap Option
Since WooCommerce doesn’t have a feature to add a wrapping option to your online store, we know it would be hard to find a suitable solution. Most beginners won’t be comfortable using a code snippet to bring the feature to their online store. It can get messy and not user-friendly.
That’s where YayExtra comes to help. As you can see in this tutorial, creating extra WooCommerce product options with YayExtra is a cakewalk. You do not need to deal with anything technical; modifying the options is easy for WooCommerce product gift wrap.
I recommend checking the plugin to add a WooCommerce gift wrap option to your store. Which other methods are you going to use to improve the conversion rate? Share your priceless viewpoint! Also, don’t forget to speed up your WooCommerce site for high user experience.
