Do you want to clean up the WordPress media library? Keep reading this article if you are looking for a simple but efficient guide. I will show you six methods to clean up the WordPress media library here.
I know! You deal with hundreds of images when you run a WordPress website or WooCommerce store. You have added those in your blog posts, widget areas, or galleries. But do you know they can affect the website’s performance and user experience?
Keeping your media library clean is a wise choice. It will help you in multiple situations. Keep reading my article to learn how to optimize your media library. I will describe six popular methods to clean up the WordPress media library here.
First, let’s see why cleaning up the WordPress media library is essential.
Disclosure: We get a commission when you buy a product via our affiliate link at no additional cost.
Table Of Contents
Why You Should Clean WordPress Media Library?
The main advantage of a clean media library is that it makes your life easier. Having a messy media library is not good in the long run.
Finding the correct files could take a lot of time if you work with multiple authors and all are constantly uploading images.
That’s where the media organizing comes in. Cleaning up the media library and removing duplicate images will help you save storage space.
Now you know why you should clean up the WordPress media library. Next, let’s see how to do it!
How to Clean Up WordPress Media Library? Expert Tips
To clean the WordPress media library, follow these steps:
- Use CatFolders to Organize the Media Library
- Resize the Images
- Compress the Image Files Before Uploading
- Use JPG Formats Instead of PNG
- Delete Duplicate Images
- Use a Dedicated Media Cleaner Plugin
Below, I will explain how to do these optimizations and how they impact them. Without any further ado, let’s get into the tutorial.
1. Use CatFolders to Organize the Media Library
Organizing your media library is one of the first things you should do. By default, WordPress doesn’t come with the media organization feature. You will be uploading images, ZIP files, GIFs, or even video files to the media library, and it will look like this:

As you can see, you cannot find the images you have added to a specific post. Plus, it looks messy. With a powerful plugin like CatFolders or FileBird, you can take the media library organization to the next level.
Here’s how you can do it. Once installed and activated, CatFolders or FileBird, you can create custom folders and move the image files to specific folders. For this demo, I will use the CatFolders plugin.
Using this media organizer tool, you can create unlimited folders and move the images to them. It comes with a folder smart context menu, which allows you to choose a specific folder operation upon right-clicking.
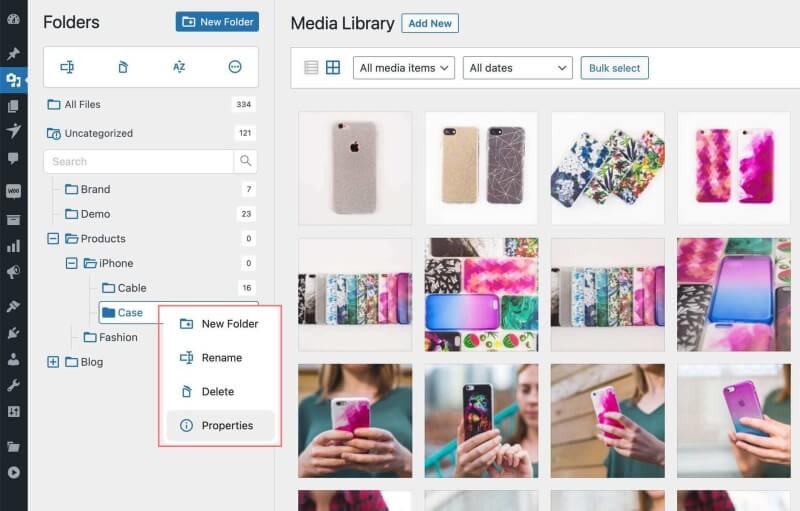
The premium version plugin will also allow you to create subfolders. So, if you have made a blog folder to handle every image you add to the blog posts, you can create subfolders to create unique spaces for individual blog posts. This is an excellent feature offered by CatFolders.
Another notable feature of the plugin is the ability to find uncompressed/non-optimized images. To do this, you need to go to the CatFolders Tools section and enable the click to generate attachment size option. Look at the image below!
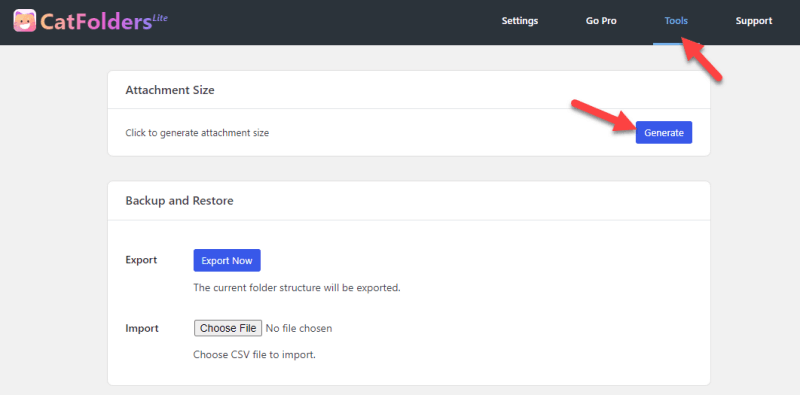
Now, you can use the sort by filesize option to find larger images and handle the situation.
This attachment size generation feature displays a sortable WordPress document gallery on the website front end.
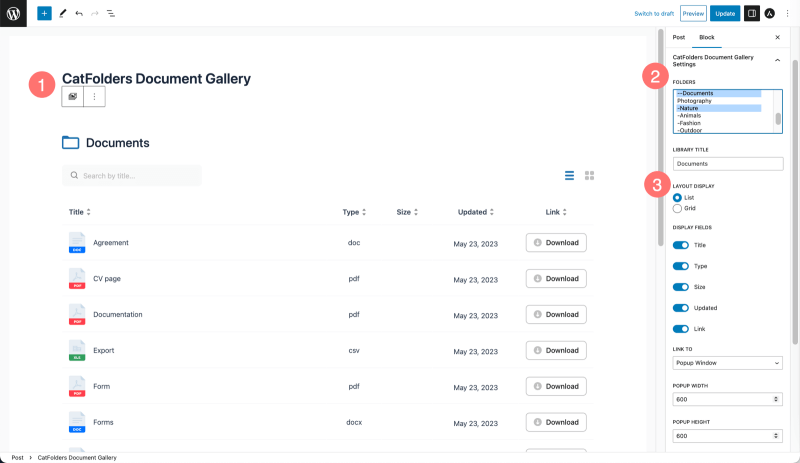
By generating the corresponding file sizes, it’s become easy for your website’s visitors to sort all file types by size shown on your WordPress page/post.
2. Use FileBird to Sort Media Library by File Size
Even the attachment page details show the file size attribute, making the media library sortable by size impossible.
So, to help you sort the large images to the top or the bottom, using FileBird would be a great solution!
The interface is self-explanatory, in which you can choose the Sort icon → pick Folders or Files →, and select a sort method.
For instance, sort files by size, ascending or descending, as shown in the image below.
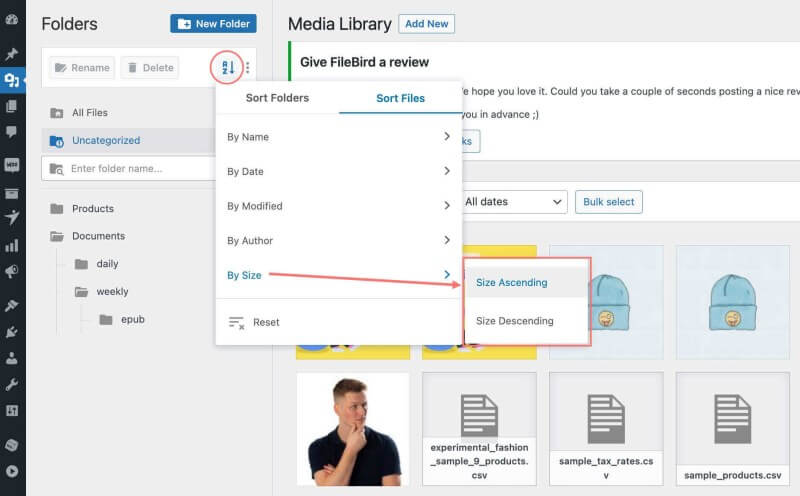
This built-in sort mode is helpful when you want to resize or optimize only those large files. Once you have completed this, let’s move to the next step, resizing your images accordingly.
3. Resize the Images
The next option is to resize the images. By default, WordPress comes with three image sizes. From the Media settings, you can see it:
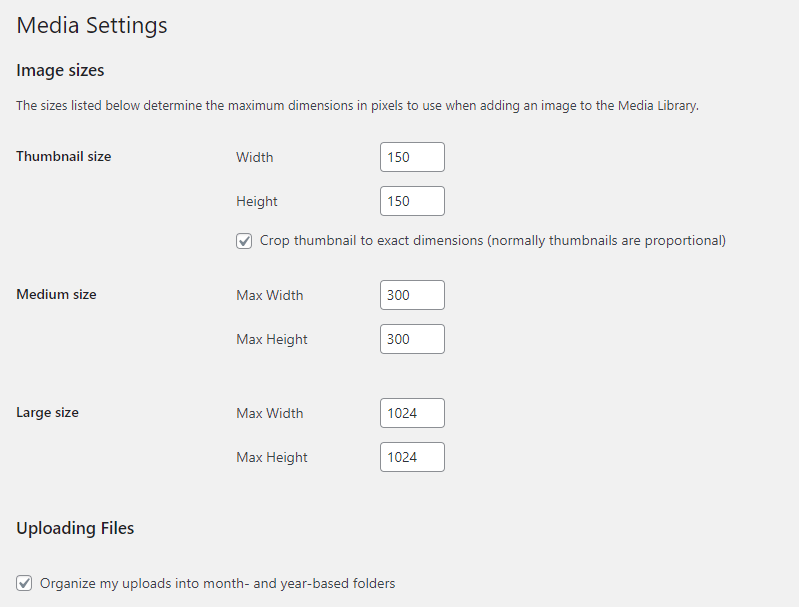
Apart from this, your theme will also add several image sizes. If you do not need to use any of these image sizes, use 0 in the width and height slot.
Here’s an example:
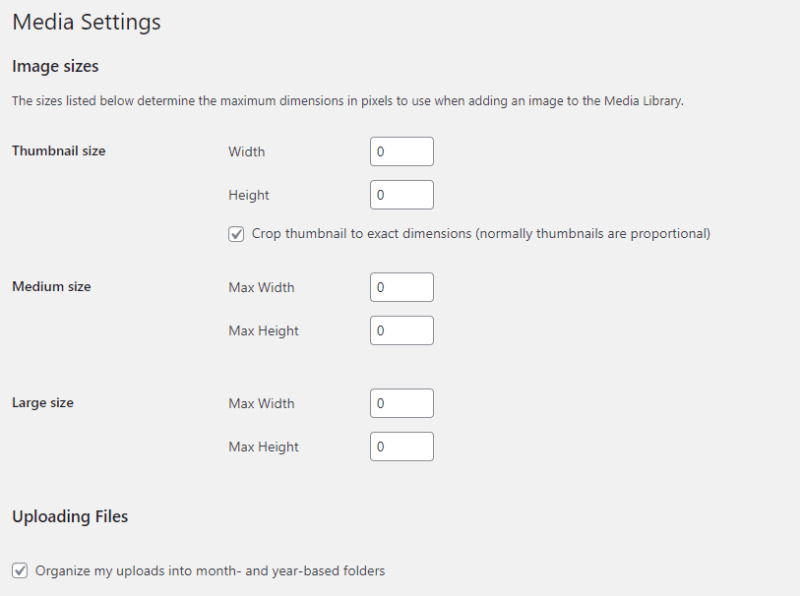
After modifying the mage sizes, save the settings.
4. Compress the Image Files Before Uploading
Uploading images that are heavy in size is not recommended. It can slow down your website, and big files consume more space on your server. Compressing images is one of the best methods for using any web hosting company that limits disk space usage.
You can compress the images in two ways:
- Manually
- Using a plugin
If you prefer the manual method, use any of the listed tools:
You may start using the tools without any technical knowledge. Once you have uploaded the image, the tools will take a few seconds to compress it. After that, you can download the optimized images, which are reduced in size.
The manual method would be challenging if you need to automate the image compression. Plus, the manual method won’t be feasible if you have already uploaded images to the media library and need to optimize them.
That’s where the plugin method comes in. Once you have installed and configured an image compression plugin, you can focus on other tasks and leave the image compression task to the plugin.
These are the best image compression plugins available for WordPress:
Most of these plugins are free (with some limitations). You can use any of the tools to optimize the image size.
5. Use JPG Formats Instead of PNG
Image format matters. Instead of using PNG pictures, you need to start using JPG images. While you capture a screenshot or save an image, you can save it as a JPG file. On the other hand, if you already have PNG files, you can convert them using any online tools.
In my experience, PNG2JPG is an excellent tool for converting pictures. All you need to do is upload the PNG file, wait a bit, and download the JPG file.
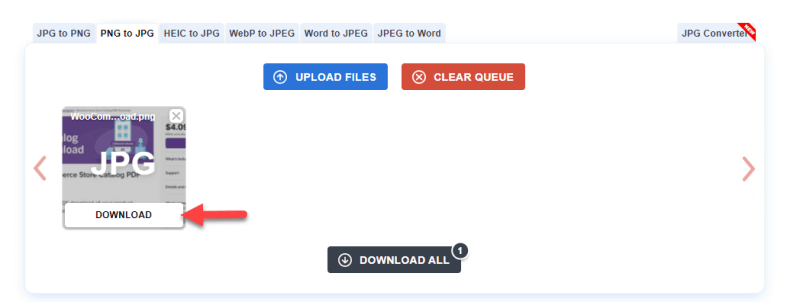
You can also use any other online tools for the task.
6. Delete Duplicate Images
If you have uploaded the same image multiple times, delete it. Deleting duplicate entries is not a challenging task. Once you have opened the WordPress media library, select the image you need to remove.
On the bottom right-hand side, you will see the option to delete the image from the website.
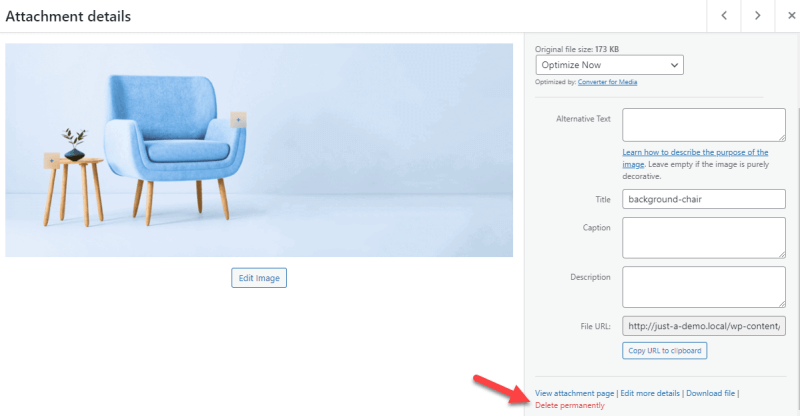
This way, you can delete duplicate images.
7. Use a Dedicated Media Cleaner Plugin
Using a plugin like Media Cleaner, you can optimize the media library. After activating the plugin, you can scan the media library.
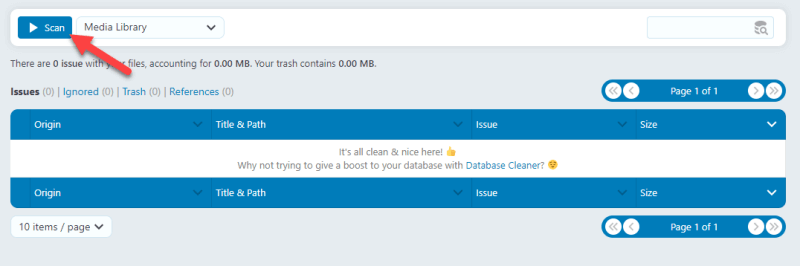
The plugin will show you the images you haven’t used on your website on the next page.
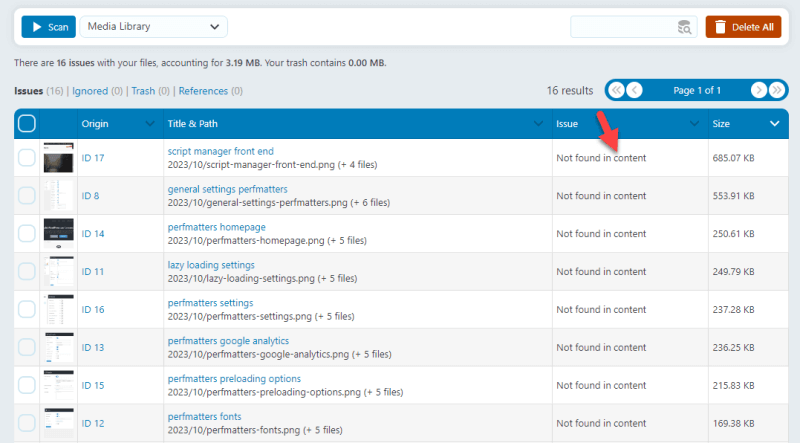
You can mark the images, delete them to save disk space, and clean up the media library. That’s it!
Wrapping Up
As you can see above, multiple ways exist to optimize and clean up the WordPress media library. One of the best ways to follow is to use a media organizer plugin like CatFolders or FileBird. Both options are great and will be helpful in the future.
Plus, resize and compress the images to reduce the disk space needed for the images. You can also delete the duplicate images, use a dedicated media cleaner plugin, and use JPG formats instead of PNG.
These are the top ways to clean the WordPress media library. I’m glad I took a great opportunity to keep your WordPress clean! Do you know any other methods? If you know, please let me know in the comments!
Another interesting plugin for image optimization:
https://wordpress.org/plugins/optipic/
OptiPic automatic convert image to Webp (for webp-supported browsers) and compressed/optimized png/jpeg (for webp-unsupported browsers).