


If you are using the Astra WordPress theme for your business site or blog, then you should know an important SEO strategy. It is nothing but how to show the last modified date in WordPress that uses the Astra theme.
As we are using the super-fast theme, Astra, for one of our blogs, I can clearly explain the step-by-step process so that you can easily implement the procedure without any difficulty.
But before getting into the details, you should understand the importance of executing the modified date display method for your blog content.
Disclosure: We get a commission when you buy a product via our affiliate link at no additional cost.
Table Of Contents
Why Show the Last Modified Date In WordPress?
Freshening up your content has a lot of benefits! Google values fresh content, and searches also look for the latest information available. And hence, removing the date from your articles is a bad SEO practice.
So, the benefits of showing the last modified date of the blog posts are
- Gives the best user experience as your readers would feel good that they are on the most recent content.
- Google introduced the EAT (Expertise, Authoritativeness, Trustworthiness) terminology in 2018, and yes, it is a ranking factor. Exhibiting the most recent date on your content reveals to Google that you stay active and value your readers’ requirements, which in turn improves your EAT score.
- The recently updated date will get displayed in the search engine results, and hence it boosts the CTR. Finally, you will get increased leads or subscribers through more organic traffic.

Showing The Updated Date For Search Engines Using Astra Theme
Telling the content modified date to Google is an excellent SEO strategy that would improve the click-through rate in the search engine ranking results.
Let’s see how to do it in the Astra theme without any 3rd party plugin.
Step 1: Go to your WordPress Dashboard > Appearance > Astra Options > Custom Layouts
Step 2: Click “Add New” to create the new custom layout, and now, the content editor will open up.
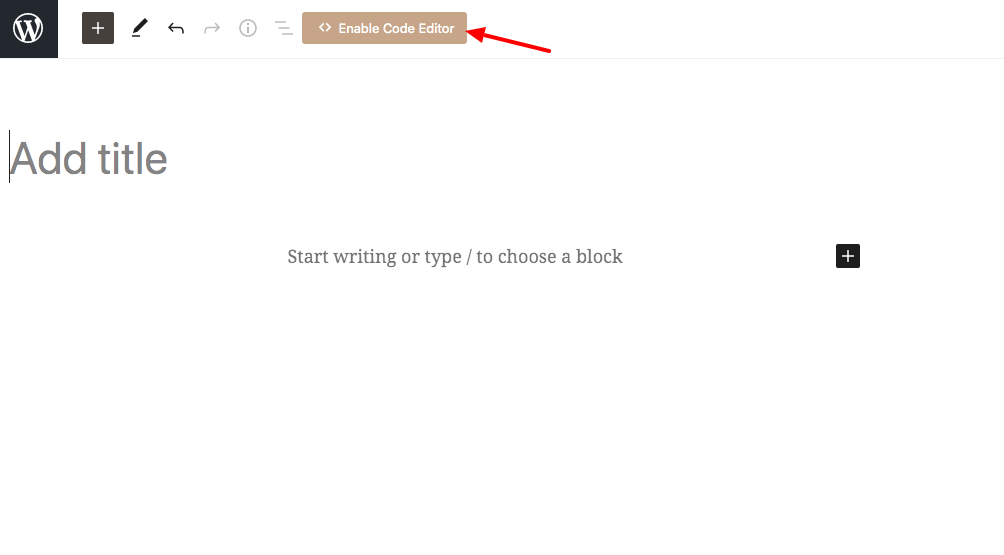
Step 3: Click “Enable Code Editor” at the top, and you will be taken to the WordPress classic editor.
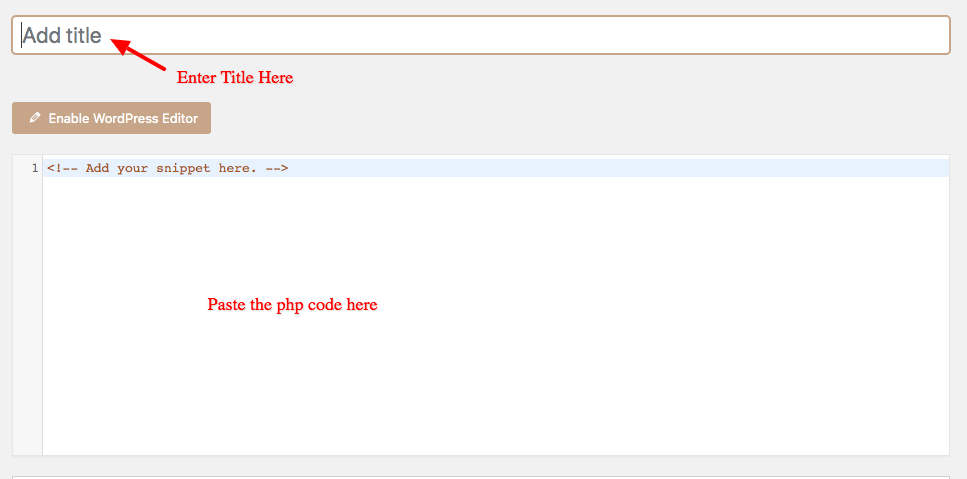
Step 4: Give a title for the new page that you are creating and add the following code in the content area.
<?php
/**
 * Display only last modified date in the post metadata.
 *
 * @param String $output Markup for the last modified date.
 * @return void
 */
function your_prefix_post_date( $output ) {
	$output        = 'Last Modified on';
	$format        = apply_filters( 'astra_post_date_format', '' );
	$modified_date = esc_html( get_the_modified_date( $format ) );
	$modified_on   = sprintf(
		esc_html( '%s' ),
		$modified_date
	);
	$output       .= '';
	$output       .= ' ' . $modified_on . '';
	$output       .= '';
	return $output;
}
add_filter( 'astra_post_date', 'your_prefix_post_date' );
?>
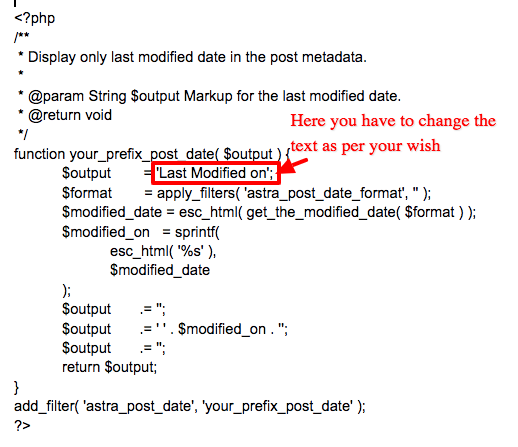
Step 5: If you want to change the “last modified on” text, then you may do it. Check the screenshot below and identify the spot to change the words of your choice.
Step 5: Now, scroll down and come to the “Custom Layout Settings”; Choose the option “Hooks” under the layout.

Step 6: A bunch of choices will be displayed, and you need to fill in every field like
1. Action – It is the most admirable option given by the Astra theme. Yes, you can display the last updated date anywhere you want, like Header, Content, Footer, and Sidebar. There are so many selections available, and here I’m preferring “content_before” to show off the date just above the blog content.
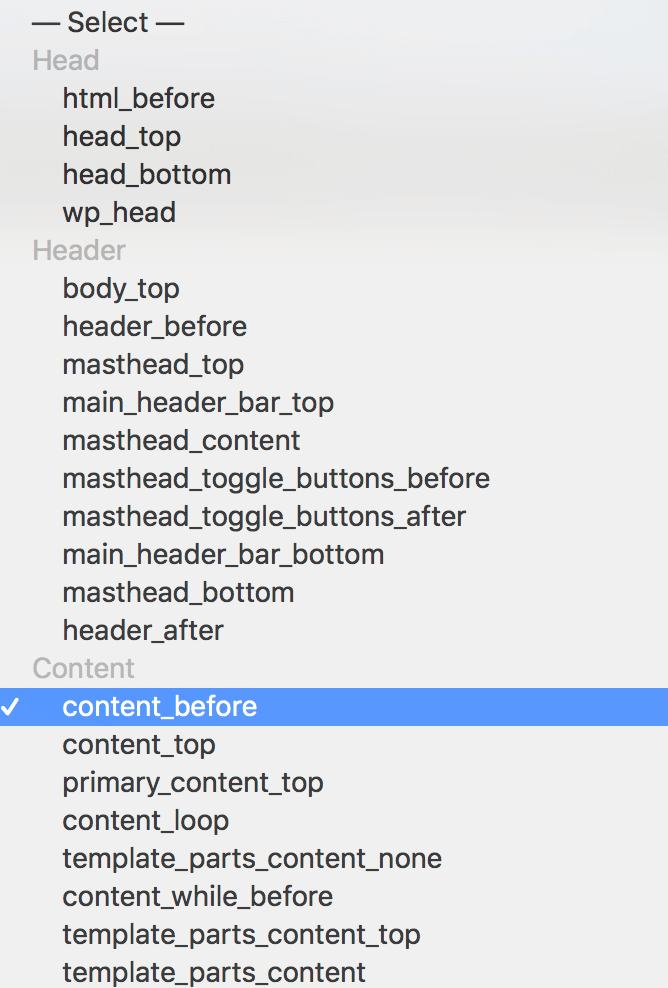
2. Priority – You may pick any value for the priority, and here I have chosen “1“
3. Spacing – Here also, you may give your desired count to get enough space for the “last updated date”; here I’m going with the default value zero for both top and bottom spacing.
4. Display On – Here comes the critical part, where to implement the “Last Modified Date”? Astra theme provides several options to execute the process according to the pages, posts, tags, categories, archives, and specific pages or posts.
I would like to perform the procedure for my whole site, and hence I have picked the option “Entire Website”
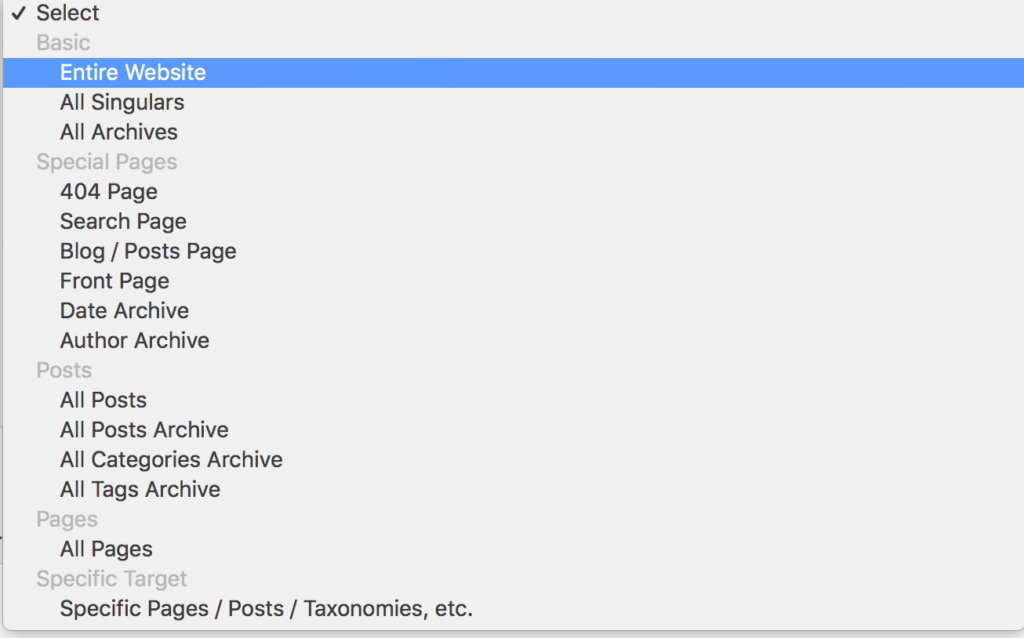
Note: Not to display the updated date on particular posts, pages, tags, categories, archives, and taxonomies is also made possible by the Astra theme team.
5. User Roles – Your website may have different user roles, like the author, editor, contributor, subscriber, and SEO manager, to handle the content. You may restrict showing the recently modified date for specific user roles. Here I’m choosing “All” and you may go with the suitable choice.
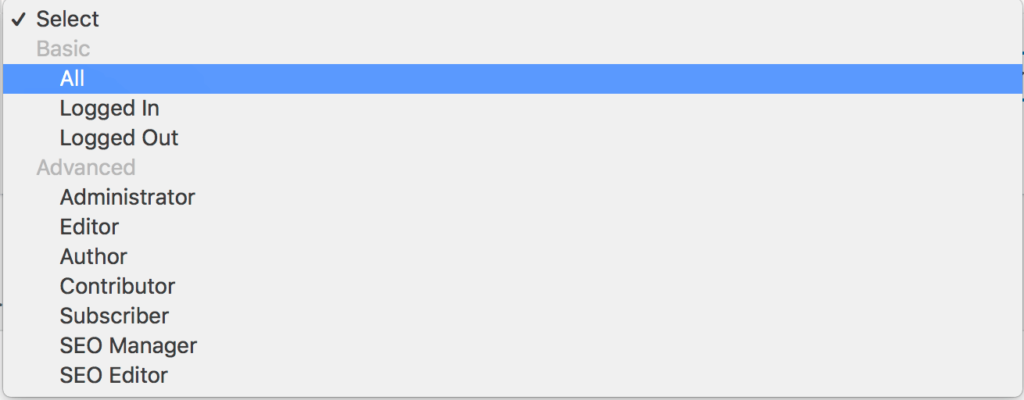
I’m sure you will love the comprehensive settings options provided by the Astra theme for presenting the last updated date details of the site content.
How To Display The Altered Date In Astra Theme Free Version?
If you are using the free version of the Astra theme, then you will not be getting the “Custom Layout” option to use the Hooks feature.
So, you have to rely on a third-party plugin like “WP Last Modified Info” to display the last updated date of your blog posts, and yes, this plugin is compatible with any WordPress theme.
You can customize the plugin as per your wish and change the text – Last Updated On. This is an SEO-friendly theme with 20,000 active installations, and therefore, you may install and use it without any hesitation.
However, I would suggest you read Astra Free Vs Pro and upgrade your plan to the premium version to perform better than your competitors.
Wrapping Up
Google doesn’t like the old content, and it gives higher rankings to the content that has been updated with recent information. Your blog audience and Google search users are also looking for the latest article with trending news.
So, when you display the last modified date for both search engines and your readers, then you will stay authoritative in their eyes. At last, it paves the way to win your readers’ hearts and grasp top search engine rankings, which boosts your organic traffic.
I hope you have learned the easy way of showing the updated date for the blog posts & pages in the Astra WordPress theme. If you feel any difficulty in adding the codes, feel free to reach me through the comment section.
You can achieve the same process in the GeneratePress theme as well. Yes, if you get a chance to use this super lightweight theme, make sure to know how to display the last updated date in the GeneratePress theme for WordPress.




Your blog is really great. I can learn a lot from your content. Thank you so much for gifting us this beautiful blog.
Hey Sakthi, I have the ready-made code for Astra users. I would love to present it here for your readers. This code is directly applicable to for Astra theme but with change of the function names (easy task) it will work on all themes. I myself use it on my site.
//Example//
Before- “September 13, 2020 / By Ajay Choudhury”
After- “Last Updated on September 13, 2020 By Ajay Choudhury”
The code is :
function your_prefix_post_date( $output ) {
$output = ”;
$format = apply_filters( ‘astra_post_date_format’, ” );
$modified_date = esc_html( get_the_modified_date( $format ) );
$updatetxt = “Last Updated on”;
$postedtxt = “Posted on”;
$u_time = get_the_time(‘U’);
$u_modified_time = get_the_modified_time(‘U’);
$modified_on = sprintf(
esc_html( ‘%s’, ‘%s’),
$modified_date
);
if ($u_modified_time >= $u_time + 86400) {
$output .= ”;
$output .= ‘ ‘ . $updatetxt . ”;
$output .= ‘ ‘ . $modified_on . ”;
$output .= ”;
return $output;
}
else {
$output .= ”;
$output .= ‘ ‘ . $postedtxt . ”;
$output .= ‘ ‘ . $modified_on . ”;
$output .= ”;
return $output;
}
}
add_filter( ‘astra_post_date’, ‘your_prefix_post_date’ );
add_filter( ‘astra_post_meta_separator’, ‘__return_false’ );
Now for the implementation of the above code just paste it in the functions.php if you are using a child theme. If you are not using a child theme you can use the code snippet plugin and add the above snippet as advised by Sakthi in the post.
Was searching for this since a long time, Glad found this here. Thank You for the tutorial.