
How to stress test WordPress website? Do you want to learn about the stress test and how to do it properly for your WordPress business site? If you are looking for a step-by-step guide, keep reading this article!
Starting a WordPress website or WooCommerce store is easy. You only need web hosting, a domain name, and a little time to store the files. You can start a website in under 30 minutes with the right resources.
But will the website run smoothly under load?
Whenever you get a post trending or get a massive spike in traffic, the web server needs to handle the situation efficiently. If the server went offline or it takes too long to load the pages, that’s not a good sign.
Before happening something similar, you should ensure the server can handle a spike in the traffic and serve the contents without hassle. That’s where the stress test comes into the scene.
To help you with testing your website, I have created this tutorial. Here, I will show you how to perform a stress test properly. Before going further into the tutorial, let’s see what a stress test is and why conducting one is mandatory.
What Is a Website Stress Test?
A stress or load test is a method used to evaluate how a server/website will perform under load. By default, there are no ways to understand how the server will deal with the spike in traffic and what would be the response time.
With the stress test, you can understand how the server will respond to the spike in traffic. This way, you can ensure the website is optimized for high traffic. If the website went offline or took too long to respond, this could be an issue.
During this evaluation, your site will be subjected to higher traffic and concurrent user interactions than regular usage. This simulated stress helps to know potential bottlenecks, performance limitations, and vulnerabilities that may not be visible under normal conditions.
Primary Objectives Of Website Stress Test Includes
Calculating Maximum Load: It determines the maximum number of users or requests the website can handle before performance degrades or the site crashes.
Performance Evaluation: It gives insights into how the site responds under heavy load, including server response time, resource utilization, and database performance.
Identifying Weak Points: It reveals areas of the site’s architecture, infrastructure, or code prone to failure or slowdowns under heavy traffic.
Capacity Planning: By learning how the site performs under loads, you may plan for server upgrades, scaling, and other adjustments to ensure your site remains responsive during traffic spikes.
Security Assessment: It can uncover security vulnerabilities triggered by high activity levels. So you can address the security risks proactively.
Failover and Recovery: It provides insights into how well your site recovers from crashes or performance degradation; hence, you can plan for recovery.
Now you know what a stress test is. Next, let’s see how to conduct one.
Why Should You Stress Test WordPress Website?
Apart from the main objectives that I have discussed above, stress testing a WordPress site is essential to
- Enhance User Satisfaction
- Boost SEO & Organic Rankings
- Increase Your Conversions
- Prevent Your Site Downtime
- Avoid Overpaying For Server Resources
It’s time to see, how to do the stress test for a WordPress site!
How to Stress Test A WordPress Site?
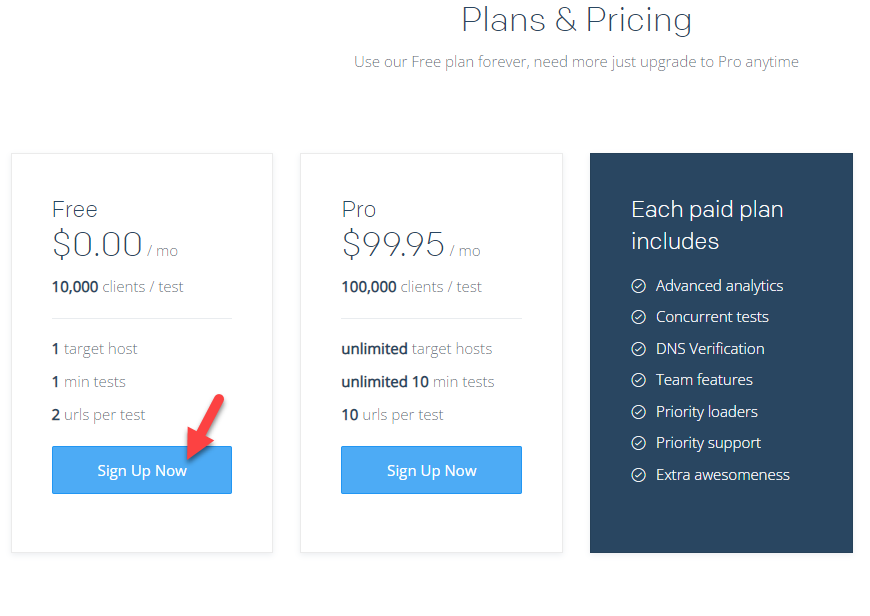
There are several tools available for stress testing a WordPress website. For this tutorial, I will be using Loader.io.
The first thing you need to do is create an account on Loader.io. Loader.io comes with two subscriptions. The free version plan is good enough for starters,
With your email address, create an account. Once you have created an account, verify the email address. After that, you will be redirected to the dashboard.
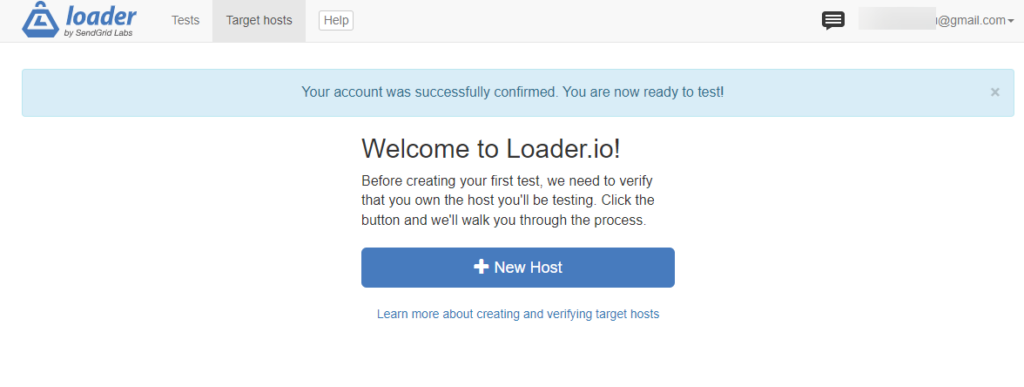
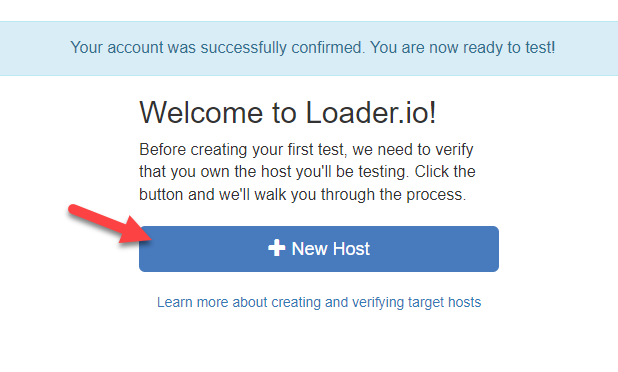
The next thing you need to do is click on + New Host.
On the next page, you can enter the domain name. Once you have entered the domain name, you should click on Verify.
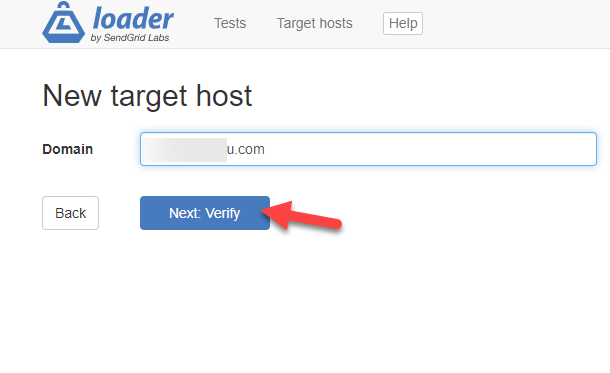
Next, you need to verify the ownership of the domain.
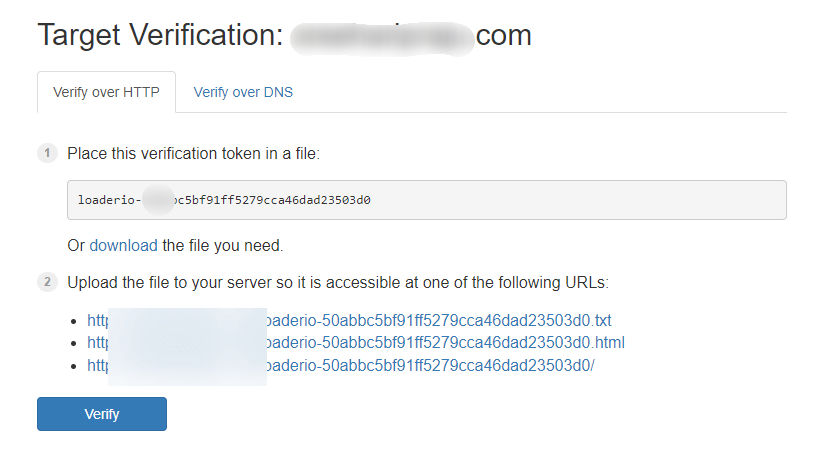
There are two ways you can do it.
- Manually uploading a verification file to the public HTML directory
- With DNS (premium users only)
In this case, I will be uploading the file to my server. Once I have completed it, I can click the Verify button to complete the process.
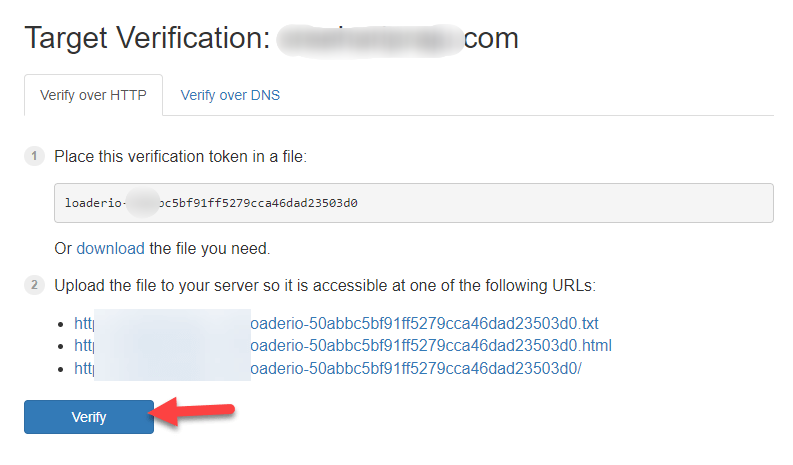
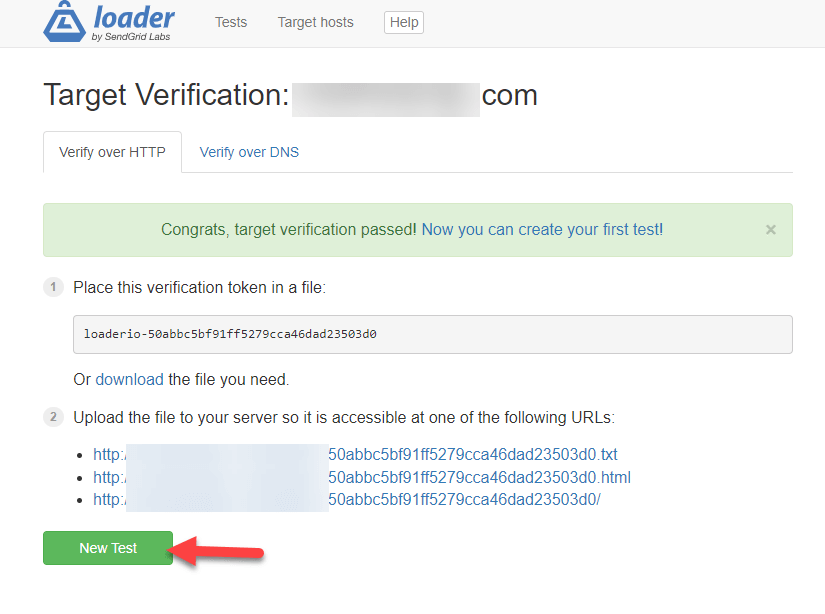
The platform will take a few seconds to complete the verification. Once it is done, start a new test.
On the next page, you can see every configuration option.
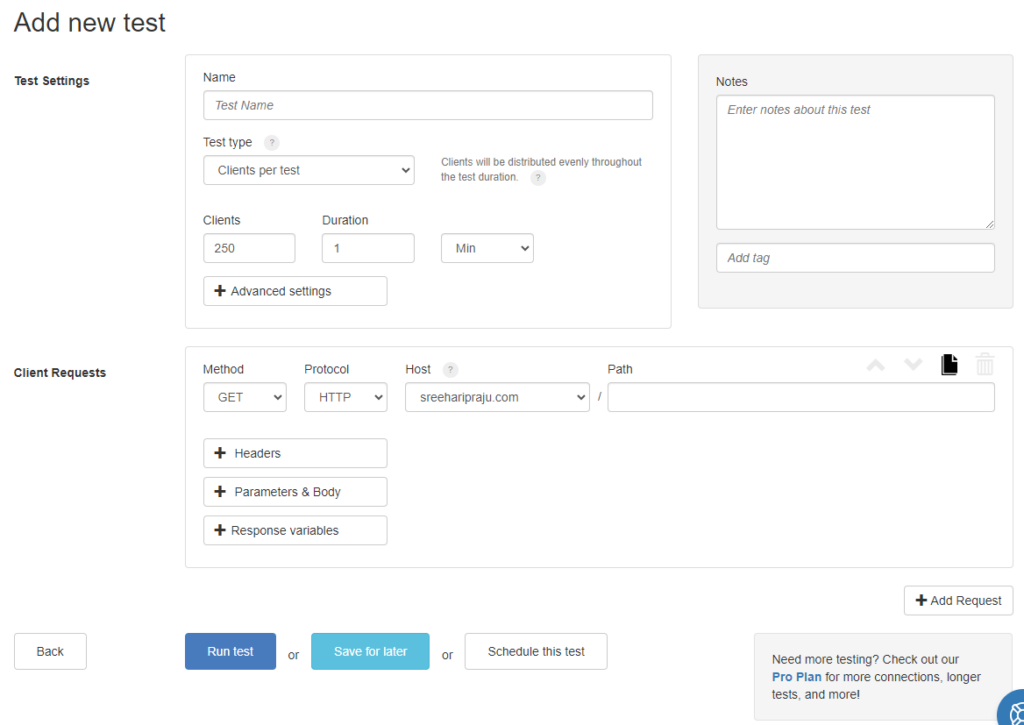
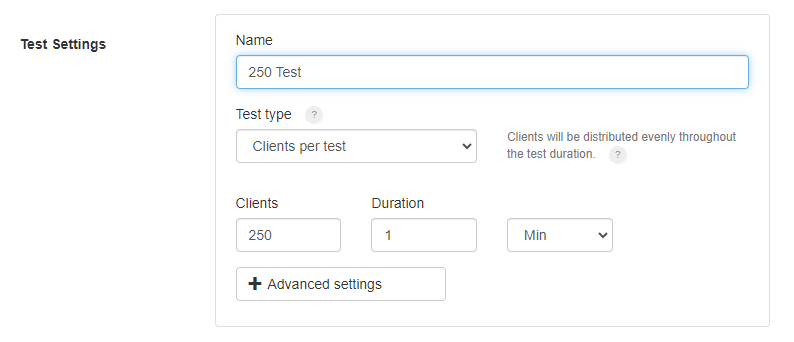
Under the Test Settings, you can choose a title for the test, how many clients you need to deploy, and the duration. In this case, I will deploy 250 users to my website.
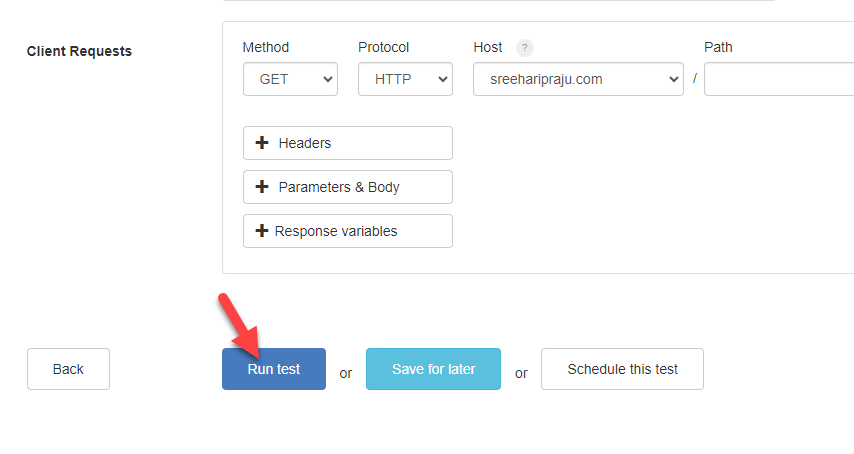
Once you have completed the configuration, scroll down and click the Run Test button.
On the next page, you can see the result:
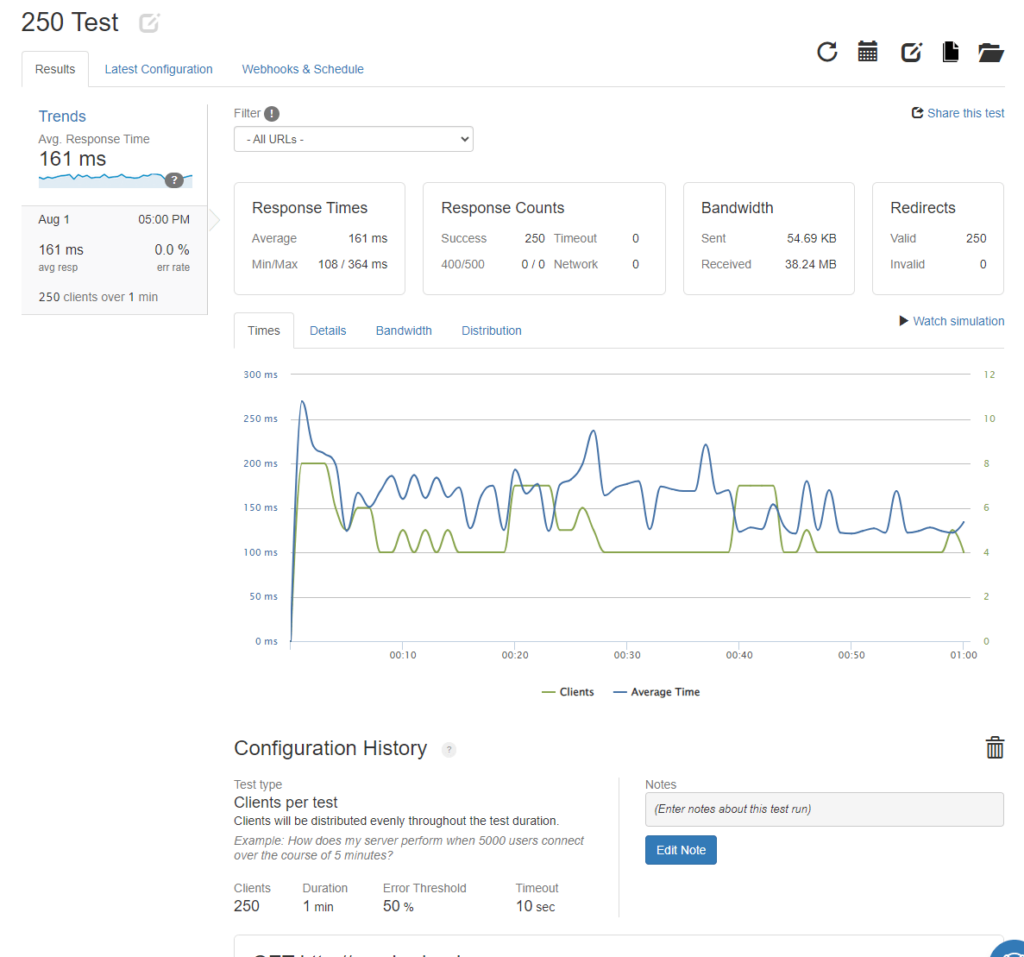
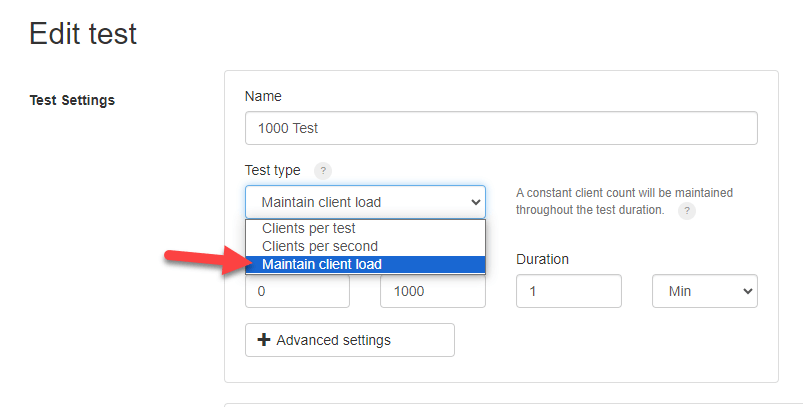
As you can see in the above screenshot, the tool evenly spread the 250 users across the website. And the response time averages 161 ms. Not bad at all. Next, let’s see how the server will respond if we configure 0 to 1000 clients while maintaining the client load.
You can start a new test. And while configuring it, select the third option available in the dropdown.
After configuring it, run the test. Here’s the result:
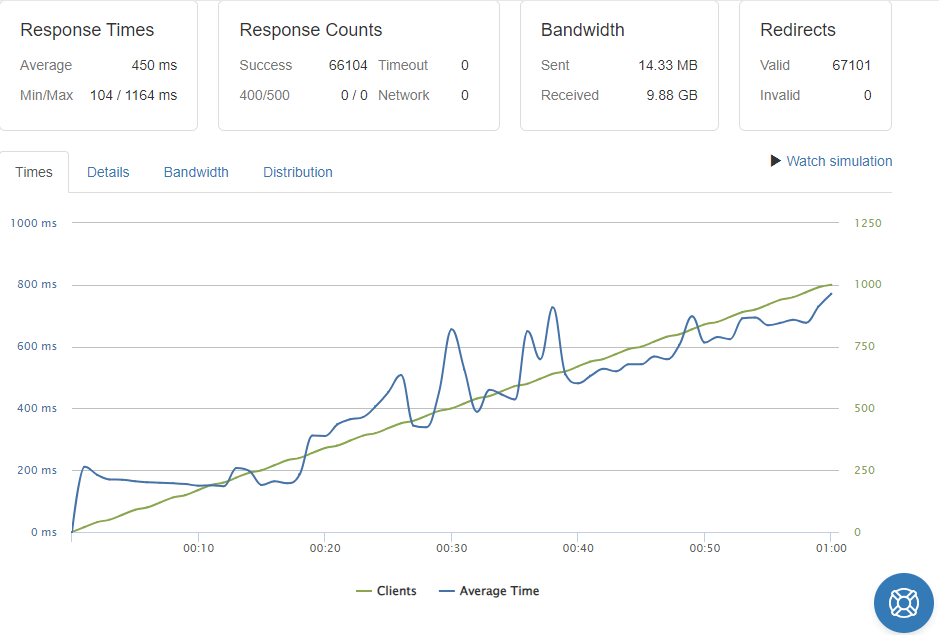
The peak response time was 1.1 seconds. But the server handled the load, and the response time averaged 450 ms.
Next, let’s step up the game and send 10,000 users to the site! I have modified the configuration, and let’s start the test.
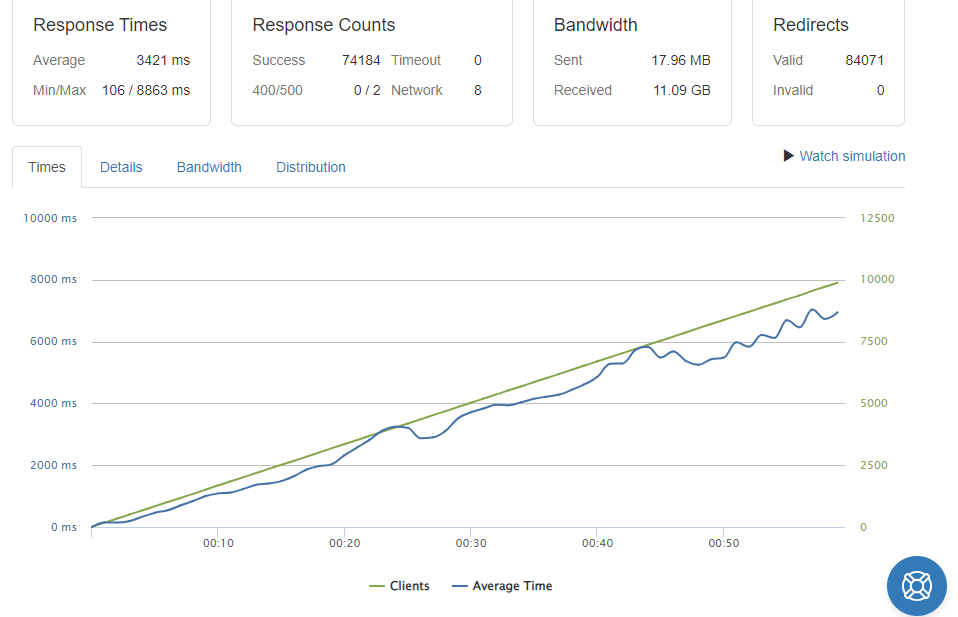
This was a crazy test. As you can see, the peak response time was 8.8 seconds. The average is about 3.4 seconds. These results are alright. If your response time could be improved after checking the stress test results, I recommend upgrading your hosting plan.
How To Improve Stress Test Results Using Cloudways Hosting?
As I use Cloudways managed hosting for my blogs, I highly recommend it for your dedicated business sites. This fastest web hosting comes with an in-built server monitoring option.
Under server stats, go to the Monitoring details.
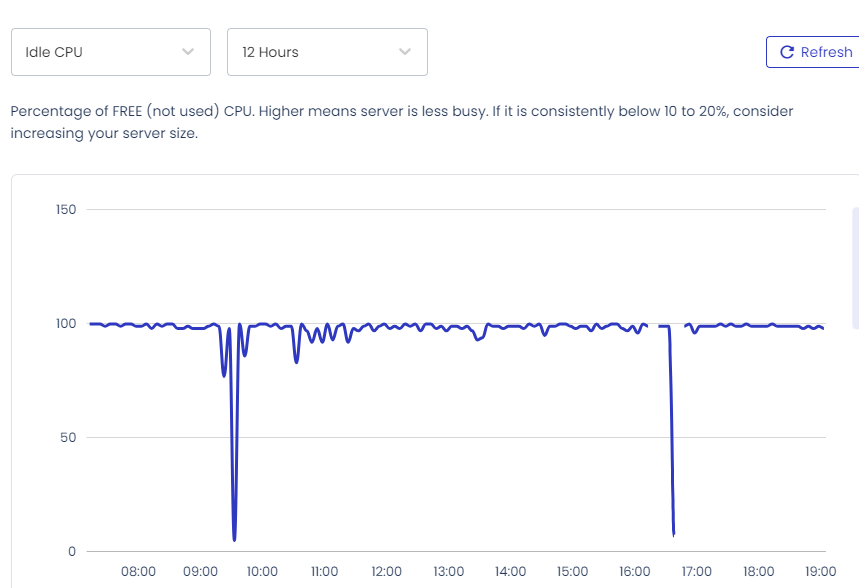
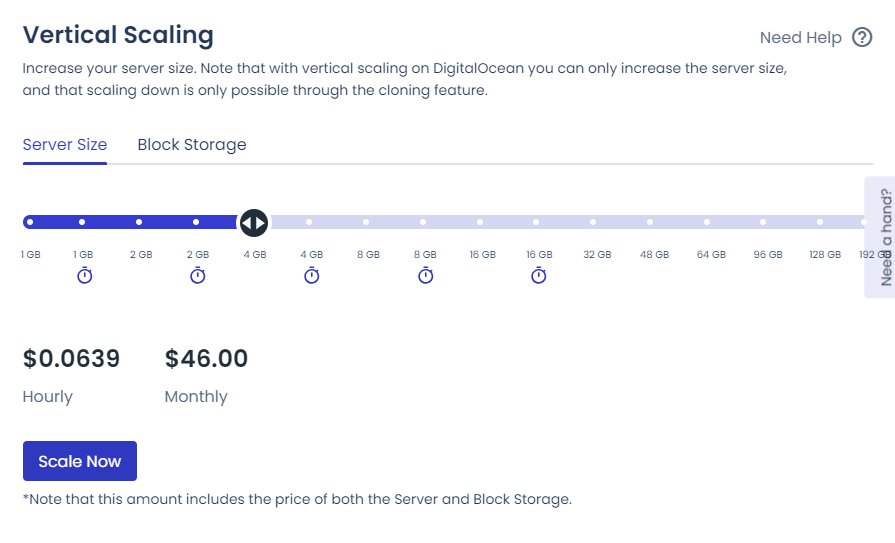
It is alright but could be improved. Adding more RAM and upgrading the server would be an excellent option here. Go to the vertical scaling option and add more RAM or block storage.
That’s it!
This is how you can perform stress tests in WordPress and get improved results. Now, let’s see some popular tools for the same task.
Best Tools To Stress Test A WordPress Site
Here are the tools you can use to stress test your WordPress site!
- LoadView
- Gatling
- OctoPerf
- BlazeMeter
What Is The Difference Between a Load Test and a Stress Test?
Load testing evaluates the site performance under expected conditions and ensures the system meets performance criteria.
On the other hand, a stress test pushes the system beyond its limits to understand how it reacts under extreme stress and helps identify vulnerabilities and recovery strategies.
Both tests are important for ensuring a robust and well-performing website. So, understand the difference between Load testing and Stress testing to meet your requirements.
Note – The stress test should be performed carefully and in a controlled environment because the excessive load simulation can impact your site’s availability or cause unintended problems.
Conclusion
While handling a WordPress website, ensure that it can handle heavy traffic. You can lose revenue if you are an online seller and the website takes too long to respond. With a load testing tool like Loader.io, you can analyze your website and spot potential improvements.
As you can see in this article, you do not need technical knowledge to conduct stress tests in WordPress. Once you have verified the ownership of the domain, you can start sending live traffic to the website.
Since the tool can display every detail, such as response time, and bandwidth consumption, you can prepare for the best. Which tool are you going to use for the load testing? Let me know in the comments!