
Do you want to install Google tag manager for your WordPress website? It’s undoubtedly a good solution and can make your life much easier when managing tracking codes and tags on your website. Trust me; you’ll wonder how you ever survived without it!
Not everyone knows how to install, activate, and use this fantastic tool. And it’s not your fault; I also faced a similar problem initially. But now, I don’t think I’ll ever leave the GTM, and I’m sure you’ll feel the same after reading this guide.
In this article, I’ll share all my experience and detailed information about Google Tag Manager for WordPress. You’ll get answers about the benefits, why you should use GYM, and the installation process. Let’s explore this topic further!
What’s Google Tag Manager – An Overview
Google Tag Manager (GTM) is like a superhero for website owners and marketers. As its name suggests, it’s a Tag Manager. It manages the tags we put on the site’s backend when using tools like Google Analytics, etc.
In simple words – when you want to track user interactions, run marketing campaigns, or get those juicy website insights, you usually have to add bits of code to your website separately for all tools. It’s not easy and secure, especially if you’re not tech-savvy.
The biggest issue is that you’ll not be at peace even after adding all codes separately. Your website will end up with a jumble of code snippets which is a real pain to maintain and update. But with Google Tag Manager, it’s like magic!
Google Tag Manager acts as your one-stop shop for all those tags. You add the GTM code snippet to your site, and – you’re in control! You can add, edit, and manage all your tracking codes and tags from one convenient dashboard.
The best part? You don’t need to be a tech wizard to use GTM. It’s super user-friendly, and you’ll be up and running quickly. You can track clicks, form submissions, page views, and much more without any coding skills required!
Why Should You Use Google Tag Manager? Reasons
Now you know what’s the purpose of the Google Tag Manager. Let’s move towards another important topic: why you must use it. Here I’ll discuss the reasons why I think it’s essential to have GTM on your website in detail.
Simple To Use
Imagine you have a magic box that helps you organize as many products as you want without lifting and placing them separately. Google Tag Manager is like that magic box for website owners!
It makes it easy for web developers or website owners to put code on a website. You don’t have to add the code for each tool separately on the website’s backend. You need only GTM, and then you’re free to create tags as much as you want within the GTM.
These tags can provide insights like tracking how many people visit the website, which buttons they click, etc. This won’t only make the work easy but safe, too, as you don’t have to edit the code manually on the website.
Perfect For Team
Running a website alone is almost impossible; we need a team of writers, marketers, developers, SEO experts, etc. No doubt, teamwork is essential, but there’s an issue, as an owner, you must provide your team full access to the website so they can install tools like Analytics, etc.
Providing access is important, but imagine if one adds the code incorrectly; this will be a major issue. Then you probably need a developer or expert to check what’s wrong with the website’s back end.
That’s why I think using one tool like GTM is best. It allows different people, like designers and marketers, to add special tags to the website without getting in each other’s way from one dashboard. It’s like teamwork for websites!
Safe For Website
Besides everything, Google Tag Manager is safe for your website. If you think anyone can create a tag and run it, you’re wrong. Only authorized people you access can run tags on Google Tag Manager.
Plus, before running any tag, you can check it. GTM comes with debug and preview features to check, or we can say test the tags before applying them on your website, which makes it better. Remember, you can’t manually test the codes after adding them to the website’s back end.
Supported By Third-Party
Google Tag Manager opens the door to a world of possibilities with third-party integrations. Before GTM, installing and verifying tools like Facebook Pixels, Analytics, and Adsense was difficult for me.
However, now the same task has become much easier than before. Google Tag Manager opens the door to a world of possibilities with third-party integrations. It’s supported by numerous tags allowing you to manage everything from the GTM dashboard.
Budget-Friendly
Last, Google Tag Manager is your budget savior, particularly if you’re not tech-savvy. The reason is that website owners usually hire developers for small tasks to ensure website safety – and developers are expensive.
Good for you if the budget isn’t an issue anymore. With the power of GTM in your hands, you don’t need to hire expensive developers for every little change. You only need access to GTM; the rest of the work is easy.
What’s the Difference Between Google Tag Manager & Google Analytics?
Are you confused between Google Tag Manager and Google Analytics? Don’t worry! Here is my simple explanation to clear up your confusion! GTM and GA are excellent tools provided by Google to manage and analyze your site data. Still, they have different purposes and distinct functionalities.
Google Tag Manager is a tag management system that lets you add and manage various tracking codes, scripts, and tags on your website without modifying any codes. It acts as a container for all your tracking codes, making it more efficient and organized to implement and update various tracking functionalities on your site.
Google Analytics is a web analytics service that provides detailed insights into website traffic and user behavior. It collects data on user interactions, such as page views, clicks, conversions, and other events. GA processes this data to generate reports that help you understand user behavior, traffic sources, audience demographics, and the effectiveness of your marketing efforts.
In Simple Words
Google Tag Manager is a tag management system that can easily manage and deploy various tracking codes on your website. In contrast, Google Analytics is a web analytics service that analyzes the data collected from these tracking codes to provide valuable insights into user behavior and website performance. Both tools are essential for tracking and understanding website performance and user behavior.
How To Install & Set Up Google Tag Manager In WordPress?
Here is the step-by-step process to install and set up Google Tag Manager in WordPress. Make sure to read everything carefully and follow all steps stated in the guide. If not, you may face difficulty in installing GTM.
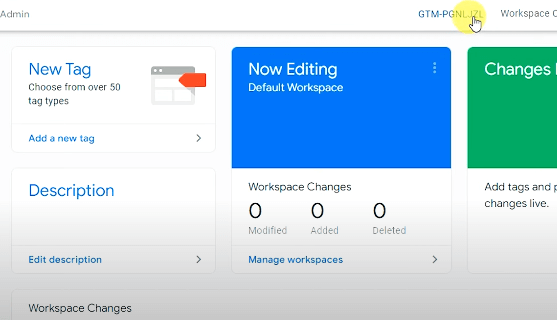
1. Create A Google Tag Manager Account
- Visit the Google Tag Manager website (https://tagmanager.google.com) and sign in using your Google account. If you don’t have one, you’ll need to create it.
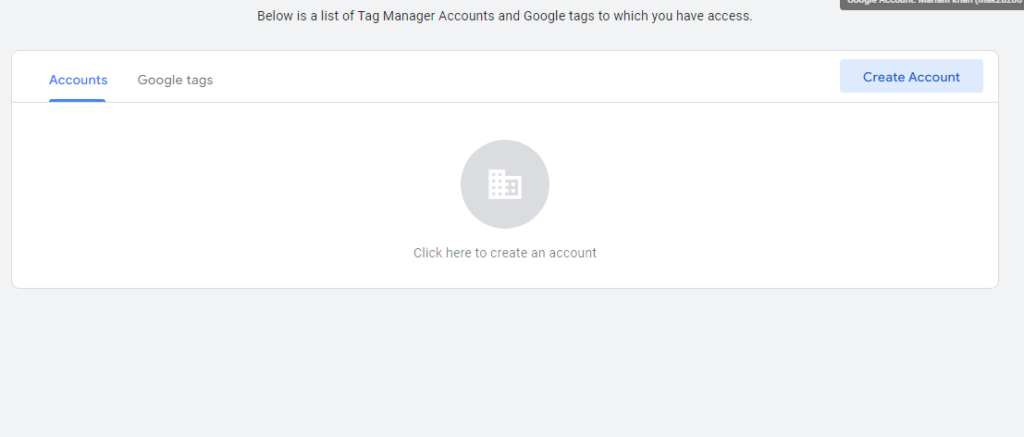
- Click “Create Account” and follow the instructions to set up your Google Tag Manager account.
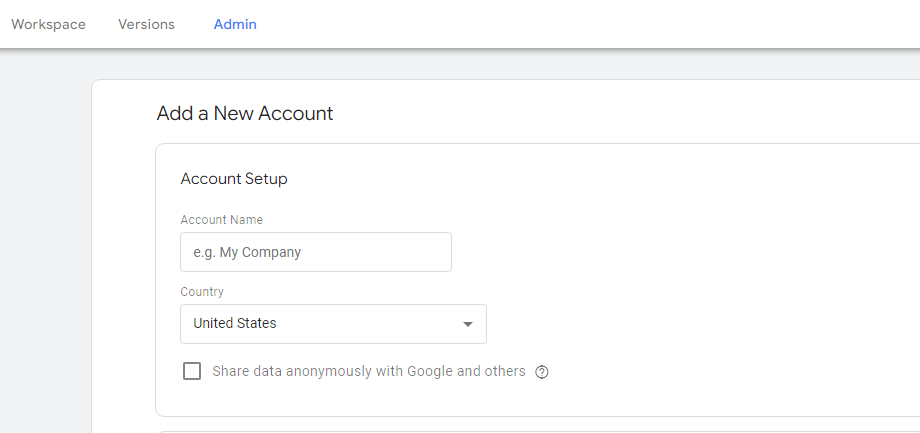
2. Set Up Your Account & Container
- Add information like your account name and country.
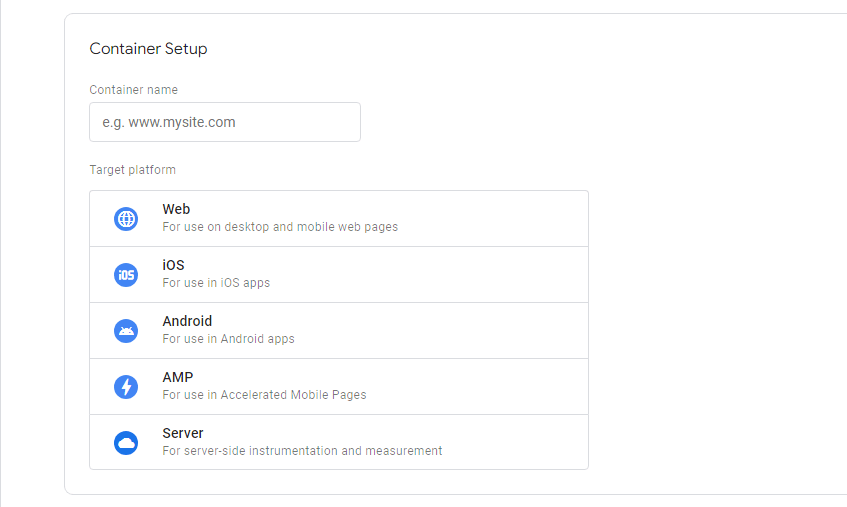
- Enter your website or app name and select the platform type (Web, AMP, iOS, Android, etc.).
3. Get The Container Code Snippet
- After creating the container, you’ll be presented with a container code snippet.
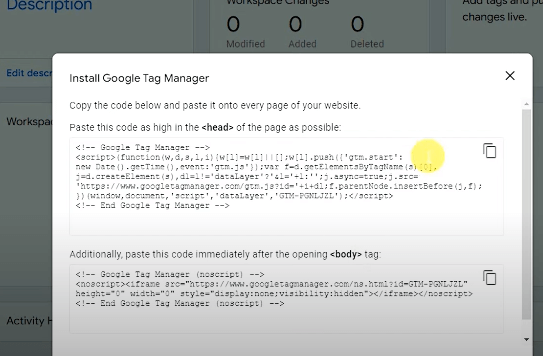
- Copy and paste this snippet into the <head> and <body> part of your website.
Note: Remember, add the <head> code in the head section and <body> code in the body section. This code allows Google Tag Manager to work on your website.
4. Another Way To Verify The Installation
If you don’t want to add code, another way to verify the installation is using the Google Tag Manager plugin.
- Install the GTM plugin, and enter the GTM ID code.
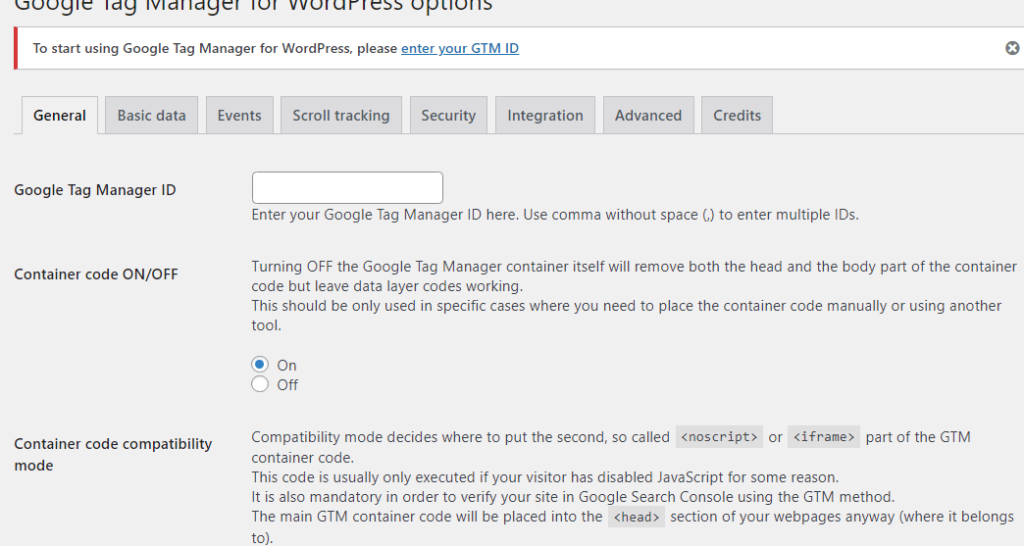
- To make sure Google Tag Manager is installed correctly, you can use the “Preview” mode. Click the “Preview” button in Google Tag Manager, add the website URL, and see whether it connects to the website.
Congratulations, you’ve successfully installed and set up GTM on your WordPress website. Now you can add tags within the dashboard of your Google Tag Manager and send data to tools like Analytics, Facebook Pixel, Adsense, and so forth without adding the code manually.
How To Set Up GA4 With Google Tag Manager?
Now that you’ve installed and set up the Google Tag Manager for your website, let’s move toward another important part. Here, I’ll discuss how to set up Google Analytics on your GTM4 account in detail.
Step 1: Connect your website to Google Analytics.
Step 2: Go to the GTM dashboard and click “Add New Tag.”

Step 3: Name your GTM tag and select the “Google Analytics: GA4” tag.

Step 4: Paste the measurement ID after copying it from the Google Analytics dashboard.

Step 5: Add triggers as per your requirements; in most cases, we choose the “All Pages’ option.
Step 6: Lastly, click the “Save” option, which will redirect you to the dashboard tab again.
Step 7: On the dashboard tab, select the tag you created and then “Submit > Publish.” Now, you should see your GA4 data in Google Tag Manager WordPress. Crossverify by checking the realtime stats of GA4.
Google Tag Manger WordPress – FAQs
What is a Google Tag Manager example?
Google Tag Manager is a tool to manage tags (code) we add to the website. If there’s no GTM, we must manually add the codes in the header or body section of the website’s back end, which isn’t only difficult and unsafe.
However, with Google Tag Manager, you don’t have to edit the back end of your website. You only need to install and set up GTM once; then, you can add tags of the tools like Analytics there instead of performing this task with the WordPress theme editor.
What are the three main parts of Google Tag Manager?
Google Tag Manager has three main parts that work together to manage the website.
- Containers is a special box that holds all the tags you want to add to your website.
- Tags are snippets of code you want to add to your website.
- Triggers are smart helpers that tell tags when to action.
What is the difference between Google Analytics and Google Tag Manager?
Google Analytics is a powerful web analytics tool that helps you track and analyze user behavior on your website. Tracking your website performance is its only task; it doesn’t connect your website to other platforms.
Google Tag Manager (GTM) is a tag management system. If you have a GTM account, you’ll be able to add snippets of code (tags) on your website from the dashboard of GTM, not manually. It acts like a bridge that connects your website to other tools.
Wrapping Up
I hope you’ve got the answers about Google Tag Manager WordPress, why it’s important, why you should use GTM, and how to install and set it up in WordPress. It’s undoubtedly a great tool that simplifies the process of adding codes, saving you time.
Just follow the installation and setup process as stated above in the guide. Your one mistake, like leaving any step, can make your work more difficult. So do everything carefully, and happy tracking!