Table Of Contents
Are you facing problem in putting Facebook Pixel to your WordPress site? Do you want to know How to add FaceBook Pixel To WordPress?
Well, there’s nothing to worry about as in this guide, I will help you install Facebook Pixel to WordPress very easily.
Whether you’re a newbie or not so tech savvy, follow this guide and adding Facebook Pixel will be a piece of cake for you.
There are two methods to add Facebook Pixel to WordPress:
- Place the Facebook Pixel code directly to WordPress
- Use a WordPress plugin to add Facebook Pixel to WordPress
However, before we do that, let’s understand what Facebook Pixel is and why is it essential in blogging today.
Well, Facebook Pixel is just like Google Analytics which Facebook uses to retarget or remarket your FB ads to your previous or regular blog visitors.
Let’s learn a bit more about Facebook Pixel.
What Is Facebook Pixel?
Adding Facebook Pixel on WordPress is a lot similar to adding Google Analytics code. However, the function of both these tracking codes is entirely different. Well, for those who don’t know what Facebook Pixel is, here is a short introduction.
Facebook Pixel is a tool developed by Facebook to let the website owners track the actions of Facebook users visiting their blog/website. Based on such data, the website owners can choose to retarget your visitors with Facebook ads for specific activities such as visiting a particular page or including a WooCommerce product to their cart.
Such detailed conversion tracking can help you spend your money on Facebook ads wisely. It is a must for you to put Facebook Pixel if you invest in Facebook Ads to generate traffic to your blog.
Check out this simple guide to learn how you can add Facebook Pixel to WordPress!
How To Include Facebook Pixel To WordPress Without A Plugin?
![]()
As mentioned earlier, adding Facebook Pixel code is as simple as inserting Google analytics code directly to WordPress.
However, you must generate the code for Facebook Pixel on your Facebook Ads account.
Once you get the code, copy-paste the code in the section of your WordPress blog or website. Here’s a step-by-step guide to generating the code and installing Facebook Pixel to WordPress.
Step 1: Open Facebook Ads Manager to create a Facebook Pixel
Log into your Facebook account > Settings > Create > Ad
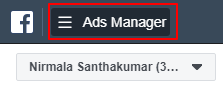
Now you will get the Facebook Ads manager dashboard. Click the three horizontal bars icon on the top left corner of the Ads manager dashboard to look for “Pixels” under Event Manager.
Click “Pixels,” and you will be directed to the “Create A Facebook Pixel” and click “Create A Pixel“
Now, a pop-up window will open by asking to enter your Pixel Name and site URL. Choose a name for your Pixel and add it in the box titled “Pixel Name” and hit “Create” button.
Next, you will get a pop-up to set up your Pixel with multiple options. You can choose either of the three options to set-up your Pixel. For the most straightforward option, opt for “Manually Install the Code Yourself.“
![]()
Once you click this option, a new pop-up will display the Pixel code with instructions to place it on your WordPress site. Copy the entire code and head onto Step 2.
Step 2: Put Pixel tracking code to your WordPress Header
Where to put the FaceBook Pixel Codes in WordPress? Let me tell you!
To set up Facebook Pixel code manually, you need to insert the code in your WordPress header right before the closing tag.
Remember, most of the WordPress themes are designed with a Header, a Main, a Sidebar, and a Footer template. Go to your theme editor panel following the path, Appearance > Editor from your WordPress blog’s admin dashboard.
You can locate the file as header.php in the editor section. Look for the tag in the header.php file and paste the Pixel code just before </head>. Hit the “Save” button to execute the changes.
It is safer to copy or download the entire header.php file as a backup before you insert the Facebook Pixel code. In case, if something goes wrong, you can restore the original file and undo the changes.
If you aren’t comfortable with the manual coding stuff, then you can always use Insert Headers and Footers plugin by WPBeginner and paste the code directly without meddling with a single line of code.
To see if the Facebook Pixel is rightly set up on your WordPress site, you can use the free Facebook Pixel Helper Chrome extension by Facebook and verify the Facebook Pixel on your site.
Insert Facebook Pixel Code Using WordPress Plugin
Not all WordPress themes are designed identically, and many WordPress themes are coded differently to hide the header or footer section to avoid any mishaps. Well, not to worry as there are WordPress plugins for rescue in such scenario.
The manual insertion method will limit the Facebook Pixel code to the active theme, and you will have to resubmit the code again whenever you change or switch themes. However, if you incorporate Facebook Pixel using WordPress plugins, it is only a one-time thing.
Best WordPress Plugins To Put Facebook Pixel To WordPress Site
Plugins are the best way to insert any code for hassle-free execution and functionality. While there are multiple plugins to add Facebook Pixel to WordPress, I recommend two of the best WordPress plugins I found.
1. Official Facebook Pixel WordPress Plugin
To place Facebook Pixel to WordPress using WordPress plugins, you can use the “Use an Integration or Tag Manager” method out of three options offered in Facebook’s “Create a Pixel” section.
Once you choose the Integration method, you will find the options for various partners including WordPress. Choose WordPress, and you will be directed to “Connect Your WordPress Account” with an option to download the plugin in a zip format.
![]()
Download the plugin file and go to your WP Admin dashboard to add a new plugin. Browse the downloaded plugin file through WP Admin dashboard and install as well as activate the plugin.
The plugin is custom coded to your Facebook Pixel, and it will automatically activate the Pixel tracking. You can either use the Facebook Pixel Helper Chrome extension to verify the Pixel tracking or choose verification method offered in “Create a Pixel” setup on Facebook Ads Manager.
2. Pixel Caffeine
Pixel Caffeine is a fantastic plugin as it not only allows easy Facebook Pixel integration but also lets you create custom audiences and conversion goals from within your WordPress dashboard.
Pixel Caffeine is free, and you can take your eCommerce conversion rate or Facebook Ad targeting to a whole different level with this FaceBook Pixel WordPress Plugin.
Go to WP Admin dashboard and visit Plugins > Add New. Look for Pixel Caffeine using the Search option in the plugin directory. Install and activate the Pixel Caffeine on your WordPress site.
Once activated, you can see Pixel Caffeine on the left panel of your WP dashboard. Go to Pixel Caffeine and complete the Facebook Pixel setup process to start Pixel tracking on your WordPress site.
You will find two options for setting up Facebook Pixel on Pixel Caffeine. Choose Facebook Connect method and select the Ad account and Pixel ID from the drop-down options. Hit “Apply,” and you’re good to go.
The best thing about Pixel Caffeine is the amazing things that you can do to track various conversions and enable retargeting or remarketing your ads based on such conversion tracking.
Over To You!
No matter what approach you choose, it is essential to add Facebook Pixel to WordPress if you are using Facebook ads to direct traffic to your website.
I recommend opting for Pixel Caffeine for the ultimate integration as it is loaded with a bunch of different conversion tracking options which come handy in targeting your Facebook ads smartly and effectively.
So, you have learned how to put Facebook Pixel on WordPress sites, right? Do you have any other plugin recommendation to get the job done? If yes, share it in the comment section.
Thanks for the tip. Nice blog you have. I have facebook pixel inserted on my wordpress website. I am using Pixel Cat Lite plugin for the same. It is working fine. No issues till date.
Hi Nirmala,
Facebook became one of the important source of driving traffic to the website.
People just love to create FB ad camapigns to attract a lot of eyeballs and eventually makes sales. In this process, it would completely make sense to understand your audience for the better outcome.
Thankfully , pixel is one of the wisest creation by Facebook which does the job easier. I already use it for few of my sites, you made the tutorial easier .
I really like and appreciate your blog post. There is very much to learn from the blog. This is really very useful.
Thank….