Do you want to build a restaurant website using WordPress? If you are looking for a step-by-step guide, keep reading this article. I will show you how to make a website for your restaurant business and connect with more people.
If you run an offline business, you should create a website. Business is happening online. Setting up a website for your business would be helpful in multiple situations. When you run a restaurant and build a website, the customers can check the items you serve, the cost, and other details.
On the other hand, if you need to take things a little further, you can also configure a home delivery system. Creating a website with a powerful but easy-to-use CMS (Content Management System) like WordPress is easy.
To help you with the process, I have got this blog post. Here, I will show you how to create a website for your restaurant and how to take care of it without any hassle. Before going further, let’s see why building a website for your restaurant is a good idea.
Why Building a Website for a Restaurant Is a Good Idea?
Setting up a restaurant website is an excellent idea to get more visibility and will help you get more targeted clients.
For example, you can use Google Ads to promote your business. If you specialize in chicken wings or something similar, bidding on the keyword is a great idea to get more customers.
Nowadays, people search for food online instead of visiting a physical restaurant. Hence, this is your chance to get more customers and boost the revenue.
You do not need to spend thousands of dollars annually to maintain a website. You can create and manage a restaurant website with a couple of hundred dollars.
How to Build a Restaurant Website Using WordPress?
You can start a restaurant website in 10 simple steps. The steps are:
- Getting a domain name
- Choosing a hosting
- Install WordPress
- Choose a suitable WordPress theme
- Find suitable plugins
- Publish all the necessary pages
- Set up a payment processor
- Set up GA and GSC
- Optimize for SEO
- Launch the website
I will explain each step below so you will understand the topic. Let’s see how to build a restaurant website using WordPress without any further ado.
1. Get a Domain Name
Before starting the website, you should figure out a domain name you plan to use. While you select a domain name, consider these factors:
- Keep it simple: While choosing a domain name, keep the name simple. Do not use complex words. Ensure the domain is easy to spell and remember.
- Use .com extension: Most businesses use .com domain extension. If the .com extension is unavailable for the domain, you can try country-specific extensions like .in, .us, .ca, etc. Or, tweak the domain name so you can get a .com extension.
- Make it brandable: Ensure the domain name reflects your business. If you have a brand name, use it as the domain. It is best for brand awareness.
- Avoid numbers: Adding numbers in the domain names is a bad practice.
- Avoid hyphens: Similar to numbers, you should avoid hyphens from your domain name. It is not ideal to keep hyphens in domains.
You can choose any of these providers for registering the domain name:
- Namecheap
- Domain.com
- GoDaddy
Usually, a .com domain will cost anywhere between $10-$15 a year. You can purchase a domain and later link it with the hosting, or you can directly get a domain while buying a web hosting plan.
Here’s how you can purchase a domain name.
First, go to a domain registrar. I use Namecheap. On the homepage, you can search for domain names.
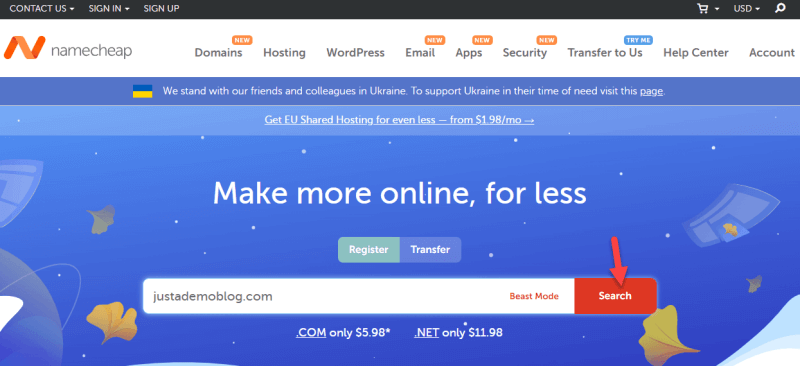
If the selected domain name is available, you can add it to the cart.
Ensure you have spelled the domain name correctly. If the searched domain name is not available, try something else.
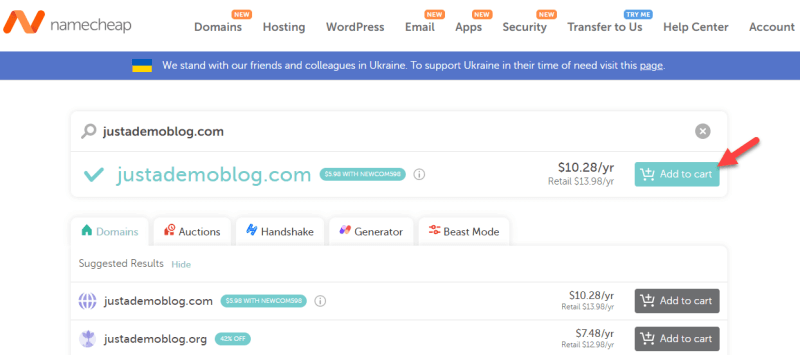
Move to the checkout page once you have added the domain to the cart.
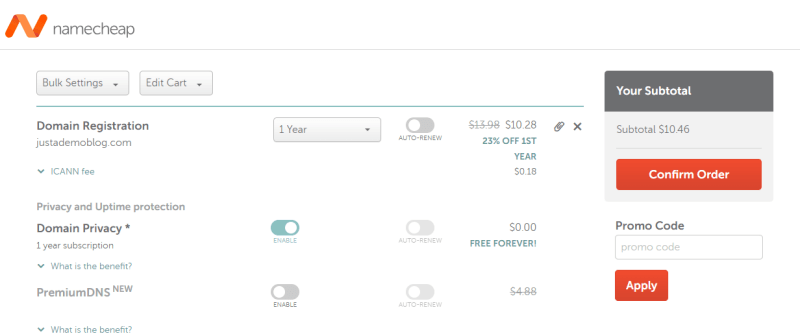
From there, you can choose the domain registration period, configure the auto-renewal settings, enable/disable whois guard, etc. After tweaking the options, complete the purchase using your credit card or PayPal account.
Now, you can log in to your Namecheap account and manage the newly registered domain name.
Once you have figured out a domain name or purchased it, let’s move to the next step: selecting the right web hosting provider.
2. Choosing a WordPress Hosting
Choosing a WordPress hosting is a crucial task.
If you search for WordPress hosting or shared hosting in Google, you will land on multiple free, freemium, or premium providers. In my experience, I always avoid free hosting since they can’t guarantee proper uptime or security.
When choosing a web hosting provider, consider these factors:
- Performance: Choosing a web hosting provider with NGNIX servers would be ideal. Those providers will help you with the performance.
- Security: Since the web hosting provider deals with your website’s data, you should choose one with excellent security standards.
- Support: Contact the support team to help set up or configure the server. An excellent support team would help you solve every issue quickly.
- Data centers: Check the available data centers the web hosting company offers. Get a DC closer to the location you are targeting. On the other hand, using a CDN provider like Cloudflare or KeyCDN will fix the issue.
The two hosting companies I recommend are:
- Cloudways
- A2 Hosting
Let’s take a quick look at each hosting and what they offer.
Cloudways

When your main priority is performance-optimized cloud hosting with excellent customer support, Cloudways is an ideal fit. Since the platform uses SSD for storage units, the website’s files will be served faster than traditional storage units. On top of that, they have created a custom caching plugin called Breeze to help you optimize the platform further.
Another notable feature of Cloudways is it is easily scalable. You can scale your server if you need more resources, such as storage or RAM, from the server configuration. Since you can add unlimited applications under a single server, Cloudways would be ideal for running multiple WordPress applications.
The security practice Cloudways uses is excellent, too. They have dedicated firewalls to help you protect your website from attacks and malware. You can take backups easily. If you want to use a powerful cloud hosting provider for your restaurant website, check out Cloudways.
Features
- Multiple cloud partners
- Optimized for performance
- Excellent customer support
- Custom caching system
- CloudwaysCDN with Cloudflare
Pricing
Cloudways pricing starts at $11 a month for their DigitalOcean servers.
A2 Hosting
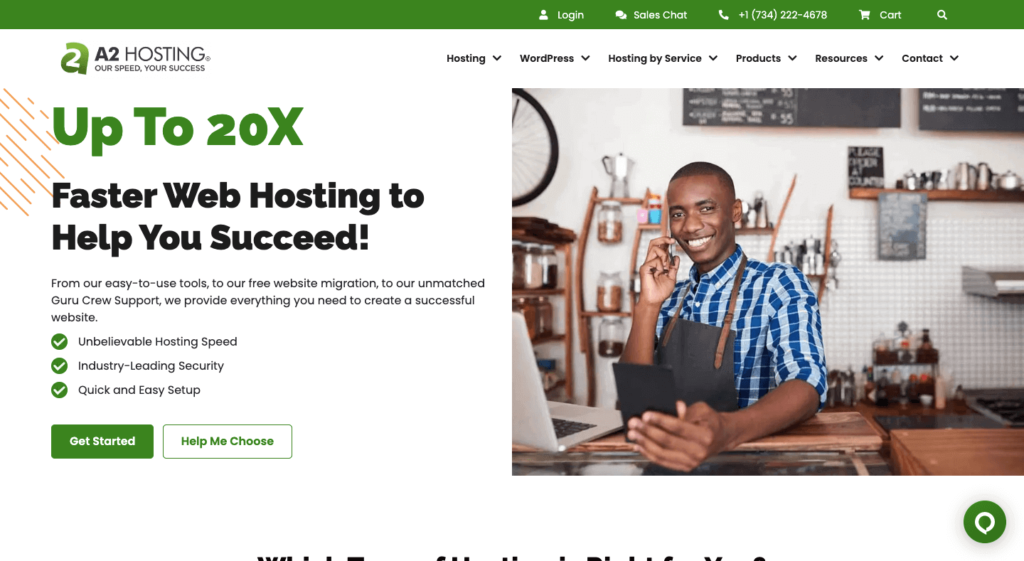
When your main goal is to start a restaurant website on a budget, you should check out A2 Hosting. A2 Hosting has a speed-boosting technology called Turbo. Once enabled, you can quickly improve the website’s performance and reduce the bounce rate.
A2 Hosting also allows unlimited data transfer. So when your site grows, the hosting provider won’t show any HTTP errors on the front end. You can keep the site alive and grow the business without any hassle. All the plans will give you access to a free SSL certificate. You can use this SSL certificate to secure your traffic.
When you accept payments through your website, an SSL certificate is mandatory. While you sign up for their hosting plan, A2 Hosting will also ask for your preferred data center. You can pick one from the list based on your preferences.
Features
- Affordable hosting plans
- Turbo servers
- Unlimited bandwidth
- Free SSL certificate
- Multiple data centers
Pricing
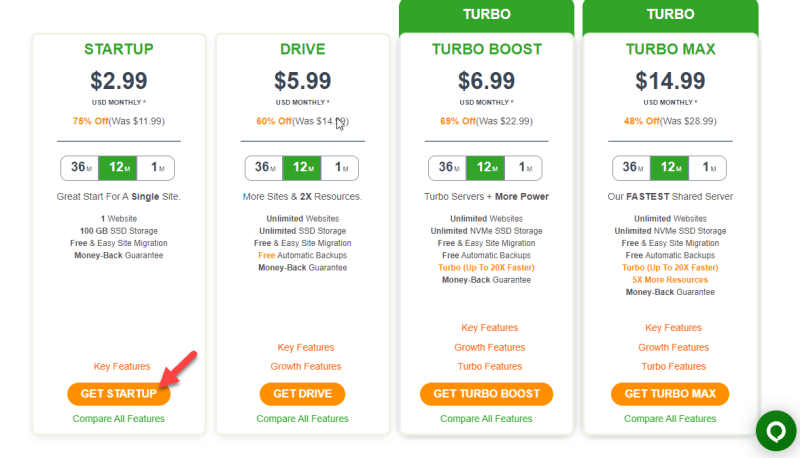
A2 Hosting shared hosting plans will cost you $2.99 monthly.
I chose A2 Hosting for this demo. Here is how you can purchase a hosting plan from A2 Hosting.
The first thing you need to do is go to A2 Hosting. Shared hosting plans are enough if you are a beginner and need a simple website. On the other hand, if you are expecting heavy traffic to the restaurant website, managed WordPress hosting would be ideal.
Next, you need to link a domain name with the hosting plan. You can either
- Use your domain
- Register a new domain
- Transfer your domain to A2 Hosting
- Use a temporary domain from A2 Hosting
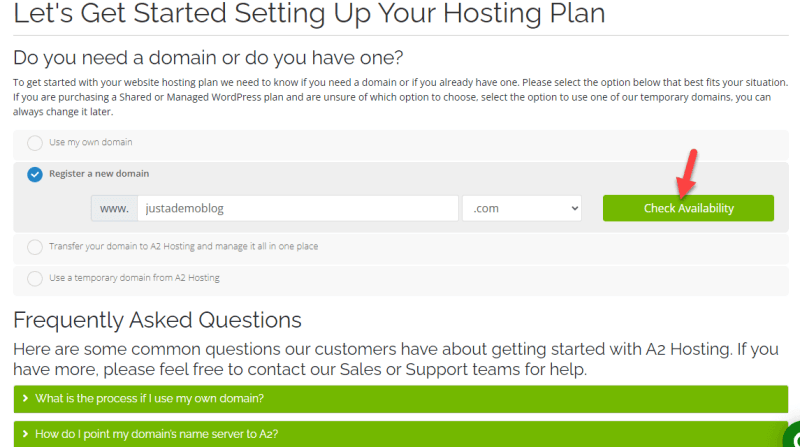
Use the first option if you have already purchased a domain from Namecheap or any other registrar.
After finishing the domain setup, you will be redirected to the checkout page.
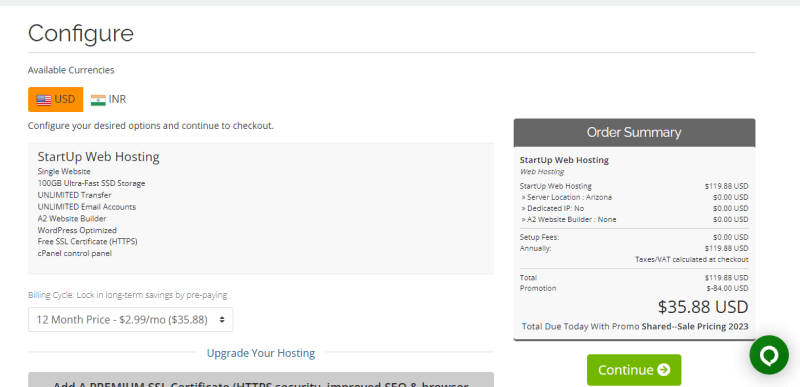
You can
- Choose a billing cycle
- Add premium SSL
- Choose a DC
- Add dedicated IP
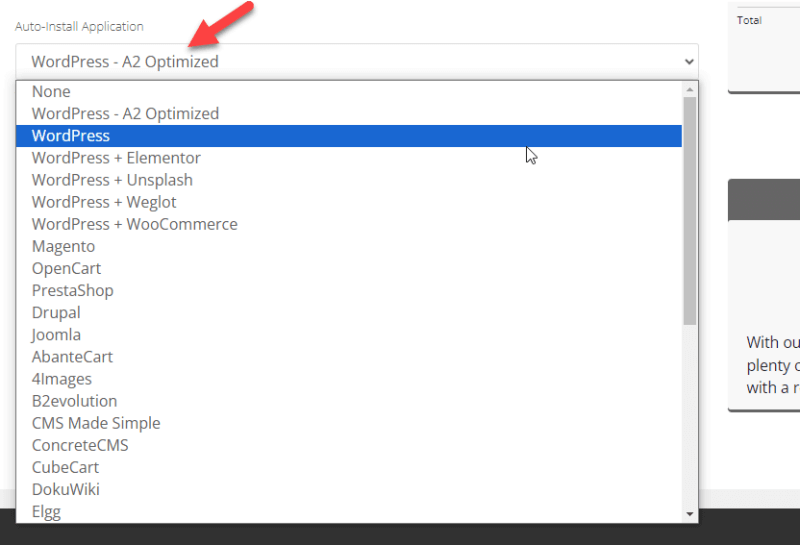
- Auto install application
Configure the hosting plan according to your needs. Under the auto-install application, choose WordPress.
Now, complete the payment using your credit card or PayPal account. Once you have completed the patent, log in to the A2 Hosting account and manage the purchased plan.
3. Install WordPress
WordPress will be automatically installed on your hosting plan if you have used the auto installer from the checkout page. Remember that they will show you a custom username and password while you select WordPress from the dropdown.
If you have used this method, you can skip this step. On the other hand, if you used other hosting providers, open the cPanel, aka control panel, and look for one-click installers.
You can also use the Softaculous installer to install WordPress on your hosting. After finding the option, install WordPress by entering the username, password, database details, etc.
It will take a couple of minutes to complete the installation. So, sit back and relax. Once you have completed the installation, log in to the website using the credentials.
To log in to the admin area, use /wp-admin at the end of the domain. For example, if your domain is example.com, enter – example.com/wp-admin in the address bar to access the backend.
A fresh install of WordPress comes with default themes, plugins, etc. These themes have limited customization features, which is unsuitable for a restaurant website.
Next, let’s redesign the website.
4. Find a Suitable WordPress Theme
Once you have installed WordPress on your server, select a theme for the website. You can find several WordPress themes in the market. Based on your requirements, you can get one.
I recommend the following WordPress themes:
- Astra
- Divi
Both themes are optimized to run a restaurant website. Plus, they come with pre-made templates you can import to the website. Let’s see what makes each theme unique.
Astra

Astra is the most popular WordPress theme designed to be fast and highly customizable. Suitable for all types of businesses, it is built with performance in mind, making it one of the lightweight themes for WordPress users.
It has a wide range of Pre-made templates under Restaurant categories like Food, Catering, Cafe & Bakery, and Wine & Winery. So, you can quickly launch a stunning Restaurant website in WordPress with minimal effort.
Features
- Performance-focused theme with faster loading times.
- Header-Footer builder is available to get a unique design.
- Works well with famous page builders like Elementor.
- Responsive design and SEO-friendly.
- Extended Add-ons for Functionality enhancements.
Pricing
Even though the Astra WordPress theme has a Free version, I suggest you buy its premium version, which is available in 3 different pricing plans. You may go with the basic Annual plan that costs $47.
Divi

Divi is a performance-optimized WordPress theme created by Elegant Themes. Divi has some in-built speed optimization options to help you make your website faster. You can customize every inch of your website by combining Divi with the Divi Builder.
The developers have already added several pre-made templates to the theme, which you will find helpful. All the templates are 100% customizable, and you can change the design or content based on your preferences. You do not need to deal with coding to tweak the website’s design.
From the front end, you can modify the design. This will help you create a stunning website in a couple of minutes.
Features
- Highly customizable; Anminations available.
- Modify the Divi Footer and Remove the Sidebar for personalization.
- Visual design control through Custom CSS.
- Add a Contact form and Google Maps.
- Compete design control to build your business site.
Pricing
If you prefer a yearly license, the plan will cost you $89 annually. Apart from Divi, you will also get Monarch and Bloom with the subscription. The lifetime subscription will cost you $249 (one-time fee).
I use Divi. Since it is a premium WordPress theme, you need to purchase it. Once you have completed the purchase, log in to your Elegant Themes account and download the theme files.
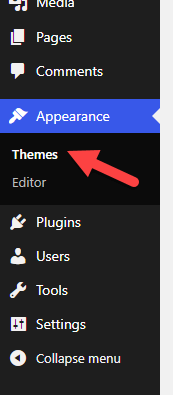
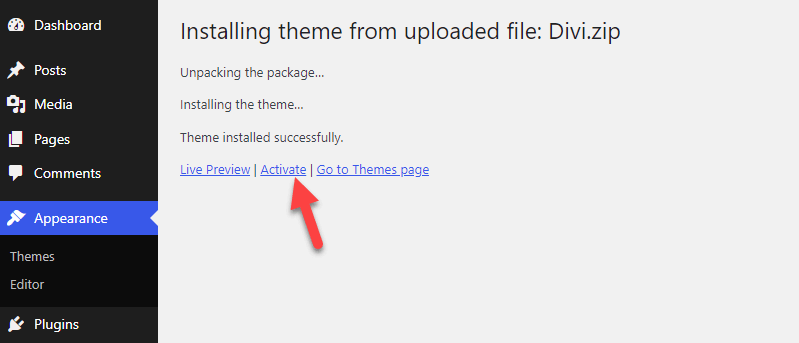
Now, go to the Appearance section on your WordPress website.
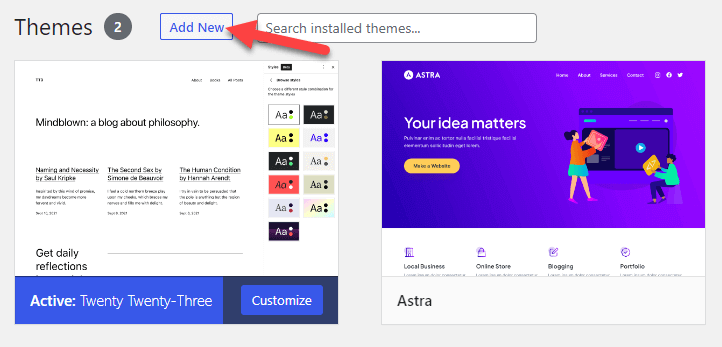
There, click on Add New.
Now, Upload the theme files.
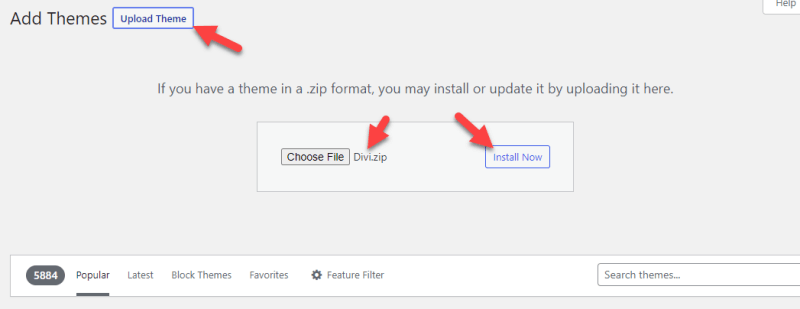
Once WordPress completed the installation process, activate the theme.
That’s it! This way, you can change the WordPress theme. From now on, you can start making modifications.
You will see the theme settings on the left-hand side of the WordPress admin panel.
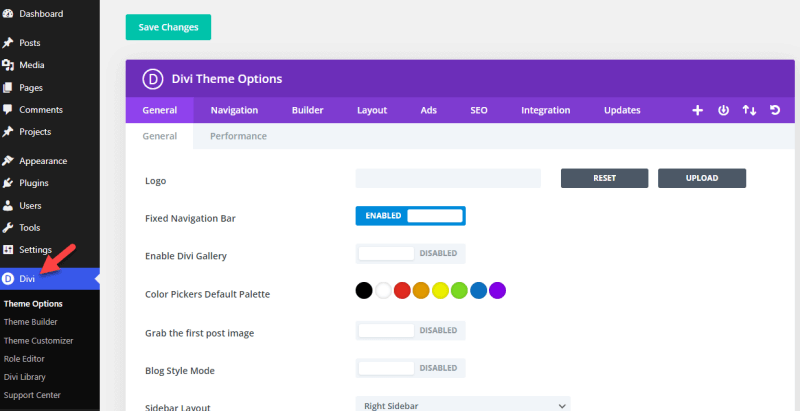
Save the changes when you are good to go.
5. List the Required Plugins
Plugins will enhance the features of the website. This section will list the plugins you should use on your restaurant website to improve it.
- Akismet: Protects your website from spam comments. You only need Akismet if you add a blog archive to your restaurant website.
- Rank Math: Best SEO plugin to handle on-page SEO. You can optimize the website for up to 5 keywords per post or page.
- WPForms: To create contact, feedback, or order forms, WPForms would be helpful. It has a drag-and-drop form editor, so you do not need to deal with coding.
- OneSignal: When you release a new dish or run a discount campaign, sending push notifications would be ideal. You can implement the push notifications feature using OneSignal.
- Sucuri Security: Since WordPress is the widely used CMS in the market, hackers will try their best to access the admin area. With a security plugin like Sucuri Security, you can protect your website.
- Bloom: To get returning visitors, you should start lead generation. With a plugin like Bloom by Elegant Themes, you can collect the email addresses of your website visitors. You should also get an email marketing service subscription to store the addresses and send email newsletters.
- Social Snap: If you need to add social media sharing buttons inside your blog posts, check out Social Snap.
- WP Rocket: WP Rocket is the most popular WordPress caching plugin with cutting-edge features.
- WP-Optimize: To optimize the MySQL database, WP-Optimize could be helpful.
- Elementor: Elementor is a popular page builder plugin you can use to create stunning landing pages.
- Classic Editor: If you don’t like the Gutenberg editor and need to return the old-style editor to your website, install the Classic Editor plugin.
- ShortPixel: Optimizing the images is another great thing you can do to make the website faster. Using ShortPixel, you can reduce the image size without losing quality.
- UpdraftPlus: To generate backups of your website, UpdraftPlus can be used. There are so many backup plugins available. The free version of UpdraftPlus is all you need.
- ManageWP: WordPress, plugins, and themes will get regular updates. To take care of the updates without logging in to the dashboard, you should use ManageWP.
You can always find alternatives for these options. For example, as a caching plugin, you can use FlyingPress/ W3 Total Cache/ WP Super Cache or WP Fastest Cache instead of WP Rocket.
Based on your preferences and requirements, choose plugins. The next thing you should do is create the essential pages.
6. Create Essential Pages
Next, set up all the required pages. You need to create pages like:
- About
- Contact
- Blog (optional)
- Homepage
- Privacy policy
- Terms and conditions
You will see the page’s settings on the left of the WordPress dashboard.
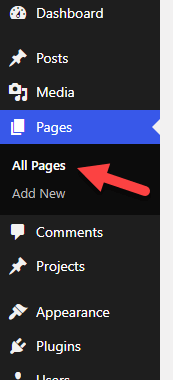
From there, you can create new custom pages.
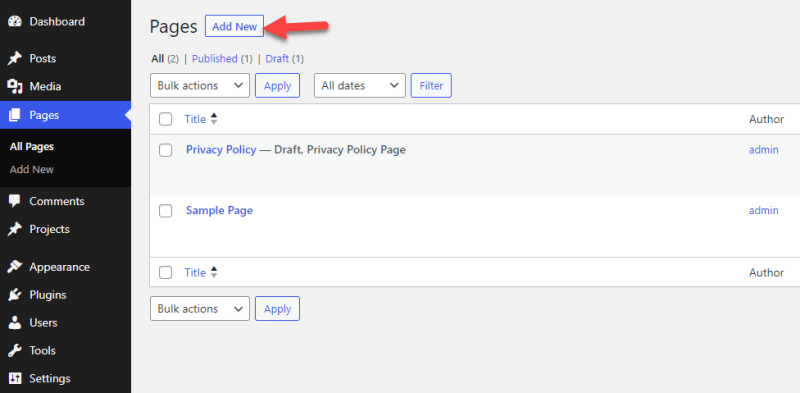
Publish the pages after modifying them.
7. Get Started with a Payment Processor (optional)
This step is optional. If you add a food ordering system to your restaurant website, you should integrate a payment gateway. If you will use WooCommerce as the base, WooCommerce comes with several payment gateway integrations.
On the other hand, use any of these services as the payment gateway:
- Stripe
- Amazon Pay
- Razorpay
- Square
- Authorize.net
- PayPal
Remember that using these payment gateways will cost you an extra fee. So, increase the food’s cost based on your additional fee.
If you are not going to add an online food ordering system, you can skip this step.
8. Add Site to Google Search Console & Google Analytics
To improve the visibility of your website, you should add the restaurant website to GSC (Google Search Console). Search Console is a free tool developed by Google to help webmasters take their websites to the next level.
Setting up a GSC property is not a challenging task. The first thing you need to do is go to the official GSC website. Now, you can log in to the website using your Gmail account and create a new property for your website.
Verifying the added property is also simple. There are multiple verification methods available. However, I recommend using the verification file upload method in our case. You need to download an HTML file from the page and upload it to your web server.
You may use FTP or the file manager tool for uploading the file. After completing the uploading process, verify the property. The next thing you need to do is submit the XML sitemaps with the help of SEO plugins. Check how to add your site to GA and GSC.
Now, your Restaurant website is ready for crawling and indexing by the search engines. You will get rankings for your blog articles through which you will get your targeted customers by doing SEO. What is SEO? Let me explain!
9. Work On SEO
SEO is search engine optimization that makes your site search-engine friendly. It is not rocket science. However, you must learn the basic SEO tips to get more visibility and surpass your competitors. Don’t forget to understand and implement keyword research.
You can handle the on-page SEO with a plugin like Rank Math or Yoast SEO. While you create a post or page, ensure you have added the right keywords by following the Rank Math plugin. Also, you must optimize the images uploaded to the website by adding proper ALT tags.
For off-page SEO, build backlinks through guest posts on other relevant websites. To track how your website is doing, use Google Analytics. Learn using tools like Semrush or Ahrefs to improve the SEO. Check, I have written a detailed guide on SEO for restaurants.
10. Launch the Website
So, we have completed all the steps! Now, take your website live by hosting it on the server that you bought. Publish the blog posts by targeting your audience. You can share the website’s URL on social media handles and add them to your business card, local listing, etc. However, there is always room for improvement. You will learn more about optimizing the website as you grow.
Frequently Asked Questions
Now, let’s see some frequently asked questions for making the restaurant site with WordPress!
Why Build a Restaurant Website in WordPress?
Several website builders for restaurants are available. I picked WordPress because it gives you complete control over the website and limitless customization options. Building a restaurant website would be easy with WordPress. You can create a restaurant website in a couple of hours.
Which WordPress Hosting Type is Best for Restaurant Websites?
If you are starting a website for the first time, shared hosting would be ideal. As the name says, all the resources would be shared with others. As your website grows, you can upgrade to managed or cloud hosting, giving you more resources and power.
Which Themes Are Best for Restaurants?
You can pick Divi, Astra, or GeneratePress. Most of these themes come with pre-made templates to import to your website. On the other hand, combining a page builder plugin with a WordPress theme is a great idea. This way, you can create unique designs without any hassle.
How Much Does It Cost to Build a Restaurant Website
How much to build a website for a restaurant is one of the main questions most people will have. Here is a quick answer.
The cost to build a restaurant website is based on the tools/hosting you have selected. If you use A2 Hosting, that will cost you $3 a month. A domain will cost you $13 a year. Considering all the costs, it would be around $200-$400 a year.
However, you can also cut costs using free version themes or plugins.
Wrapping Up
While you run a restaurant, you should start a website for it and gain more exposure. As I mentioned at the beginning of the article, business is happening online, and you need to step up to keep up with the competition.
Most people rely on online food delivery apps, so creating a website and integrating a food delivery system into the website is an excellent idea to grow your business by reaching your targeted audience.
I have clearly explained how to create a restaurant website using WordPress. You don’t need coding knowledge to set up a website for your restaurant business. A powerful CMS like WordPress will make the job easier. Any doubts? Catch me in the comment section.